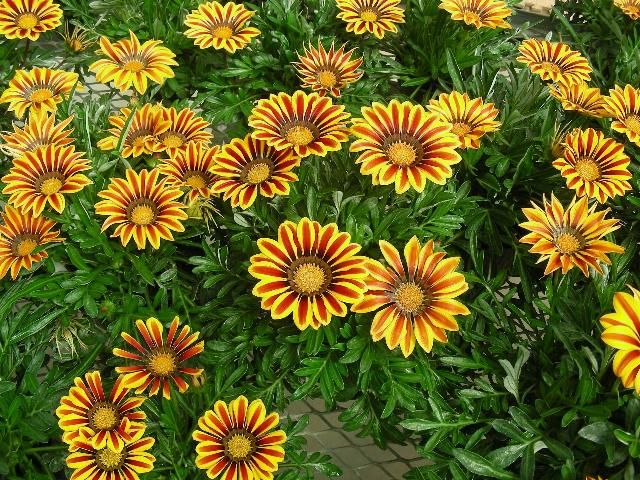
Annuals offer an almost infinite variety of flower color and plant form. They brighten landscape beds and add a splash of color to a porch, deck, or patio when placed in containers (Figure 1). Some also make good cut flowers (Table 1).
Selection and Use
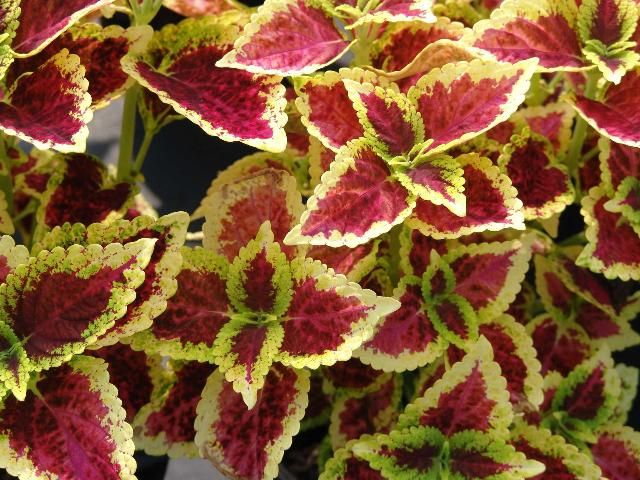
In Florida, most annuals only last one season (not one year). To be successful, they must be planted at the right time, but unfortunately they are sometimes sold out of season and are therefore short-lived in the garden. Typically, annuals are divided into two types: warm season and cool season. Warm-season (tender) annuals are damaged by frosts or freezes and should be planted after the last frost date (Figure 2). Based on historical records, this is typically March 15 for north Florida and February 15 for central Florida; frosts and freezes are rare in South Florida. However, early and late frosts can occur almost anywhere in the state, and tender annuals need to be covered if this occurs. Cool-season (hardy) annuals are intolerant of heat, rainfall, and humidity. They are planted in fall and usually expire with the onset of summer (late May/June).
Florida's winter climate varies greatly from north to south. For example, impatiens, normally considered a warm-season annual for shade in north and central Florida, thrive in full sun as a winter annual in south Florida. Also keep in mind that landscapes along the coast are typically warmer than inland areas of the same county. These coastal landscapes demand annuals that tolerate high winds, salt spray, and perhaps irrigation water from wells that contain high levels of salt. Table 2 lists annuals with moderate to high salt tolerance. Additionally, some plants considered annuals in north Florida grow as perennials in south Florida and vice versa. North Florida is designated as the area north of State Road 40 (Jacksonville to Pensacola); central Florida is the area between State Road 40 and State Road 70 (from Crystal River, Ocala, and Daytona down to Bradenton, Lake Placid, and Ft. Pierce); and south Florida is south of State Road 70 to the Florida Keys. Table 3 provides the typical planting and removal times for the potted annuals commonly sold throughout the state.
Before shopping for annuals, determine how much sunlight the plants will receive. Some annuals tolerate full sun all day; others do best with just morning or filtered sun. Remember that in summer the sun is directly overhead, while in winter the sun is in the southern sky and may be blocked by trees or buildings. No annuals perform well under heavy shade. Optimum and acceptable light levels for many bedding plants are also presented in Table 3.
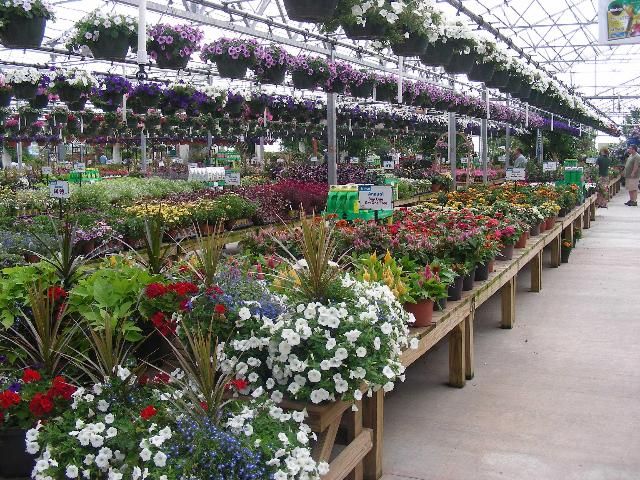
Garden centers today offer a wide assortment of annuals in various sizes, from cell packs to 1-gallon and larger pots (Figure 3). The size you purchase depends on your budget, patience, and the landscape impact you desire. Larger plants provide instant effect and may be easier to establish than smaller plants. Choose compact plants with healthy, unblemished leaves, good green color, and lots of flower buds. It is not necessary that they be in bloom at the time of purchase. Growing annuals from seed requires time, water, fertilizer, and weeding; they often begin to flower about the time they should be removed.
Annuals serve as an accent to the landscape, not a dominant feature. They should harmonize with the setting and the color of your home. Combinations of many flower colors and plant forms are appropriate for a "cottage garden" look, but attractive flower beds can also be achieved by using just one or two types. Color should be used to direct the eye. For example, a colorful flower bed along a walkway to your home visually pulls a visitor to the front door.
Site Preparation and Planting
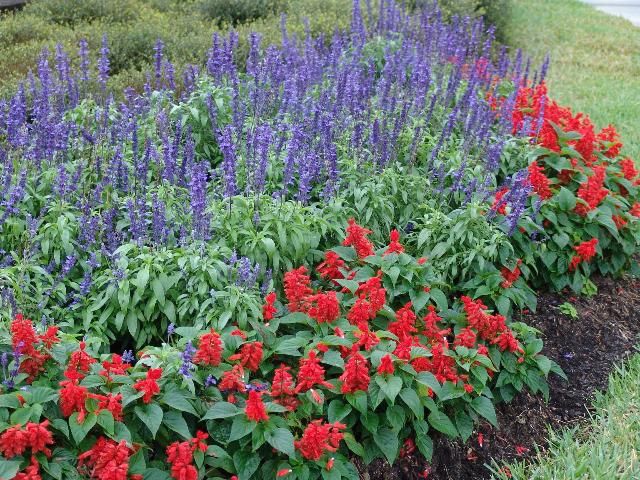
Good preparation of the flower bed is another key to success (Figure 4). First, add 2–3 inches of organic matter, such as compost, peat, or potting soil, to the soil surface. Next, sprinkle a controlled-release fertilizer such as Osmocote®, Dynamite®, or other similar product at the rate indicated on the label. Thoroughly mix it into the top 6 inches of soil. Organic matter helps the soil retain moisture, and controlled-release fertilizer provides a continuous nutrient supply over an extended period of time. Product labels normally specify the time span that the fertilizer will be released (e.g., 3–4 months). Choose a release time suited to the life span of the annual(s) you plant (Table 3).
Water the annuals well before and after planting. Spacing of plants should be based on the mature size of the plant (Table 3). Hand-water newly-planted annuals until their root systems are established. The frequency depends on the site (soil and sunlight) and the time of year. Thereafter, keep a close eye on the plants and water as needed.
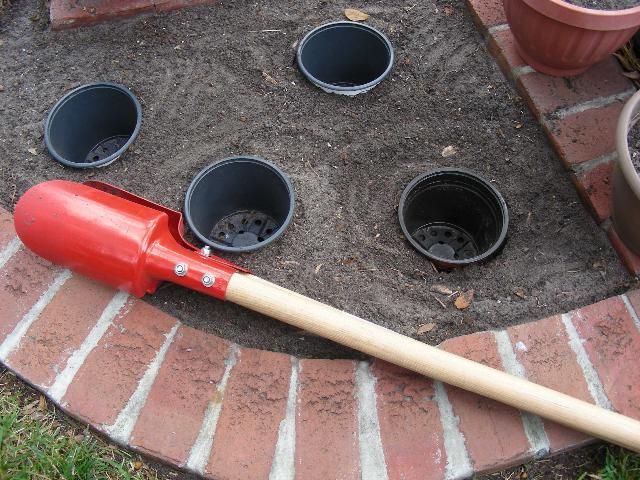
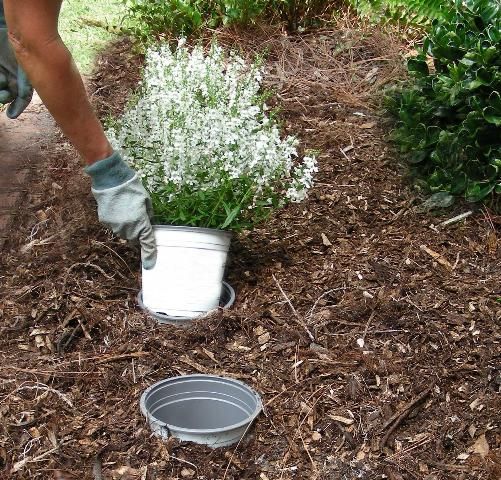
Another approach is the pot-in-pot method. With this technique, empty pots are sunk into the soil and potted annuals of the same size are simply dropped into the empty pots (Figures 5 and 6). This works well in areas where soils are extremely poor, difficult to cultivate, infested with nematodes, or where tree roots would outcompete the annuals. Pot-in-pot plants may need more frequent watering, but this can be efficiently accomplished by installing a microirrigation system that drips directly into each pot. Fertilizer can also be precisely applied to the pot rather than the entire bed, and mulch and herbicide barriers are not disturbed. Cold-tender annuals can be lifted and moved to a protected location during short-term frost or freeze events. Overall, the pot-in-pot method allows you to have year-round color with less work.
Care
Watering
Water applied by an overhead sprinkler system can destroy the beauty of a flower bed by physically damaging the fragile petals or by causing the blooms to rot. The flowers of geranium, celosia, marigold, gerbera, verbena, petunia, phlox, portulaca, snapdragon, strawflower, and pentas are easily damaged by overhead irrigation. Begonia, pansy, coleus, caladium, impatiens, and New Guinea impatiens are more tolerant. Bedding plants are best watered with a handheld hose or with a microirrigation system. Both allow water to be directed to the soil and roots without wetting the flowers.
Weed Control
Weeds can be suppressed by mulching, using pre-emergent herbicides, and/or hand weeding. Mulches should be weed free and applied deeply enough to smother weed seeds or seedlings. Of course, weed seeds can blow or wash in on top of mulch and germinate. The amount of mulch to apply depends on the texture and density of the mulch. Compost and many wood and bark mulches should not be applied any deeper than 2–3 inches (after settling). Excessive amounts around shallow-rooted plants can suffocate their roots, causing chlorosis and poor growth. Mulches composed solely of shredded leaves, small leaves (oak leaves), or grass clippings should never exceed a 2-inch depth. These materials have flat surfaces and tend to mat together, restricting water and air to plant roots. Mulching materials should not come in contact with plant stems. The high moisture environment created by mulch increases the chances of stem rot, which can result in plant death.
Pre-emergent herbicides can be very effective in managing weeds in flower beds. In most cases, they should be applied after the annuals are planted and mulched. Because most weed seeds germinate within the upper ½ inch of soil, surface-applied herbicides control them without injuring the deeper roots of annuals. To reduce the chance of damage, always check the label of an herbicide to see if it is registered for use on the annual(s) you are growing. If the annual does not appear on the herbicide label, it is illegal to use the herbicide on that plant even though you assume all risks and liabilities. Pre-emergent herbicides act by inhibiting the normal root development of small plants before they emerge from the soil. Therefore, do not use pre-emergent herbicides in beds where annuals will be established from seeds. Hand-weeding is labor intensive, but it is a good option when herbicides can't be used or won't control certain weeds. Hoeing is also effective but can damage plant roots and expose dormant weed seeds to light, causing them to germinate.
Fertilizing
Make sure that annuals receive nutrients throughout their growing season. Controlled-release fertilizers provide an extended, steady supply of nutrients. Fertilizers that are not controlled release should be applied monthly according to the label's directions.
Pruning
Many annuals perform best when they are pinched and deadheaded. Pinching is just light pruning of stem tips to control the size and shape of the plant. Deadheading is the removal of spent blooms to improve appearance and redirect plant energy into new growth and flowers rather than seed production.
Pest Management
Annuals sometimes have insect and disease problems that must be quickly recognized and managed. Monitor annuals frequently for insects and diseases. Infestations detected in the early stages can be controlled by spot treatments before the entire flower bed is infested. An insect infestation on a few plants can sometimes be controlled by picking insects off by hand or, in the case of disease, by removing infected leaves. For severe infestations, chemical control is needed. Contact your local UF/IFAS Extension office for help in identifying and managing problems. Find Your Local Office - UF/IFAS Extension (ufl.edu).
Root parasites, called nematodes, cause serious injury to some annuals. For more information, including lists of annuals that are susceptible to or tolerant of nematodes, see Nematode Management for Bedding Plants (https://edis.ifas.ufl.edu/in470).
Cultural Practices that Can Help Reduce Pest Problems
- Plant annuals at the appropriate time of the year (i.e., cool-season annuals in the fall, winter, and early spring; warm-season annuals in the spring and summer).
- Match the growing requirements (light and moisture) of annuals to the planting site (right plant/right place).
- Keep plants growing vigorously by watering and fertilizing as needed.
- Do not let plants wilt frequently since water-stressed plants shed their flowers and are more susceptible to infestation by thrips and spider mites.
- Reduce the chance of fungal diseases by keeping plant foliage as dry as possible. Use drip irrigation in flower beds and allow ample spacing between plants to encourage good air circulation and drying of foliage.
- Remove weeds from flower beds since weeds frequently host insects and/or disease organisms.
Reference
Tjia, B., and S. A. Rose. 1987. "Salt tolerant bedding plants." Proceedings of the Florida State Horticulture Society, 100: 181–182.
Additional Resource
Perennial Gardening in Florida https://edis.ifas.ufl.edu/mg035
Acknowledgments
The author wishes to thank UF/IFAS faculty members Terry Delvalle and Kim Moore for reviewing the 2014 revision of this document.

