Introduction
So you're buying a new home, and you're committed to "buying green"—a house with good indoor air quality, that doesn't cost a fortune to heat and cool, is efficient in the use of water, in an ecologically friendly neighborhood. How do you find out about all that? What do you look for? What questions do you ask? And whom do you ask? What if your realtor doesn't know? Or the home seller? Help!
Well, do not panic. This article discusses the questions you should ask, what to look for, and where to go for information. You'll find that you can have it all: a Florida home that doesn't cost a fortune to run and is healthy and comfortable year-round, in a nature-friendly neighborhood.
To help you evaluate the potential "greenness" of the community in both the short- and long-term, below are eleven questions to ask a developer or realtor. Use them to start a conversation with a developer, realtor, or homeowner. While these questions pertain to a new community, most of them also apply to buying an older home in an established community. Not all questions apply to every situation, and some may be more important in one locality than another. For example, if the community you're investigating is situated near wetlands, then how the yards were designed and are managed would be of primary importance in order to minimize the impacts of yard maintenance on the wetlands.
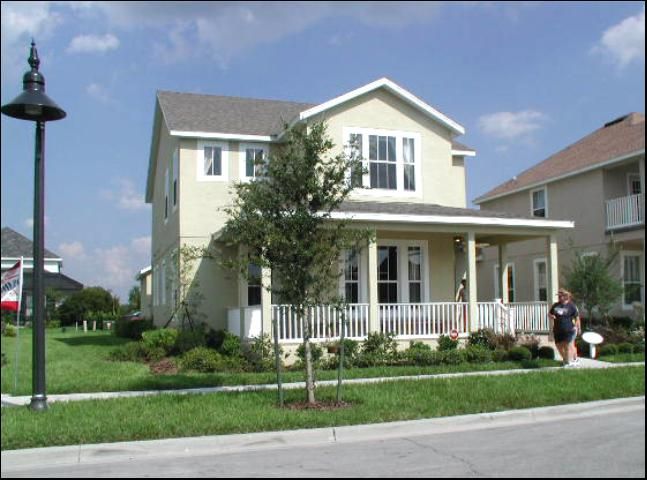
Credit: Mark E. Hostetler, July 14, 2004.
In new or master planned communities, typically you'll meet a realtor from the sales office who will take you around the property, or show you a model home and discuss the layout of the community. This is your opportunity to get an idea of the green components of the neighborhood and how committed the developer is to sustainability. Now, the realtor may not have any idea what you're talking about—a first sign of the developer's attitude towards sustainability; the realtor should have been trained—but be persistent. Ask the developer—or somebody "in the know"—to answer your questions. His or her responses—and the response time—will help you determine how dedicated she or he is to a resource-efficient and healthy community. To help organize your findings, use Table 1 which contains a list of the important questions and space to note what you find out about the community.
Top Eleven Questions
1. Do the Covenants, Codes, and Restrictions (CCRs) address any environmental issues?
Most master planned communities have Covenants, Codes, and Restrictions (CCRs) which act as guidelines to how the community is managed. These help set the flavor and tone of the neighborhood. In older developments, CCRs may be in the deed for the home, establishing the codes and restrictions for the subdivision in which the home resides. If the community has a homeowner association (HOA), it usually has the power to enforce the CCRs. Thus it behooves a homebuyer to understand what the CCRs regulate—especially if they don't encourage sustainable practices.
There are several things to look out for: first and foremost, is there language within the document that could prohibit sustainable practices? For example, the CCR document could stipulate that the front yard has to consist of 80% lawn. If you (as the homeowner) decide to convert the lawn to more native landscaping, will you be able to do so without penalty?
On the other hand, a good sign is language about land stewardship and conservation of wildlife habitat. Some examples of this include:
- prohibitions against planting invasive exotic plants (and definitions of what "invasive exotic" means)
- recommendations about pet care and wildlife (e.g., rules against free-roaming pets)
- no rules against keeping dead trees (i.e., snags) in place; these are beneficial to woodpeckers and other wildlife species
Take a close look at the wording and intent of the document; it should state somewhere that it's in the community's best interests to conserve natural resources. See University of Florida's EDIS document for an example of a CCR that addresses environmental issues (https://edis.ifas.ufl.edu/UW248).
2. Are all of the homes ENERGY STAR® compliant?

Credit: Energy Star program, 2007.
Started in 1992, ENERGY STAR® is a voluntary labeling program administered by the federal Environmental Protection Agency (EPA), which identifies and labels products that are energy-efficient. Many people are now familiar with the ENERGY STAR® labeling for consumer products such as light bulbs, dryers and washers, and refrigerators, but there is also an ENERGY STAR certification process for new construction. Such ENERGY STAR® homes are certified by an independent party and generally are 30% more energy-efficient than typical homes.
How do homes achieve an ENERGY STAR® rating? A builder can choose from a number of "upgrade" packages: building envelope upgrades; high-performance windows; controlled air infiltration; upgraded heating and air-conditioning systems; tight duct systems; and upgraded water-heating equipment. After the home has been built, a third-party tester inspects it and issues the certificate. A certified home will have an ENERGY STAR® label on the circuit breaker box; the builder may also have the ENERGY STAR® certificate for the home.
To make the entire community more energy efficient, a developer should mandate that every home within a new community be ENERGY STAR® certified. It should not be just an optional choice for homebuyers—an option that may not result in every home being built to ENERGY STAR® standards.
Now, a home may be quite energy-efficient, yet the builder did not seek out the ENERGY STAR® label. A case like this will take investigation on your part to determine if the home is truly more energy efficient. Also keep in mind that an older home may have certain features that make it energy efficient. Below are some key questions adapted directly from the ENERGY STAR Website (http://www.energystar.gov). Ask the builder or homeowner the following questions:
- Has the home qualified for the ENERGY STAR label?
The ENERGY STAR label assures you that your home's predicted use of energy for heating, cooling and hot water energy use is at least 30% less than a comparable home based on the national Model Energy Code. Be aware that outfitting a home with ENERGY STAR®-labeled products (for example, windows, lighting fixtures or appliances) will not necessarily make it an ENERGY STAR® labeled home.
- Are the home's windows appropriate for the climate?
When you think about it, a window in a Florida home has a rather complicated job: it must allow the sun's light to pass though, but not the sun's heat. It must keep cool conditioned air inside, but not have condensation on the outside surface of the glass. It must not allow hot, humid outside air to leak into the home in summer, and also not allow warm inside air to leak out of the house in winter. As you can see, a window is a complex system. With the improvements in window technologies, it is now possible—and more affordable than ever before—to buy energy-efficient windows designed for your home's specific climate. A window's energy performance is based on three measures:
- How well it insulates. The U-value is the measure of the amount of heat (in Btus) that moves through a square foot of window in an hour for every degree Fahrenheit difference in temperature across the window. A lower U-value rating means a better overall insulating value for the window.
- How well it blocks heat—not light—from the sun. The Solar Heat Gain Coefficient (SHGC) is the measure of the amount of solar energy that passes through the window. Normally, values range from 0.4 to 0.9; the higher the SHGC, the more solar energy passes through the window system. Windows with high SHGC coefficients (above 0.7) are designed for colder climates, while windows with low SHGC coefficients are designed for hotter climates.
- Air leakage is the amount of air that leaks through a window; it's measured in terms of cubic feet of air per minute (cfm) per foot of window edge. The best windows have air leakage rating between 0.01 and 0.06 cfm/ft.
Houses in colder climates should have windows with a low U-value, effectively holding heat in the house and preventing condensation. In hot climates, a low SHGC is important, allowing visible light into the house while blocking out heat. Look for a window's National Fenestration Rating Council (NFRC) rating to find these specifications, or simply look for windows with the ENERGY STAR label.
- Is the home's insulation optimized and was it properly installed?
Insulation in the walls and attic serves as a protective barrier, keeping out excessive heat and cold and maintaining even temperatures within the home. Insulation is rated in terms of thermal resistance, called R-value, which indicates the resistance to heat flow. The higher the R-value, the more effective the insulation. In Florida, a rating of R-16 to R-19 is recommended for walls and R-30 for ceilings.
For insulation to work properly, it must be installed carefully, without gaps, crimping, or compression. This is most important in places where insulation fits around obstacles such as pipes, electrical wiring or outlets. Ask the builder about how the insulation was installed and check insulation around pipes and electrical outlets.
- Is the home's building envelope properly sealed and tested for air leakage?
The average home has hundreds—if not thousands—of small holes through which heated or cooled air escapes to the outside. Even worse, they let moisture, dust, pollen, and insects in. A tightly sealed and properly ventilated home, verified on-site by a home energy rater, will not only reduce your energy bills but also improve your home's indoor air quality. Ask to see air leakage results from the ENERGY STAR® test (if performed).
- Are the home's heating, ventilation and cooling (HVAC) equipment highly efficient and properly sized?
Energy-efficient HVAC equipment can also bear the ENERGY STAR® label; this equipment saves you money, requires less maintenance, and often comes with longer warranties. Furnaces must be rated at least 90 AFUE (Annual Fuel Utilization Efficiency) and air conditioners rated 12 SEER (Seasonal Energy Efficient Rating) or higher to qualify.
Note that when a home is built with energy-efficient windows, optimal insulation, and tight (not leaky) construction, it will need a smaller HVAC system than conventionally built homes. Such a smaller, properly sized system can effectively maintain home comfort—with lower monthly costs than a large system—and will last longer.
- Is the home's ductwork tightly sealed, sufficiently insulated, and tested for air leakage?
Tightly sealed ducts are crucial to energy efficiency. Typical ducts leak 20–30% of the air forced through them, wasting 2–30% of the money you spend on heating and cooling. With proper sealing and insulation, verified on-site by a home energy rater, you can substantially reduce these leaks. Many utility companies will check duct work for free.
- Is the home's air handler and ductwork in conditioned space?
A big factor in heating and cooling costs is the location of the air handler and ducts. All too often, air handlers are located out in the (uninsulated) garage, with ducts running through the (uninsulated) attic. The HVAC system is thus exposed to extremes of temperature in summer and winter—and as mentioned above, leaks in systems are common. Ideally, both the air handler and ducts should be in conditioned space—that is, within the space that is cooled and heated.
- Does the home have ENERGY STAR® lighting and appliances?
Check if light-emitting diode light bulbs (LEDs) have been installed throughout the house. LEDs provide just as much light as typical incandescent bulbs, but use at least 75% less energy, give off less heat, and last 25 times longer.
ENERGY STAR® appliances can save up to 50% in energy costs; look for labels on washers, dryers, and refrigerators. Pay special attention to water heaters—they use about 11% of the energy "budget" in a typical household. For conventional hot water tanks, look for the manufacturer's specifications of the energy efficiency of the unit. A better choice is a tankless (also called an instantaneous or on-demand water heater). As the name suggests, it does not store hot water—thus avoiding the "standby" losses associated with keeping, say, a 50-gallon tank of water hot all the time—but provides hot water upon demand, at 2–5 gallons per minute. For more information, see: https://www.energy.gov/eere/office-energy-efficiency-renewable-energy?print
3. Are there trails and sidewalks planned along with open and shared spaces?
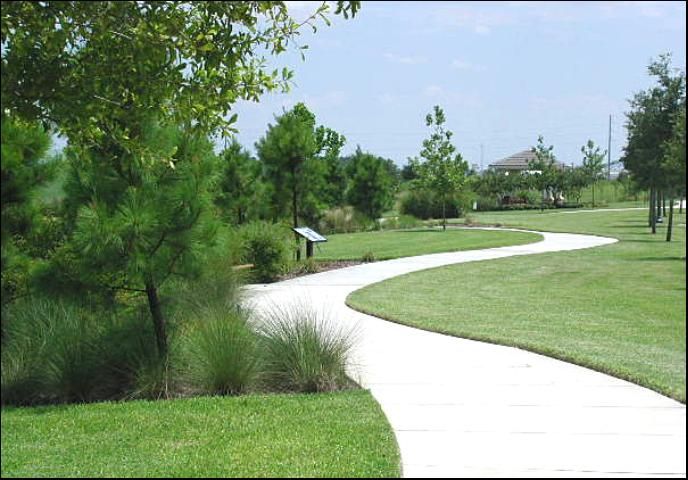
Credit: Mark E. Hostetler, July 14, 2004.
Trails, sidewalks, and open spaces not only encourage residents to interact with their environment, but also promote a strong sense of community by facilitating interactions among neighbors. This sense of community is vitally important to creating and fostering sustainability in a subdivision. For example, if everybody in the community sets out recyclables at the curb, then it is an accepted behavior, and people are more apt to feel that being a responsible neighbor means recycling. Overall, open communications and interactions among residents helps spread sustainable behaviors as well as discouraging behaviors that may go against the trend.
Other designs within a community can promote a sense of community:
- Look for front porches located near the sidewalks with garages in the back. This type of arrangement can encourage residents to talk with their neighbors.
- Look for common areas where people can gather, such as a community pool, shelter, or playground. A community pool is especially "green," as it not only provides a common gathering place, but also decreases the incentive for families to build their own individual pools. This conserves vast amounts of energy and water: think about the resources used to take care of several pools versus those used for one pool.
Inquire about the management of open spaces such as parks and/or natural areas. Is there a plan to maintain them? Are there guidelines to keep people on trails and out of the more "wild" areas? This is important—too many people tracking through a natural area can disturb wildlife and destroy plant communities. In some cases, natural areas will need extensive management practices to retain the biological integrity of the area. For example, in the South, the prescribed burn is an important management tool that promotes healthy pine/upland ecosystems. Without fire, these systems revert to thick shrub/hardwood ecosystems. In these fire-mediated habitats, species such as the gopher tortoise and a host of other animals and plants depend upon fire to maintain the open aspect of pine/upland ecosystems.
How are the more groomed areas (e.g., parks and playgrounds) maintained? This is especially important if parks are located near more natural areas. What goes on in the park can have immediate impacts on surrounding areas. If a grassy area such as a lawn or playing field is a prominent feature of the park, is it planted with a variety of grass that requires little fertilizer and water? Are pets permitted to enter the natural areas? Are playground benches, tables, and other built structures made out of durable recycled materials? If pavement or other impervious surfaces are present, are they permeable? In other words, can water soak into the ground instead of running off into nearby areas? There are a variety of products that allow percolation of water into the ground while providing a solid walking or driving surface. Rather than building paved sidewalks, trails could be mulched or even simply cleared of vegetation, with good signs or markers to keep users—and the community—"on the right path."
4. Is there a long-term environmental education program for the community?
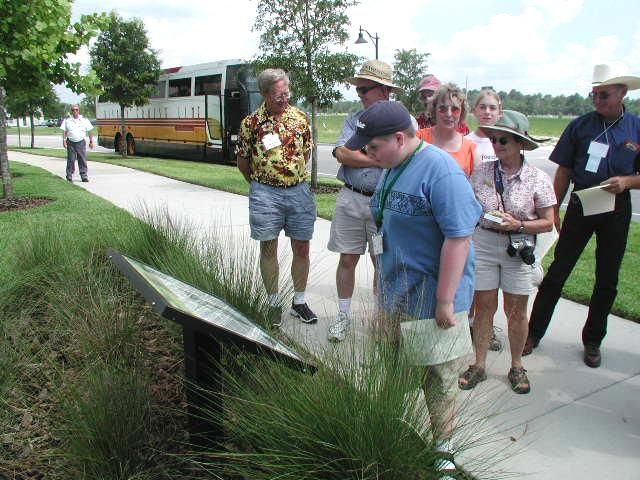
Credit: Mark E. Hostetler, July 14, 2004.
Homeowner understanding and buy-in are essential if the community is to function as originally intended. Although it is the developer who originally implemented the green design, it is up to the community residents to manage and maintain many of the sustainable features.
As an example, consider light-emitting diode light bulbs (LEDs). When a replacement (eventually) must be purchased, an uninformed homebuyer may see the lower price of a halogen or incandescent bulb and buy it instead of an LED. But if the homeowner clearly understands how much money and energy has been saved over the lifespan of the bulb, the replacement will be another LED.
The choice of light bulb is a green feature that only affects the homeowner; it has no direct effect on the rest of the neighborhood. But consider the effect if a homeowner added new plants to her/his garden and her/his choice included some invasive exotics: that choice would have an impact on natural areas that a developer set aside during site development. The invasive plants could spread into those natural areas and have a negative impact on the habitat. Property owners need to know which plants are considered invasive exotics and avoid planting them in their yards. They also need to know how to remove any invasives that might be currently be part of their gardens.
To repeat: initial design is fine, but management is key! Neighborhoods turn over: houses are sold all the time, experienced owners leave, and new owners arrive, unfamiliar with the community "green culture." All residents must be on board in terms of understanding the goals of the community and actions that help conserve natural resources.
One way to get the word out is for the developer to set up an educational package that consists of a brochure, a website, and kiosks. The three elements help inform residents in the following way:
- Interpretive Kiosks: Highly visible interpretive kiosks/signs are placed in public areas where people traffic is high or on a trail system. Each of the signs contains informative displays that discuss a particular topic, such as water, energy, or wildlife. Kiosks should be dynamic, with different informative panels being inserted throughout the year. These kiosks are not only informative and provide a place for neighbors to interact, but they can also serve as a catalyst for people to obtain more information by directing them to the website.
- Website: Because the kiosks/signs can give only limited information, an associated website is constructed that gives detailed environmental information and management strategies pertinent to a community.
- Brochure: A brochure is given to each new homeowner. This brochure highlights local natural resource issues and invites homeowners to explore the kiosks in their neighborhood and visit the website.
At a minimum, a developer should have a brochure and website. Environmental information should be specific to the community and not just a general list of "good" practices—for example, the Website should not simply say it's good to recycle, but should list places nearby in the county where residents can recycle materials. For large master-planned communities, it is also useful to have a full-time conservation manager that works for the neighborhood. This manager can serve as a local source for information and help implement newsletters, local conservation committees, and environmental activities such as bird walks and clean-ups. For a living example of a community that has both an environmental education package and a conservation manager, visit https://wec.ifas.ufl.edu/extension/gc/.
5. What are the types of plants used for landscaping within the community?
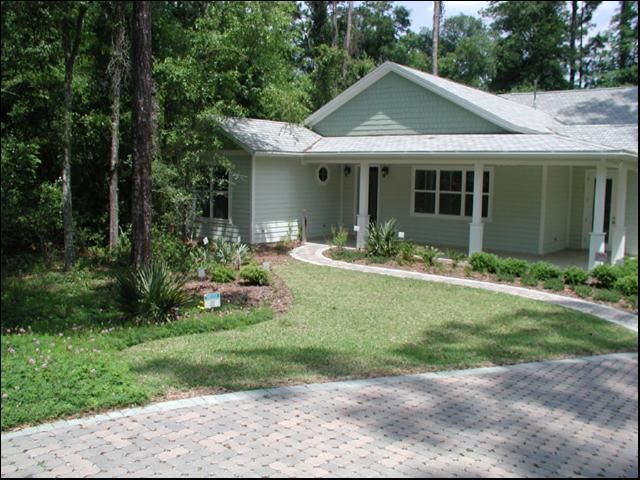
Credit: Mark E. Hostetler, 2006.
The plant palette is the selection of plants that a landscape architect (hired by the developer) installs around homes and in shared spaces such as medians and parks. If the developer provides you with a list of plants, the first question to ask is "Which of these plants are native to the area?" Using native plants—naturally adapted to local climate and soil conditions—saves water and energy. Native plants do not require the fertilizers, pesticides, and herbicides that non-native species need. If the developer doesn't know which plants in the palette are native—and can't find somebody who does know—this indicates how serious he/she really is about conserving natural resources.
The next questions to ask are "How much of the yard is planted with turf grass? What type of turf grass is used?" If 50% or more of each yard is lawn, the community collectively will consume a good deal of water, pesticides, fertilizers, and herbicides taking care of those lawns. Each yard does not have to be entirely devoid of grass—we do need a place to gather and perhaps grill outdoors—but it should be much reduced. Its also important to know what type of turf was used. Some species or hybrids of grass require much less water and fertilizer in their upkeep. Some examples of grasses suitable for the South are: Bahia grass, Bermuda grass, and Zoysia grass. All have excellent drought tolerance and go dormant during dry periods. When the rain comes, these grasses will turn green again.
The landscape architect should have a good knowledge of which plants work the best in your locality. Grill her/him about why she/he chose and planted certain plants. Below are some common installation mistakes made by landscapers (adapted from University of Florida's Florida Yards & Neighborhoods, original author Dr. Greg Davis):
-
Mistake #1: Over-planting
Small trees and shrubs are often planted too close together to get a "full" look. The result, several years later, is a crowded landscape. Plants then must be removed or drastically pruned to reduce competition.
Solution: Beware of "instant landscape." The landscape architect should account for the mature size of plants and give them room—and time—to grow.
-
Mistake #2: Lawn areas are cluttered with trees and shrubs.
Plants scattered throughout the lawn appear unorganized. They also create maintenance problems in terms of mowing, raking and giving plants the amount of water they need.
Solution: One should group shrubs and trees in mulched plant beds bordering the lawn.
-
Mistake #3: Shrubs around the home are too tall.
When plants grow too tall, they cover windows and no longer enhance the home's appearance. The only way to compensate for this "misplanting" is by shearing to control the plant size. This constant shearing sometimes weakens and disfigures shrubs. It also creates extra work and yard waste.
Solution: Select foundation plants with an ultimate (mature) size that fits their location. Instead of shearing shrubs, selectively clip stray shoots to keep the plant neat and full.
-
Mistake #4: Plants are planted too close to the house.
Plants too close to the house have an unattractive "cramped" look. They also create a maintenance nightmare when it's time to repair or paint the house.
Solution: Foundation or corner shrubs should be planted half their mature width plus one foot away from the wall. Therefore, a shrub that will grow to be five feet wide should be planted 3½ feet (= 2 ½ + 1) away from the house.
Do not be hesitant in finding answers not only about what was planted but also how it was planted. Many mistakes can be made in planting shrubs and trees. This is important because years (or even only months) down the road, you may be dealing with dead and dying trees, shrubs, and other plants that were not installed properly in the first place!
One final note: landscaping and orientation of the house can make a home more energy efficient. In the South, a home should be oriented north-south to minimize sun exposure, and trees should be planted on the east and west sides of the house to provide shade in the summer. Limit trees on the north and south sides to allow sunlight to warm the house during winter—or plant deciduous trees that lose their leaves in winter. Minimizing windows on the east and west walls will also prevent sunlight from entering the home during the summer.
6. What kinds of tree protection and native area preservation strategies have been employed?
When driving through the neighborhood—either before or after the homes are built—you may see lots of vegetation: natural areas, large trees, and shrubs. But be aware! Depending on how careful the developer and hired contractors were in protecting them, trees and other large plants may not survive. How trees and whole natural areas were designated and managed during the construction process is critical for their long-term health. You may wind up dealing with the expensive problem of cutting down a dying tree near your house, a tree that was actually killed during construction. It just took several years to see the full effect bad practices had on it.
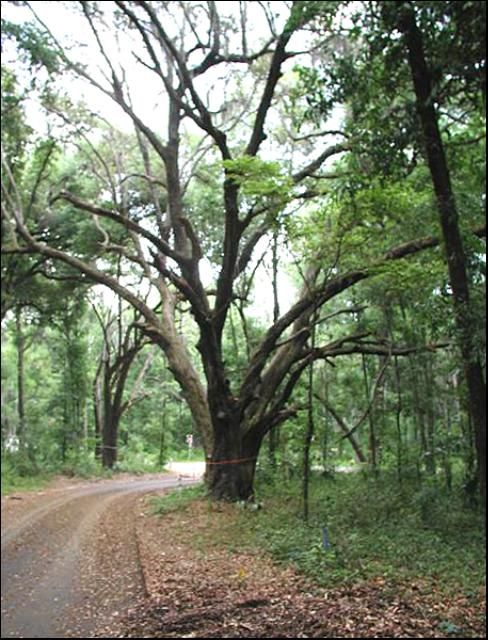
Credit: Mark E. Hostetler, 2006.
It is vitally important that trees and their root systems be protected from damage during the construction process. Tree roots absorb essential water and nutrients. Find out if fencing was used to prevent heavy vehicles, such as trucks, from damaging trunks and running over the root zone causing soil compaction. Pay special attention to how much of the area around the tree was protected. It is not enough just to place a fence or flagging around the trunk of the tree. The roots underneath the drip line (the outer edge of the leafy canopy) should be protected by a sturdy fence.
Soil compaction is not the only hazard. Dumping fill on the soil around a tree can have a similar deleterious effect and so can paving over the soil. Other impacts can involve the placement of utilities. Typically, most utility lines (cable, telephone, etc.) are laid in by digging trenches throughout the site. If the site is heavily forested, trenching can impact a large number of roots. The best solution (and most cost effective) is to lay the utilities underneath the roads of the subdivision.
In some cases, a road, sidewalk or some type of pavement may be placed near the tree, causing some compaction. Depending on the tree species, a portion of the root zone could be compacted or paved over and the tree will remain healthy. If you see a tree that is located near construction, note how much of the root zone was protected. Ask a tree expert about the ability of that tree species to withstand soil compaction or pavement underneath the drip line.
Find out how construction debris and chemicals are being discarded; there should be designated zones for disposal of them, away from any trees meant to be preserved. This debris can be toxic or can change soil pH due to leeching of chemicals into the ground.
Ask (or observe) if any trees have been pruned, and if so, how. See if any broken limbs are visible; these should have been removed. The landscape architect should know the proper ways to prune a tree so that it remains healthy. One of the worst pruning methods—and unfortunately still too commonly used— is called "topping", where large branches at the top of the tree are simply sheared off, without regard to location or diameter. This method can cause decay in the branch stubs and trunk, weaken roots, and attract pests. Sprouts that form from topped trees are poorly attached and can break off.
With regards to protected areas, what kinds of management strategies have been implemented, both during the construction phase and post-construction? At a minimum—as required by law—there should be well-maintained silt fences around any wetlands or water bodies to prevent silt from entering these areas during construction. Run-off can carry vast amounts of silt into a wetland and essentially choke this system to death. Now, well-maintained is the operative word here. Check around the construction site. Are silt fences properly placed? Have any fallen down?
Has some kind of natural buffer or transitional zone been established between human-dominated areas and the protected areas? If the protected area is right up against a yard or some kind of pavement, such as a road, then there is no chance to filter storm water run-off from the human-dominated areas.
Wetlands and small ponds with lawn right up to their margins are other examples of bad planning. Lawns usually must be managed using fertilizers, pesticides, and herbicides, and without a buffer between the lawn and the water body, these chemicals can drain right into the water.
Take a close look at the "natural" areas. Do they look natural? The protected areas may be heavily infested with invasive exotics, such as Chinese tallow trees, and may even be dominated by exotic/ornamental vegetation such as old fruit trees. A conscientious developer should have implemented some kind of restoration plan to remove exotic vegetation, with a long-term strategy to prevent re-invasion. Ask whether any invasive exotics were found in the natural areas. If the developer or landscape architect has no idea what "an invasive exotic" is, or whether any are present in the development, this is another clue revealing how serious she/he is about conserving natural areas.
As mentioned earlier, a subdivision with protected natural areas should have a management/educational program for the entire community that addresses the boundaries between natural and human-dominated areas. The health of these natural areas is intricately tied to the behaviors of nearby residents. The developer should have some sort of visible educational program (see question 4, above) and the Covenants, Codes, and Restrictions (CCRs—see question 1 above) should explicitly address the long-term management of common spaces.
7. What is the structural envelope and materials used to build the home?
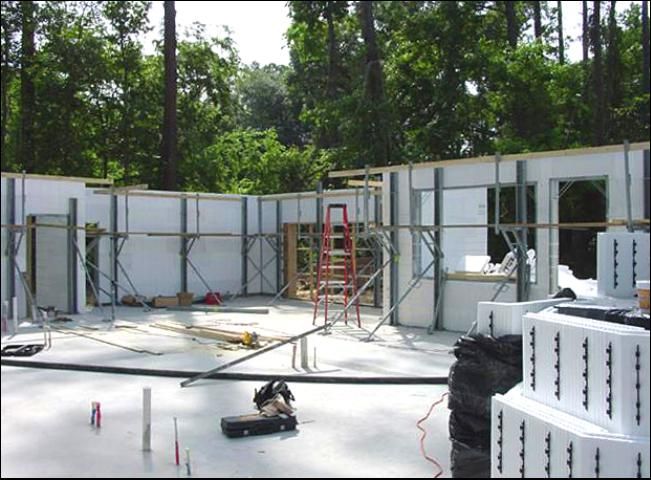
Credit: Hal Knowles, 2006.
This is a catch-all category and only a few important issues will be mentioned. Many construction techniques can benefit (or hinder) the energy efficiency, indoor air quality, and resilience of the house to weather conditions over its lifetime. Using improved construction techniques will go a long way not only in conserving energy but also in reducing repairs and improving indoor air quality.
First, indoor air quality. A leaky home can bring humidity, pollen, dust, and mold from outside, from crawl spaces, and from attics into the conditioned space. During the summer, moist warm air infiltrating into the home can cause condensation on cooler indoor surfaces. Water can also wick up from the ground through cracks or pores in concrete slabs, and enter the home. It is amazing how much water vapor can leak into a home: a ½-inch round hole in a 100-square-foot wall can allow about 50 cups of water to enter a home in a year.
The home should have an effective air barrier to prevent this kind of leakage. During construction, all leaks between conditioned and unconditioned spaces should be sealed with durable materials. It should also be designed and built in such a way as to prevent wicking of water from the ground into the house. Have a builder or developer explain the construction techniques he/she used to create the air barrier. Things to look out for:
- All electrical outlets, recessed lights, and other openings in the building shell—where plumbing and wires enter the building, for example—should have effective seals. If recessed lights must be used, install air-tight insulated ceiling-rated fixtures.
- Ask how junctions between building components—such as slab to framing—have been sealed. A barrier that prevents wicking of moisture should be present.
- Insulation should be continuous from the ceiling and walls to floor, with no gaps. Ask how the builder accomplished this.
Indoor air quality is not only affected by infiltration of contaminants from outside; there is also the potential for contaminants from within the home as well. Many paints, varnishes, and carpets emit volatile organic compounds (VOCs) that can affect indoor air quality. But this can be controlled by using the low-VOC paints, glues, varnishes, and carpet that are now on the market. Ask the developer or builder if he or she used such low-VOC compounds during construction.
Was the home properly graded? That is, does the water flow away from the house when it rains? This is important; water flowing towards the foundation will not only create moisture problems, but also attract insects such as termites.
Ahhh—termites! Ask the builder whether the foundation has a physical barrier against termites. The Termimesh System™ uses a very fine wire mesh to prevent the insects from entering the home. It must be installed by trained technicians when the foundation is laid; it can save on pesticide costs.
Was the home properly insulated? As mentioned earlier, insulation effectiveness is measured by its R-value. Ask what R-value insulation materials were used for the walls and ceilings (and floors, if they are raised). In the South, R-16 to R-19 values for the walls is good and R-30 for the attic.
Did the builder/contractor use "green" materials? To evaluate the "greenness" of a material, consider three things: embodied energy, greenhouse gases, and toxins and waste. Embodied energy is the energy required to harvest or mine the material, manufacture the final product, transport the product, and install it. The less energy used, the lower the environmental impact. Second, the quantity of greenhouse gases created is dependent on the amount of fossil fuels burned to produce the material. The more gases created, the more effect we have on our climate due to global warming. The third item, toxins and waste, addresses how much toxins and waste are created as a result of producing, installing, and disposing of any material used in construction. You may not be able to readily evaluate this, but ask if the developer has any information regarding the "sustainability" of materials used during construction.
Did the builder use "green" materials? Here are some factors that make a material "green":
- They come from renewable resources. Renewable resources take a reasonable amount of time to replenish themselves. For example, the use of fast-growing bamboo rather than slow-growing tropical hardwoods.
- They are made from recycled materials. For example, concrete can be made (in part) of fly-ash waste from coal-fired plants.
- They are non-toxic. Many non-toxic building products are available, including asphalt made from chipped rubber obtained from automobile tires and recycled plastic, used for playground structures, benches, picnic tables, fences, and even docks and decking.
- They are durable and require low maintenance. For example, steel is much more durable and requires less maintenance than wood.
Whether or not the developer or builder used green materials can help you gage how interested he/she was in constructing a sustainable home, and in reducing the impact on the environment. Did the developer go beyond material selection? A good waste management plan for the site will include strategies to reduce, reuse, and recycle as many materials as possible. For example, if the site contained buildings that were demolished, did the developer reuse the materials on site? Concrete could easily be reused throughout the site for foundations and even fill. Any trees and vegetation that were removed could be chipped and used for mulch.
The point of asking these questions is to see whether the developer explored the alternative options that are available. Many options do exist, and the developer has to weigh the costs and benefits for each. Some "green" alternatives may not be feasible in a certain locality but if the developer did not explore any options, how serious is she/he about creating a sustainable community?
8. What kind of irrigation and storm water system does the community have, and what water conservation devices have been installed in the home?
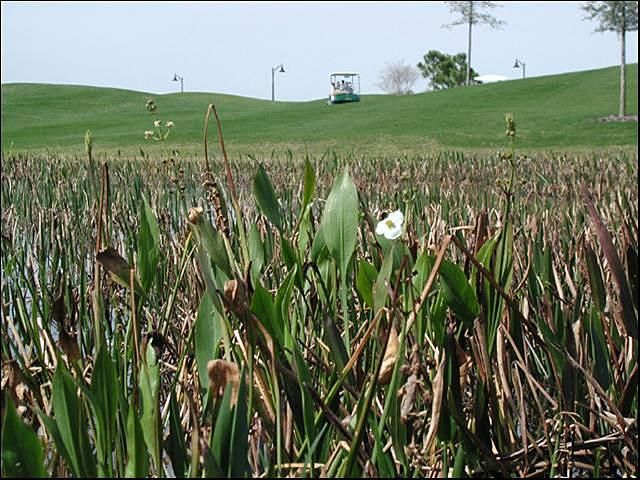
Credit: Anna Prizzia, February 14, 2003.
Water quality and quantity are big growth management issues, and residential developments present many challenges. The sheer number of impervious surfaces—such as roofs and pavement—means less rainfall percolates naturally into the ground, replenishing the water table. Instead, the water runs off the property, to cause potential flooding. It may carry chemicals (fertilizers, oils, etc.) into natural water bodies such as streams and ponds. Lawns and ornamental plants can place a heavy demand on local water resources. Of course water use within a home for bathing, flushing, and washing clothes and dishes, is another source of consumption. Extensive water use can draw down the water table, especially during drought years, and cause local wetlands to dry up.
The developer hires civil engineers to analyze the soil permeability, estimate the size and number of storm water ponds needed, and design the transport system that shunts the water to these ponds. Typically, curbs and gutters are used to keep storm water from running off the property, shunting it to retention ponds where it can slowly percolate into the ground.
Take a look at the community's retention ponds. A well-designed retention system should not only function as a water storage area but also as wildlife habitat. Wildlife will favor ponds with little lawn around the edges and a variety of trees, shrubs, and other vegetation occurring both in the water and around the shore. If you see retention ponds that are cut deep (with no shelf at the edge of the pond); completely surrounded with cement or grass; or with no native vegetation planted around or in the water, you can assume it is only minimally used by wildlife.
In certain situations, the curb and gutter system may be the only option, but there are much better alternatives. A more sustainable method, which requires fewer materials and less energy to build, is to use the natural features and soil conditions already present on the property. Through soil analyses, the sandiest, lowest-lying portions of the property can be identified. These sites—where water would naturally collect—can be set aside and left in their current state. Swales located throughout the site then direct water to these "retention" areas, and because the swales are not made of cement, water will percolate into the ground as it travels to them. With this more natural method, very little cement is used, and upkeep is minimal. Plus, the retention areas appear natural and serve an additional recreational purpose—providing an "escape" for residents to walk around and enjoy local wildlife.
Another option is called "rain gardens." Here, each residential yard acts as a mini-retention system. Low-lying areas are created and planted with water-loving plants. Each individual rain garden serves as an area where water can gather and slowly percolate into the ground. And with the right landscaping, a rain garden can be an aesthetic addition to any yard! This multitude of retention areas—the rain gardens on each property throughout the neighborhood—reduce the need for an extensive storm water retention system. This is a much better system as it better replicates how water naturally percolated into the ground before construction. A more diffuse system is much better for the hydrology of the area and can reduce impact on surrounding wetlands.
In terms of water consumption, the best thing that the developer can do to reduce water demand is to limit the amount of lawn and ornamental plants in the landscape. On a residential property, approximately 50 to 60% of the water consumed is used for irrigation. Shared areas such as parks are a further drain. Thus, limiting vegetation that requires extensive watering can save significant amounts of water.
Developers should reduce the amount of turf and install native plants that generally require less water and are adapted to local climate conditions. For areas that must be watered, an efficient irrigation system, such as drip or micro-irrigation, should be installed (see http://www.sjrwmd.com/waterconservation/index.html). The most efficient system of all is one that combines soil moisture sensors with a micro-irrigation system. The sensor tells the irrigation system to turn on only when the soil is too dry. This way, the yard is only watered when the soil is lacking the moisture required to keep plants healthy. As another strategy, rain barrels can collect water off of roofs and the barrels can be hooked up for irrigation of landscaped areas.
Although irrigation systems are usually designed for an individual property, a central watering system for the whole neighborhood would be a truly efficient system. Maintained by a knowledgeable landscaping company, this central system can reduce the amount of management error by individual homeowners. If the developer has installed an irrigation system for each yard, ask if there is someone available to train homeowners about how to manage these systems properly.
Water use inside of the home accounts for about 40% of total water use by the homeowner, and a developer can make use of a variety of options to help make the community more water-efficient. Are low-flow toilets and showerheads installed in each home? Generally, toilets should be rated at 1.5 gallons per flush or less, and showerheads should have a maximum flow of 2.5 gallons per minute or less. Each faucet should have an aerator that flows less than 3 gallons per minute. Ask about any water-using appliances installed in the home, such as the dishwasher or washing machine: are they water efficient models? Check the water meter—is it running when no water devices are turned on? If it is running, this indicates a leak somewhere.
9. Does the community have a green transportation system?
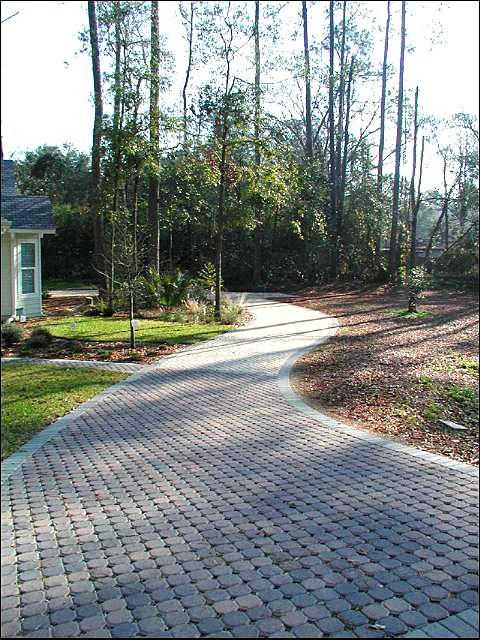
Credit: Mark E. Hostetler, 2006.
Driving a car is a significant source of energy consumption. Not only do automobiles use a lot of fuel, they emit pollutants into the air. Furthermore, they need roads, and highways take a lot of resources to create. Anything that discourages the use of a car and diminishes the surface area of roads will minimize the consumption of natural resources. Some things to look for:
- Minimal width streets, with "calming" devices such as speed humps, roundabouts, curved roads, and speed limit signs.
- Streets built (in part) of recycled material.
- Multiple exit/entry points into the neighborhood and local street connections to nearby neighborhoods. This keeps the neighborhood cars from funneling onto a single arterial road, which can cause traffic congestion.
- Trees planted along roads and in parking areas. This shades the asphalt and reduces the urban "heat island" effect.
- Roads and parking areas made of light-colored material to reduce absorption of heat from the sun.
- Walking trails and bike paths to local retail areas, schools, and recreational areas.
- Sidewalks, driveways, and roads made from pervious material that allows water to seep into the ground.
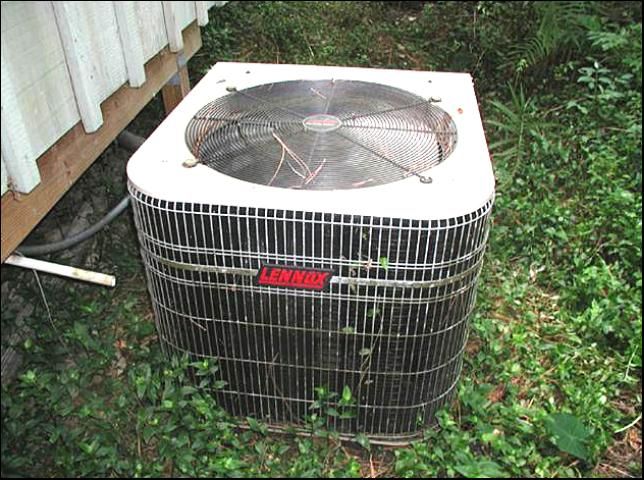
10. How was the HVAC system sized for the home and where in the home was it installed?
Credit: Mark E. Hostetler, 2006.
The heating, ventilation, and air conditioning (HVAC) system provides comfort and improved air quality throughout the year. However, homes could be designed to passively provide this comfort through much of the year and one would not have to use heat or cooling systems. For example, in hot climates, houses that are raised up off the ground, have cross ventilation, are shaded by trees, and have sensibly-placed fans could be quite comfortable throughout the year.
But if the developer of your community made the conventional choice and installed an HVAC system, ask if there are any features in the home that reduce the need to run the furnace or air-conditioning system.
HVAC systems can be inefficiently designed and/or installed improperly. Inquire about who installed the HVAC system and keep the below issues in mind.
- Bigger is not better. An air conditioner is not only designed to cool a building but also to remove moisture. An oversized unit cools the building too quickly and does not run long enough to reduce the humidity level. Humid air feels uncomfortable and promotes growth of mold and mildew. Check the HVAC unit's Sensible Heat Ratio (SHR). The lower the SHR the better since it indicates a greater amount of humidity removed. The SHR should be 0.75 or lower.
- The Seasonal Energy Efficient Rating (SEER) indicates how energy efficient the unit is in terms of removing heat per kilowatt of power used. A high efficiency unit is rated SEER 13 or higher.
- As mentioned previously, the air handler and all duct work should be in conditioned space. This helps prevent loss of heated or cooled air to the outside.
- Ask if the home has been tested for duct leaks and pressure imbalance problems. Leaks in the ducts not only result in loss of conditioned air (mentioned earlier) but also can create air pressure imbalances in the house. If the amount of air delivered through the supply ducts is not equal to that drawn through the return ducts, the resulting imbalance can cause outside air to be drawn into the house.
11. Is the developer seeking any third party "green" certification?
It can be difficult ascertaining how "green" a community really is. You may have limited time and access to information to evaluate a home or neighborhood fairly. However, there are problems with some environmental certification programs. Many have argued that it is often too easy to get certified as green. If the developer is marketing the community as green, ask whether an independent third party has certified the community. We have already talked about one certification program, the ENERGY STAR® program, where a third-party evaluator rates the energy-efficiency of the home. If the developer does have some type of certification, ask to see the application and comments made by the certifying group or agency. Beyond the level of the building, there are some organizations that evaluate the entire community, including such things as site layout, landscaping, and road design. Examples include Audubon International (http://www.auduboninternational.org) and Florida Green Building Coalition (http://floridagreenbuilding.org) that certify master planned communities.
You should not rely on the certificate as the sole indicator of how green the community is—rely more on your "on-the-ground" analysis of the community. Certification programs can be flawed, as there is typically a menu of strategies that a developer can implement to meet certification. In the scientific and environmental community, there is no consensus on which strategies are the best. Sometimes developers will do the bare minimum to get certification. They may leave out important sustainable practices that are important to you or to the local region. For example, wildlife habitat may be a feature you are interested in, but the community may have achieved "green status" primarily through the construction of buildings and roads. In some cases there are different levels of certification (e.g., bronze, silver, and gold). But in the end, some kind of certification is good because you have at least an outside party evaluating the community. However, ask for the application or contact the organization to determine why the neighborhood was certified.
For More Information
- Program for Resource Efficient Communities—http://www.energy.ufl.edu
- Living Green—http://livinggreen.ifas.ufl.edu
- Department of Wildlife Extension & Conservation—http://www.wec.ufl.edu/extension
- Florida Yards & Neighborhoods—http://fyn.ifas.ufl.edu