Introduction
Although many pesticide handlers use existing buildings or areas within existing buildings for pesticide storage, it is always best to build a separate facility designated for storing pesticides (Figure 1).
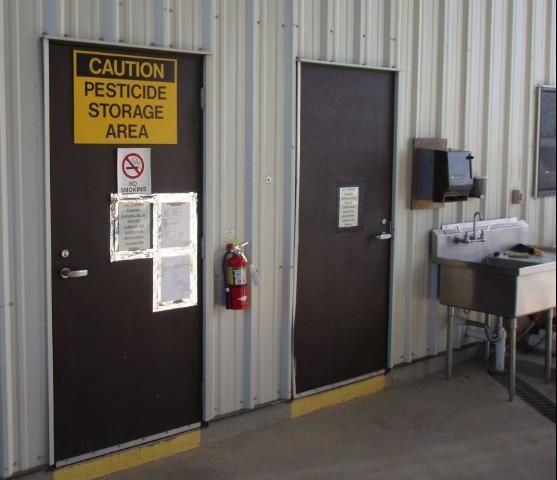
A well-designed and maintained pesticide storage site:
-
Protects people and animals from exposure.
-
Reduces the chance of environmental contamination.
-
Prevents damage to pesticides from temperature extremes and excess moisture.
-
Safeguards pesticides from theft, vandalism, and unauthorized use.
-
Reduces the likelihood of liability.
Storage and the Law
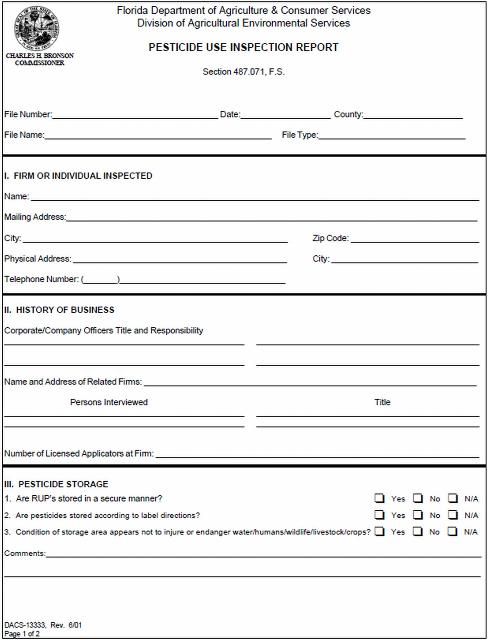
According to Chapter 5E-2, Florida Administrative Code, "restricted use pesticides shall be stored and maintained in a secure manner, such that they are not easily accessible to unauthorized persons." Regular agricultural pesticide use inspections, conducted by inspectors from the Florida Department of Agriculture and Consumer Services (FDACS), use a form containing a three-item checklist regarding pesticide storage (Figure 2).
Secure the Site
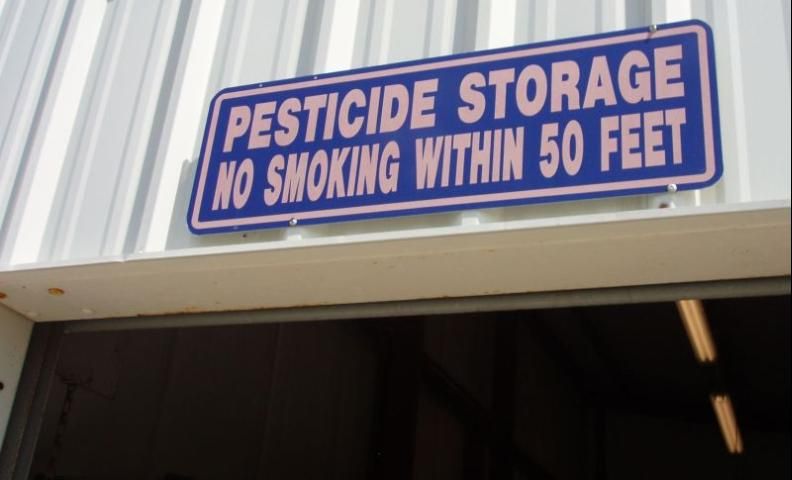
Keeping out unauthorized people, pets, and stray animals is an important function of the pesticide storage site. Whether the designated area is as small as a cabinet or as large as a building, keep it securely locked. Post highly visible warning signs (Figure 3) on doors and windows to alert people that pesticides are stored inside. In addition, post "No Smoking" warnings; many pesticides are highly flammable.
Prevent Water Damage
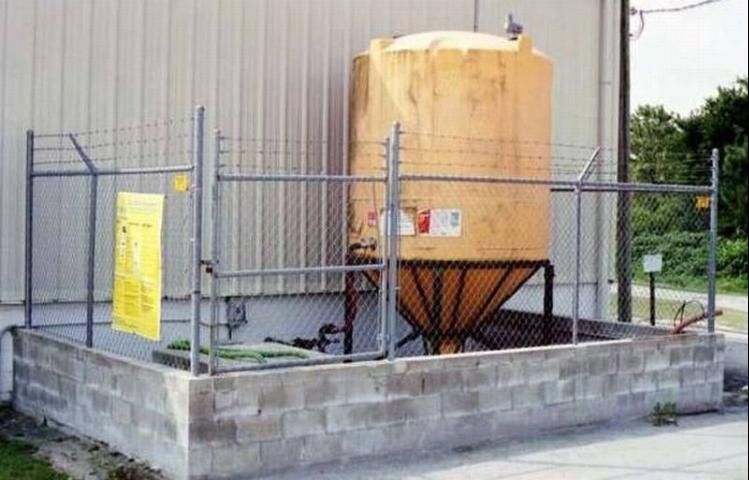
Locate the pesticide storage facility where water damage is unlikely to occur. To prevent potential contamination of surface water or groundwater, carefully consider characteristics of soil and land surface when selecting a storage site. Avoid locating the storage facility near a stream likely to flood or where runoff water can be a potential problem, such as at the base of a slope. In certain situations, consider diking the storage facility or constructing some other containment structure around it (see Figure 4).
The US Natural Resources Conservation Service and the Florida Department of Environmental Protection recommend that pesticide-handling facilities are located a minimum of 100 feet from water sources. Water or excess moisture can damage pesticide containers and their contents.
Moisture causes:
-
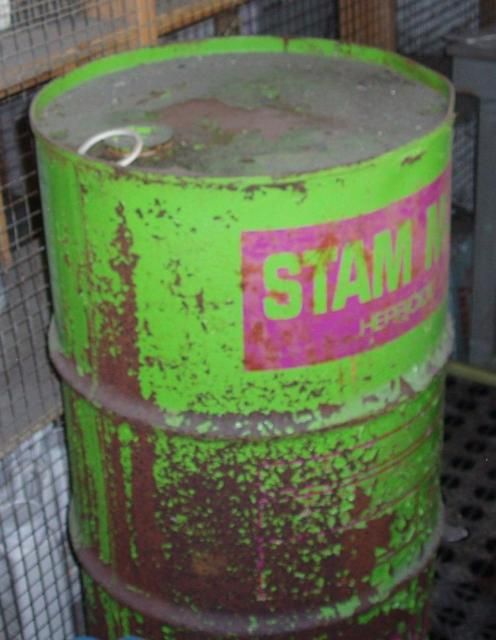
Metal containers to rust (Figure 5).
-
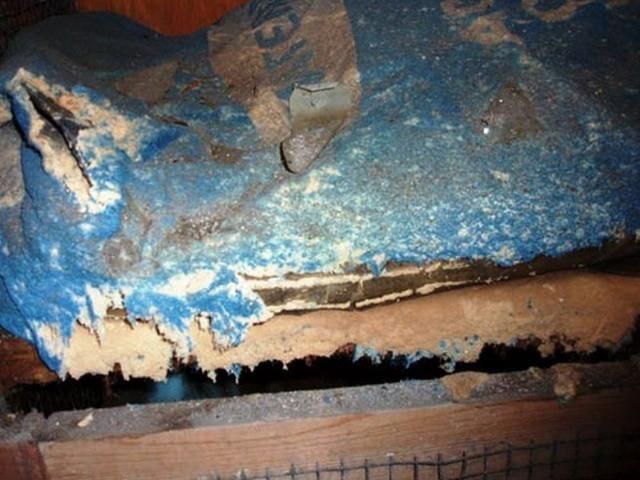
Paper and cardboard containers to split or crumble (Figure 6).
-
Pesticide labeling to peel, smear, or otherwise become unreadable.
-
Dry pesticides to clump, degrade, or dissolve.
-
Slow-release products to release their active ingredients.
Control the Temperature
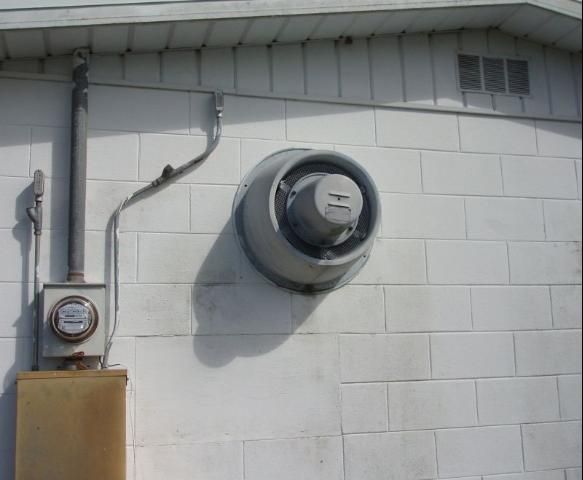
Choose a cool, well-ventilated room or building that is insulated or temperature-controlled. Exhaust fans directed to the outside of the building reduce temperatures and remove dust and vapors from the storage facility (Figure 7). The pesticide labeling often specifies the temperature limits for storing a product (Figure 8).

Temperature extremes can decrease the effectiveness of some pesticides. In addition, freezing temperatures can result in breakage of glass, metal, and plastic containers. Excessive heat can cause plastic containers to melt, some glass containers to explode, and a few pesticides to volatilize and drift from the storage site. Always store pesticide containers out of direct sunlight to prevent overheating.
Provide Adequate Lighting
Be sure the facility is well lit. Pesticide handlers using the facility must be able to see well enough to read the pesticide label and notice whether containers are leaking or corroding. Because of the volatility of some pesticide formulations, use only spark-proof lighting fixtures and switches.
Use Nonporous Materials
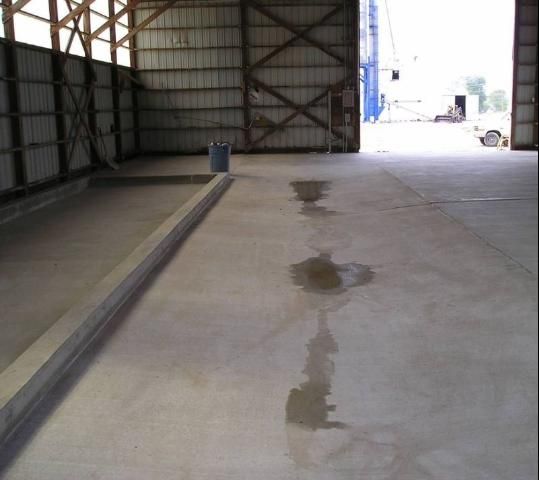
Construct the floor of the pesticide storage area using sealed cement, glazed ceramic tile, no-wax sheet flooring, or other material that is free of cracks and easy to clean and decontaminate in event of a spill or leak. Carpeting, wood, soil, and other absorbent floors are not suitable because they are difficult or impossible to decontaminate. A floor that slopes into a containment system or that is recessed below the level of the doors helps to keep spilled or leaking pesticides within a confined area (Figure 9).
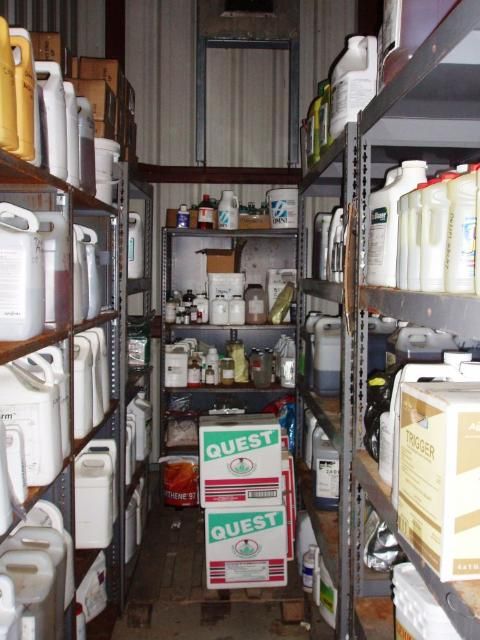
For ease of cleanup, choose shelving and pallets made of non-absorbent materials, such as plastic or metal (Figure 10).
Maintain the Storage Site
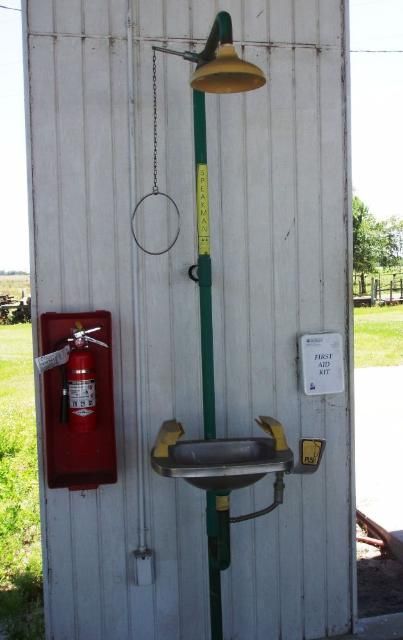
Store only pesticide containers, pesticide equipment, and a spill cleanup kit at the storage site. Never keep food, drinks, tobacco, feed, medication, medical or veterinary supplies, seeds, clothing, or personal protective equipment (other than that necessary for emergency response) at the site. These items could become contaminated by pesticide vapors, dusts, or spills, resulting in accidental exposure to people or animals. Water should be available at the pesticide storage site for the purpose of decontamination (Figure 11).
Keep Labels Legible
Store pesticide containers with the labels in plain sight. Costly errors can result if the wrong pesticide is chosen. If the label is destroyed or damaged, immediately mark the container with some basic labeling information, such as the trade and common name of the product, the EPA registration number, the amount of active ingredient(s), the signal word, the use classification, and the manufacturer. Then request a replacement from the pesticide dealer or distributor.
Store Pesticides in Accurately Labeled Containers that Seal Securely
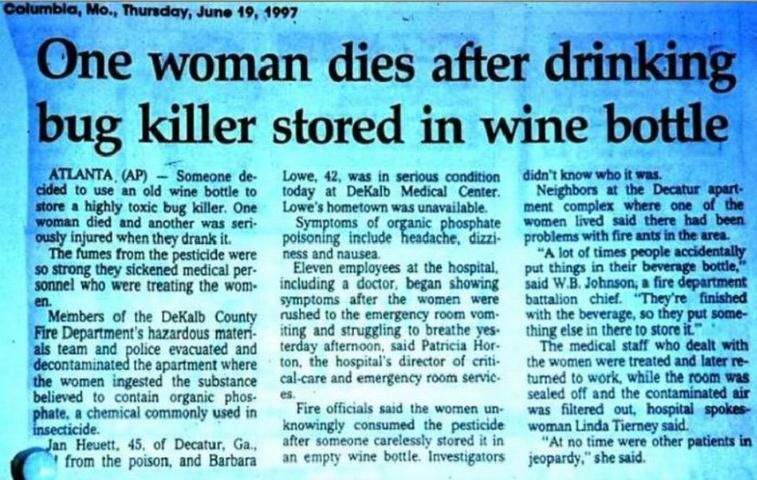
Store pesticides in their original containers or in different containers that originally held the same pesticide and still have intact labels. Never use milk jugs, soft drink bottles, fruit jars, medicine bottles, fuel cans, or other types of non-pesticide containers to store pesticides. Using the wrong containers for pesticide storage is illegal and has resulted in serious poisonings because children (Figure 12), as well as adults (Figure 13), associate the shape, size, and color of a container with its usual contents. Never lend or borrow any pesticide product in an unmarked or unlabeled container.

Keep containers securely closed when not in use. Dry formulations tend to cake when wet or subjected to high humidity. Opened bags of wettable and soluble powders, dry flowables, dusts, and granules can be placed into sealable plastic bags to prevent a spill.
Place large drums and heavy bags on plastic pallets. Store other pesticides on metal shelving, placing the heaviest containers and liquids on the lower shelves. Do not allow containers to extend beyond the edge of shelving because the containers could easily be bumped or knocked off. Be sure the shelving is sturdy enough to handle the quantity and weight. Store volatile pesticides separately to avoid possible cross-contamination of other pesticides.
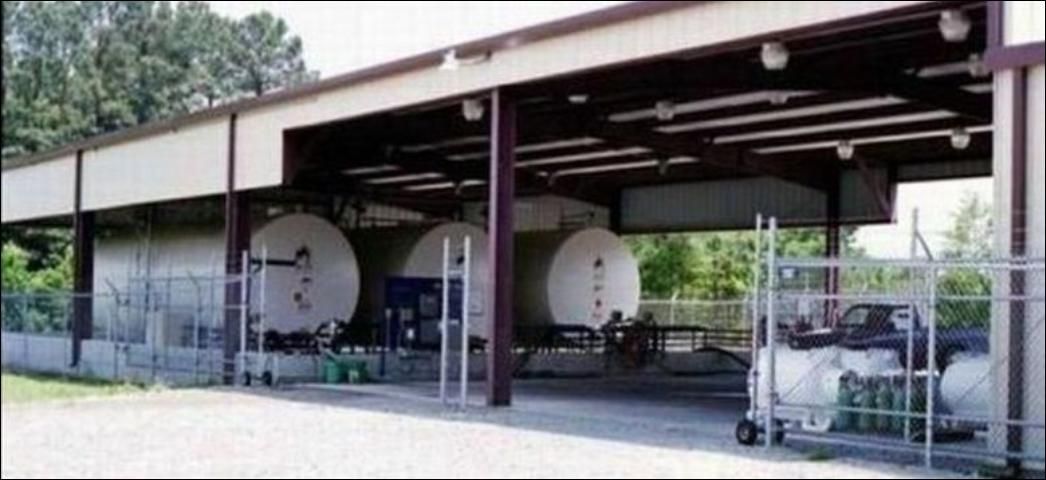
Place bulk or mini-bulk tanks on a reinforced concrete pad or other impermeable surface. Diking around a tank will keep spilled or leaking pesticides inside a restricted area and also helps to prevent damage to the tanks from vehicles and equipment. Construct the area inside a dike large enough to contain the volume of the liquid in the tank plus at least an additional 10 percent. Keep valves and pumps within the diked area. Make sure all drains within the dike connect to a holding tank. Outside, use fencing to prevent tampering or unauthorized access to any bulk tanks (see Figure 14).
Look for Damage
Inspect pesticide containers regularly for tears, splits, breaks, leaks, rust, or corrosion (see Figure 15). If you find a damaged container, immediately put on appropriate personal protective equipment and take immediate action to prevent the pesticide from leaking or spreading into its surroundings. If a container is already leaking, take corrective action to prevent further leaking and immediately clean up any spilled pesticide. Be especially careful if the damaged container is an aerosol can or fumigant cylinder that contains pesticides under pressure.
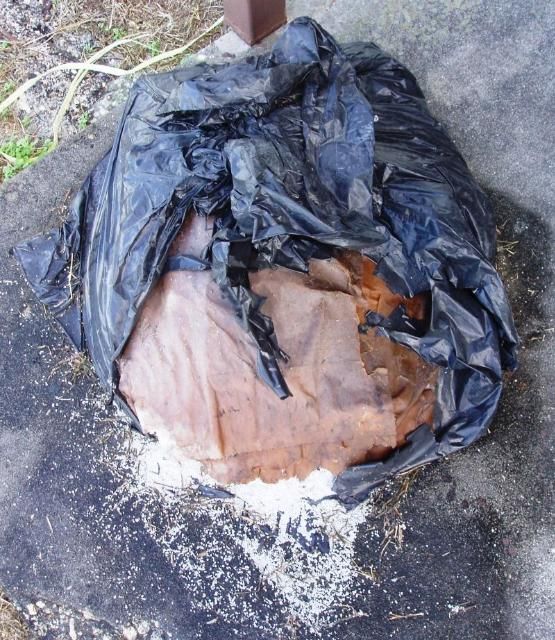
Depending on the specific situation, consider the following actions:
-
Use the pesticide immediately at a site and at a rate allowed by the label.
-
Transfer the pesticide into another pesticide container that originally held the same pesticide and has an intact label. Be sure the new container can be tightly closed. If possible, remove the label from the damaged container and place it on the new container. Otherwise, temporarily mark the new container with basic labeling information and get a copy of the label from the pesticide dealer or distributor as soon as possible.
-
Place the entire damaged container and its contents into a suitable larger container.
Note Shelf Life of Pesticides
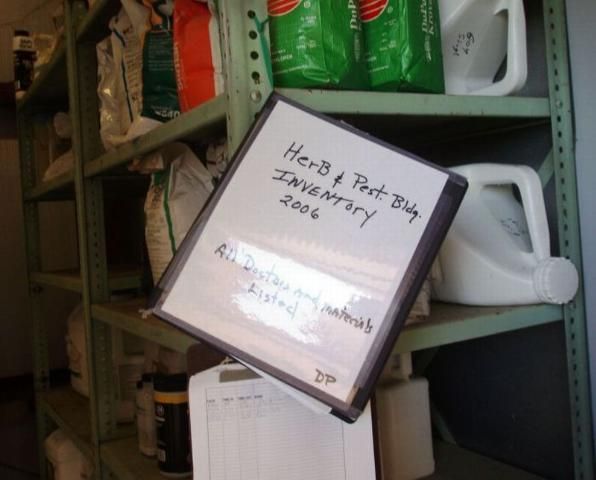
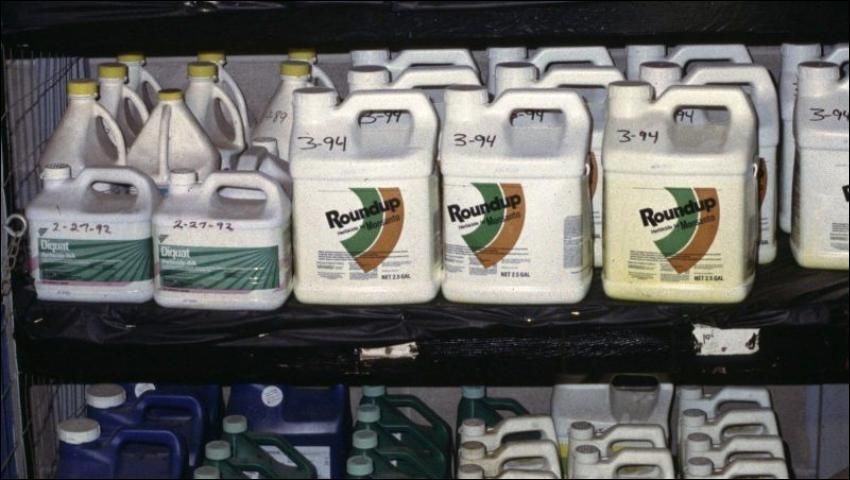
Keep an inventory of all pesticides in storage and mark each container with its purchase date (Figures 16 and 17).
Be sure to note if the product has an effective shelf life listed on its label. If you have questions about the shelf life of a product, contact the dealer or manufacturer. Signs of pesticide deterioration from age or poor storage conditions may appear during mixing. Watch for excessive clumping, poor suspension, layering, or abnormal coloration during mixing. Other times, however, the first indication of pesticide deterioration from age or poor storage conditions may be poor pest control and/or damage to the treated crop or surface.
To minimize storage problems, avoid storing large quantities of pesticides for long periods. Keep records of previous usage to make good estimates of future needs. Buy only as much as you need for the season.
Isolate Waste Products
Do not accumulate outdated or cancelled pesticide products. Make every effort to use up what you purchase because leftover pesticides may become hazardous waste. All of these materials could be subject to additional federal regulations on the storage, disposal, and reporting of hazardous materials. These materials include:
-
Outdated products, such as those whose shelf life has expired.
-
Cancelled products, past the date of legal use.
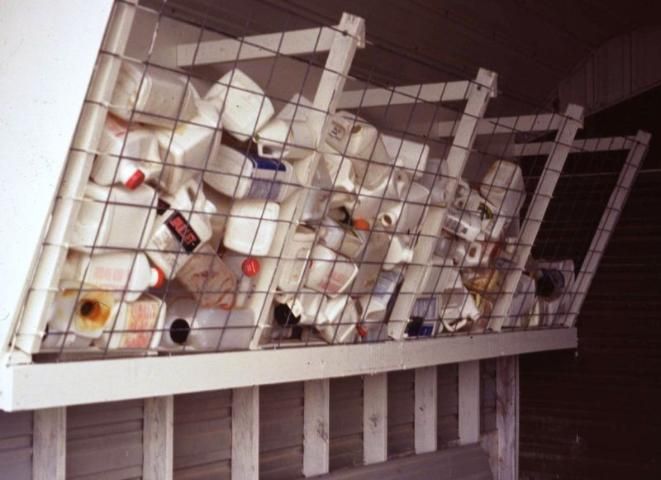
If you are saving pesticides or pesticide containers for disposal or recycling, store them in a special section of the storage site (Figure 18). Make sure all empty containers are triple-rinsed or pressure-rinsed before storing for disposal or recycling. For more on this topic, see EDIS Publication PI-3, Pesticide Container Rinsing, https://edis.ifas.ufl.edu/pi003.
Pesticide Storage and Security Issues
In recent years, security has taken precedence in many aspects of daily life, including secure storage of pesticides. For a comprehensive discussion of security measures for a pesticide storage facility, see EDIS Publication PI-42, Secure Pesticide Storage: Security Against Terrorist Threats, https://edis.ifas.ufl.edu/pi079.
Make a Checklist
Safety is the key element in proper pesticide storage. If you answer "no" to any of the statements in Table 1, you should correct your storage facility immediately.
Additional Information
Dean, T.W., O.N. Nesheim and F.M. Fishel. 2005. Pesticide Container Rinsing. EDIS PI-3. Gainesville: University of Florida Institute of Food and Agricultural Sciences. https://edis.ifas.ufl.edu/pi003 (accessed February 2016).
Fishel, F.M. 2007. Pesticide Spill Kits. PI-159. Gainesville: University of Florida Institute of Food and Agricultural Sciences. https://edis.ifas.ufl.edu/pi196 (accessed February 2016).
Fishel, F.M. 2005. Secure Pesticide Storage: Security Against Terrorist Threats. PI-42. Gainesville: University of Florida Institute of Food and Agricultural Sciences. https://edis.ifas.ufl.edu/pi079 (accessed February 2016).
Fishel, F.M. 2006. Storage Limitation Statements: Temperature—Fungicides. PI-122.Gainesville: University of Florida Institute of Food and Agricultural Sciences. https://edis.ifas.ufl.edu/pi159 (accessed February 2016).
Fishel, F.M. 2006. Storage Limitation Statements: Temperature—Herbicides. PI-123.Gainesville: University of Florida Institute of Food and Agricultural Sciences. https://edis.ifas.ufl.edu/pi160 (accessed February 2016).
Nesheim, O.N. and F.M. Fishel. 2005. Proper Disposal of Pesticide Waste. PI-18. Gainesville: University of Florida Institute of Food and Agricultural Sciences. https://edis.ifas.ufl.edu/pi010 (accessed February 2016).

