Tropical fruit trees should be pruned for the following reasons:
- To control their size and shape;
- To potentially promote earlier flower and fruit production;
- To maintain fruit production in the lower tree canopy;
- To remove unhealthy portions of the trees;
- To reduce the likelihood they will fall or break apart during a tropical storm.
In order to maintain fruit production in a tree's lower canopy, it must be exposed to sufficient light. When fruit trees are allowed to grow too tall or to become shaded by adjacent trees, the lower canopy will be lost and only the middle or top of the tree will flower and set fruit. To prevent this, fruit trees should be pruned annually or biannually.
The art and science of hand pruning take time and thought. Before making the first cut, study the tree's potential size and natural shape, and imagine how it might appear in three to four years. Try to maintain that shape in your mind as you prune. This will help you to make difficult decisions associated with pruning. The recommended tree height for tropical fruit trees varies depending upon the species and sometimes the cultivar (Table 1).
Terms to Know
To describe how to train and prune trees in the home landscape and commercial fruit grove, we must first define a few terms:
The branch collar is the area where a branch connects to the trunk of the tree (Figure 1). This area is sometimes raised and should not be pruned off when making a thinning cut. This area has callus cells that will help the tree heal properly after a pruning cut.
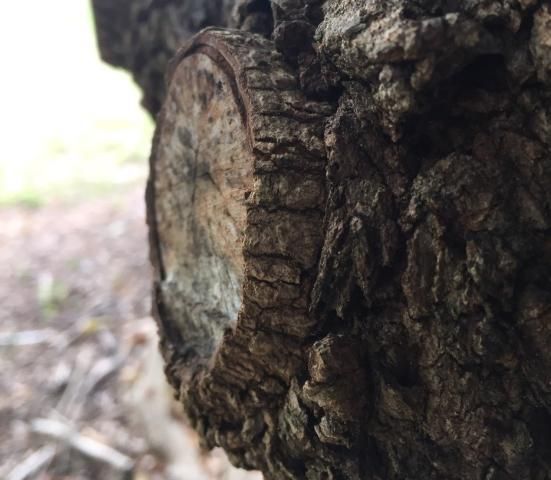
Credit: J. Wasielewski, UF/IFAS
Crossed branches are unhealthy (Figure 2). When branches cross, there is a likelihood of the branches rubbing or growing together and creating a weak point in the tree as well as an entry point for pathogens. The smaller or weaker of the crossing branches should be removed.
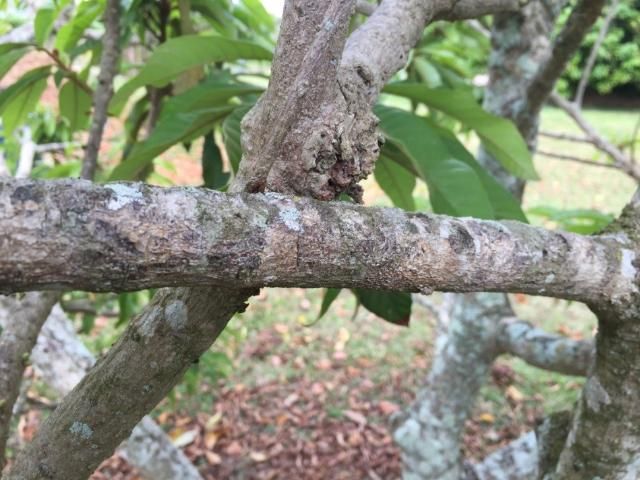
Credit: J. Wasielewski, UF/IFAS
Dead wood offers a prime entry point for wood borers, as well as pathogens that can damage your tree (Figure 3). Carefully cut away any dead wood from the tree while avoiding cutting into the healthy portion of the tree. When dead wood is left in a tree, it is a hazard, because it may fall at any time.
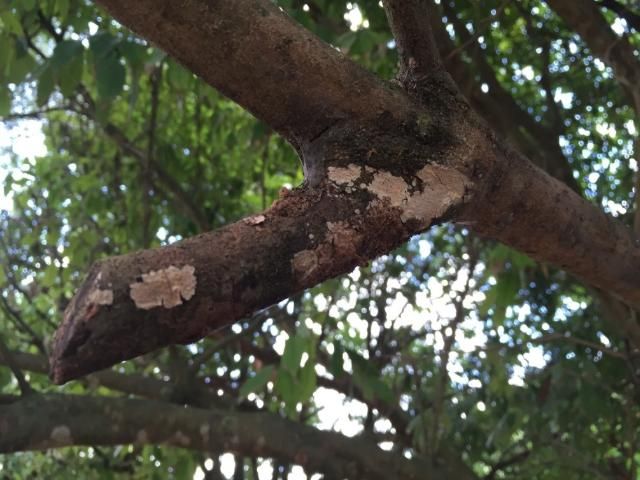
Credit: J. Wasielewski, UF/IFAS
Thinning cuts are made on a branch all the way back to a major limb or trunk of the tree (Figure 4). They generally remove a section of the tree.
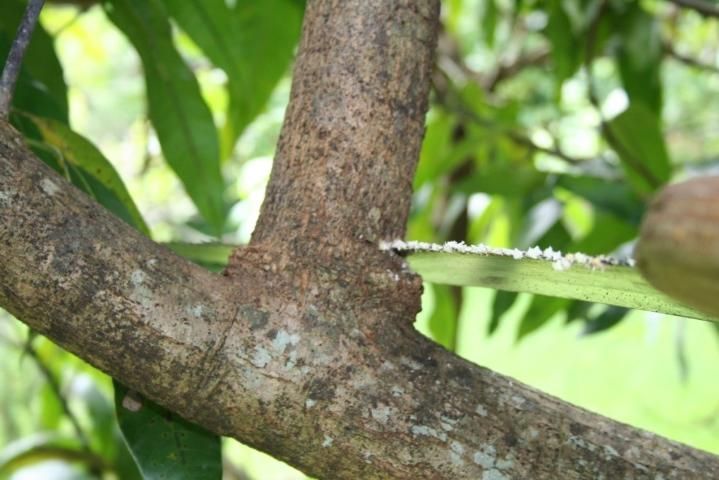
Credit: J. Wasielewski, UF/IFAS
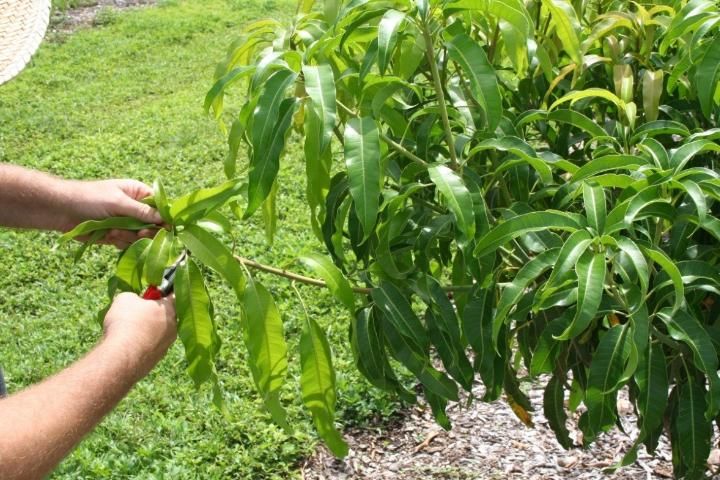
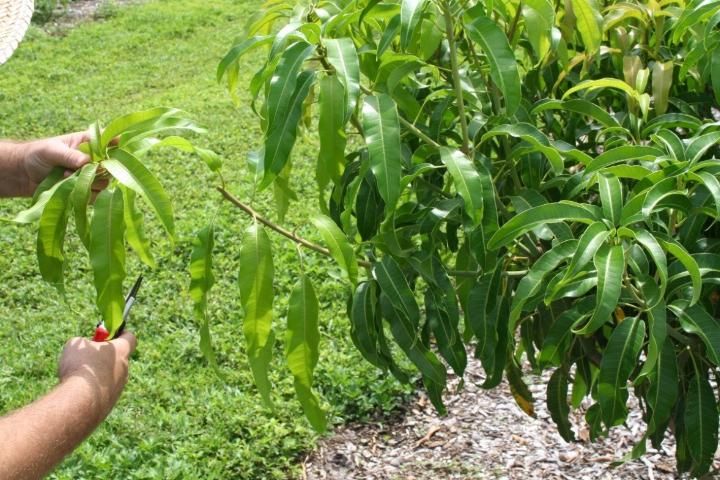
Heading cuts (tipping) are made toward the end of a branch near a node or growing point (Figures 5 and 6). Heading cuts are used to make a branch break buds and create multiple new shoots (or limbs). This is a typical pruning cut used to train young trees.
Credit: R. J. Campbell, UF/IFAS
Credit: R. J. Campbell, UF/IFAS
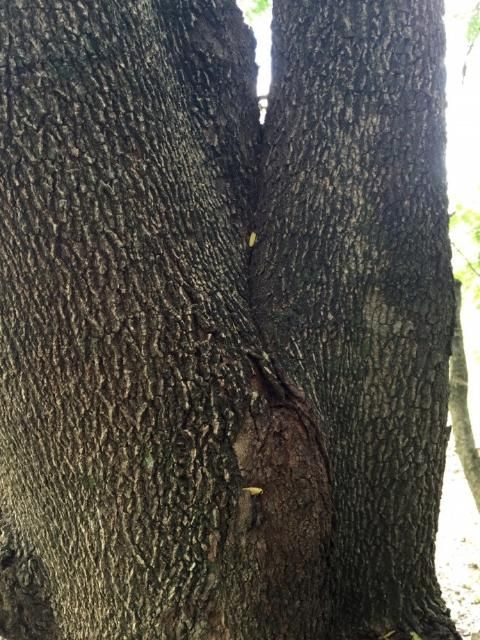
Included bark occurs when two branches or trunks grow so close that they superficially join, creating a narrow V as their width increases and they grow into each other, making the trunks and limbs vulnerable to splitting (Figure 7). This situation may be remedied by removing one of the included branches. Usually the largest branch is left in place and the smaller branch removed.
Credit: J. Wasielewski, UF/IFAS
Pruning Mature Fruit Trees
Mature trees are those that either are bearing fruit or are more than four to five years old. The height and eventually the spread of mature trees should be such that fruit production is maintained throughout the entire tree canopy. Before starting to prune, ensure that you have the appropriate tools. Three essential items are a hand pruner, a lopper, and a hand saw (Figure 8). These should all be of high quality and compatible with the user. Make sure your tools are properly sharpened and in good condition, because this will greatly ease your job of pruning. If tools are used to remove diseased wood, cutting surfaces should be disinfected after each cut (one part pine oil disinfectant to three parts water).

Credit: J. Wasielewski, UF/IFAS
Chain saws and pole-chain saws are not necessary but may be of use if large wood needs pruning or many trees need to be pruned. Sometimes a person with a chain saw tends to make snap decisions that are executed without considering if they will ultimately benefit or harm the tree. Therefore, extra caution and thought are required when using chain saws. In contrast, using a hand saw for your major cuts will allow you to think through your decisions before they are implemented.
Three-Step Thinning Cut
When a thinning cut is made, it is important to make the cut in the proper position on the tree. Do not leave an obvious stub when a cut is made. The stub will either die and rot back into the live wood and create a weak point in the tree, or it will profusely resprout. Both conditions are undesirable. Do not make a flush cut all the way back to the trunk or major branch. While a flush cut is visually appealing, it removes what is known as the branch collar. The branch collar appears as a swelling at the base of most branches (see Figure 1) and should be left intact because the cells there will aid in the healing of the wound created by the pruning cut. If the collar is removed, the wound may never heal, leaving the tree open to fungal attack and rot.
Some branches are so heavy that if you tried to remove them, they would begin to fall before a full cut could be made, which would result in tearing bark off the trunk/branch to which it was previously attached. In order to avoid tearing bark, a three-step cut should be employed on all branches over two inches in diameter.
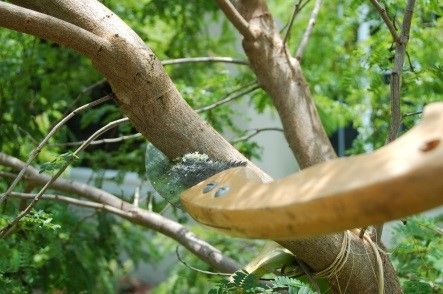
- Begin with an undercut three to four inches from where the final cut will be made (Figure 9). The undercut prevents the limb from tearing the bark as it falls.
Credit: J. Wasielewski, UF/IFAS
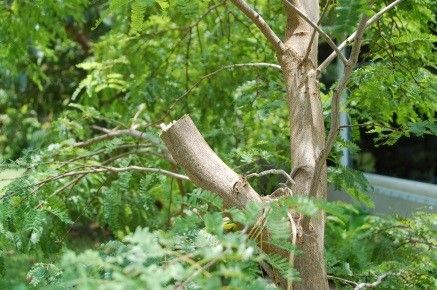
2. Make the second cut slightly distal to (to the outside) and above the undercut (Figure 10). This cut will remove the weight of the limb and prevent tearing.
Credit: J. Wasielewski, UF/IFAS
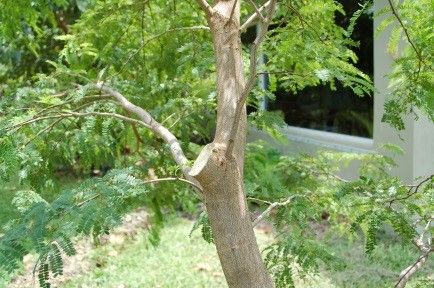
3. The final cut removes any remaining portion of the limb. This cut should leave only the branch collar attached to the tree (Figure 11).
Credit: J. Wasielewski, UF/IFAS
Training (Pruning) Young Fruit Trees
In training young fruit trees, the goal is to try to shape the tree for the future by creating a multibranched structure that allows all portions of the tree to be exposed to sunlight. Generally, tree training is only necessary the first two to three years after planting; thereafter, to maintain fruit production (from the ground upward), selective pruning is used to control tree height and spread and to maintain fruit production.
Some types of tropical fruit trees, and particularly some specific cultivars, are less vigorous than others and have a tendency toward profuse branching and smaller internodes (the distance between leaves), which all facilitate maintaining a smaller tree and heavy fruiting. Others are inherently more vigorous and must be allowed to be larger trees (but still controlled) to remain fruitful.
Tree training and pruning to maintain height begins when the fruit tree is newly planted. A heading cut should be made at approximately three feet from the ground if the tree is not already branching. This cut will encourage the tree to develop three to four branches that will eventually become the main branches of the tree (Figure 12). Heading cuts should be applied to the resulting branches when they reach approximately 20 inches long. This will again cause branching and should be repeated each time a branch reaches about 20 inches.

Credit: J. Wasielewski, UF/IFAS
Vigorous vertical branches should always be removed in favor of horizontal or wide-angled branches. The horizontal or angled branches will help the tree to maintain a reduced height. This type of pruning continues until the tree is about two to four years old. Once the tree has reached the desired height, one to two thinning cuts a year should be made to help control the height. Over time major woody branches will develop, which do not contribute much to fruiting and can be removed one by one over a period of several years. This will result in the rejuvenation of the overall canopy of the fruit tree as well as help control tree height.
Homeowners frequently allow fruit trees such as mango and avocado to become far too large. These trees should be reduced in size, but this is a job best left to a licensed and insured professional arborist, especially if it requires climbing into the tree.
For additional information, contact Jeff Wasielewski, UF/IFAS Extension commercial tropical fruit agent, 305-248-3311, ext. 227, or jwasielewski@ufl.edu.