Hops (Humulus lupulus L.) are an essential ingredient in brewing that adds bitterness and aroma to beer. Because of the rapidly growing craft beer industry and rising hop prices, the potential of hops as an alternative crop is currently being investigated at the UF/IFAS Gulf Coast Research and Education Center (UF/IFAS GCREC) in Balm, FL. Hop plants develop twining stems called bines that climb on a trellis using stiff hairs along their stems. Commercial hop trellises are typically 18 ft tall. Proper installation of twines is critical to facilitate easier crop management and harvesting. This article explains how to install twines on an 18-foot hop trellis. It is part of a series that reviews the challenges and opportunities for hop production in Florida, based on research experience at the UF/IFAS GCREC. Its video series is also available at the UF IFAS Horticultural Crop Physiology Lab YouTube channel (https://www.youtube.com/channel/UCMyYAfFZsib6d4ZI-eaxCTQ). The tutorial video for this article can be found at https://youtu.be/ZAro9MaBvxU.
Growth Habits of Hop Bines
Hops are perennial, herbaceous plants in the Cannabaceae family. Hop plants develop twining stems called bines. Unlike vines that climb using tendrils or other specialized tissues, bines twine up with the help of stiff hairs along their stems. Because of this growth characteristic, hops are typically grown on an 18 ft tall trellis in commercial production (Neve 1991). At the beginning of each growing season, twines are installed on a trellis, providing hop bines a means to grow upward. Because hops develop many bines, which can grow 4 to 8 inches a day (Sirrine 2014), they need to be trained twice a week during the peak growth. Hop bines climb in a clockwise direction, so bines must be trained on twines following this natural tendency.
Timing of Twine Installation
In Florida, hops have two growth cycles per year (Agehara, Gallardo, Acosta-Rangel, et al. 2021). The spring season is from February to June, and the fall season is from June to November. Twines should be installed before bine emergence (mid-February) in the spring season or immediately after spring harvest in the fall season. If twines are installed too late, untrained bines will grow along the ground, and their growing tips can be damaged easily. Bines may also get damaged during twine installation.
Materials for Twine Installation
Twines
Coir twines are the most common type of twines used for growing hops (Figure 1A). Because of the high tensile strength and coarse texture, they are ideal for training hop bines, which need a support structure to climb up. The tensile strength of coir twines generally ranges from 75 to 100 pounds. Coir twines are sold as precut strings. Most precut twines are 20.5 ft long, which provides enough length to be used for an 18-foot V-trellis. The cost of twines ranges from $0.12 to 0.25 per twine, depending on the quantity purchased and tensile strength. In general, one bundle has 100 twines, and one bale has 2,400 to 3,000 twines.
W Clips
W-shaped metal clips, commonly known as W clips (Figure 1B), are used as an anchor to secure coir twines in the ground. The arms of the “W” will open up to resist against the soil, securing twines in place.
W Clip Applicator
A tool called a W clip applicator (Figure 1C) is used to secure twines into the ground with W clips. This tool has a handle and a footpeg for applying pressure.
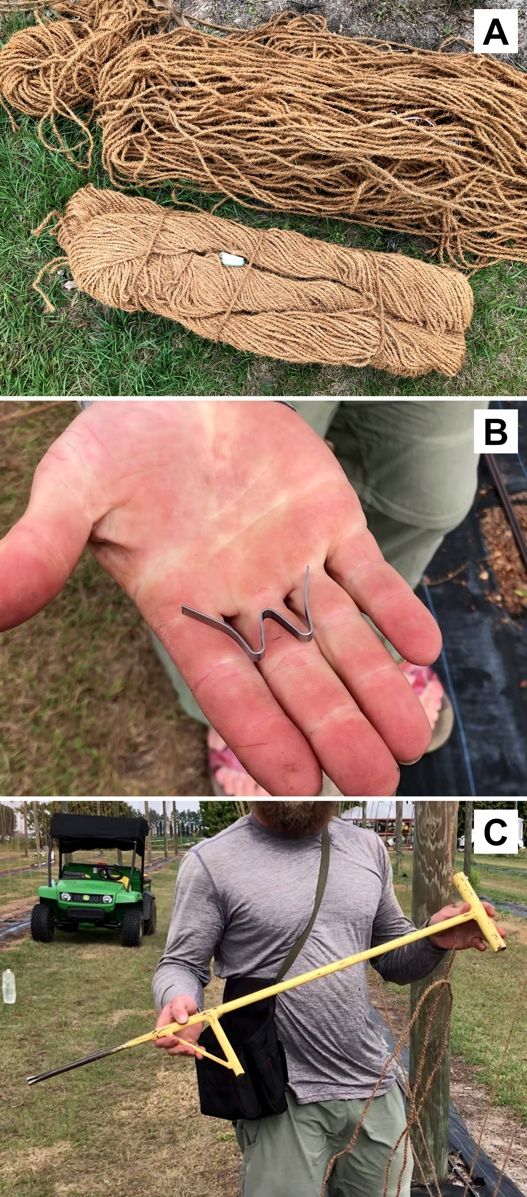
Credit: Shinsuke Agehara, UF/IFAS
Prewetting of Twines
Soaking coir twines in water for 24 hours will make them more pliable and easier to tie a knot (Figure 2). Heavier twines are also easier to work with because they do not move too much by wind. In addition, coir twines shrink as they dry out, making the knots tighten.
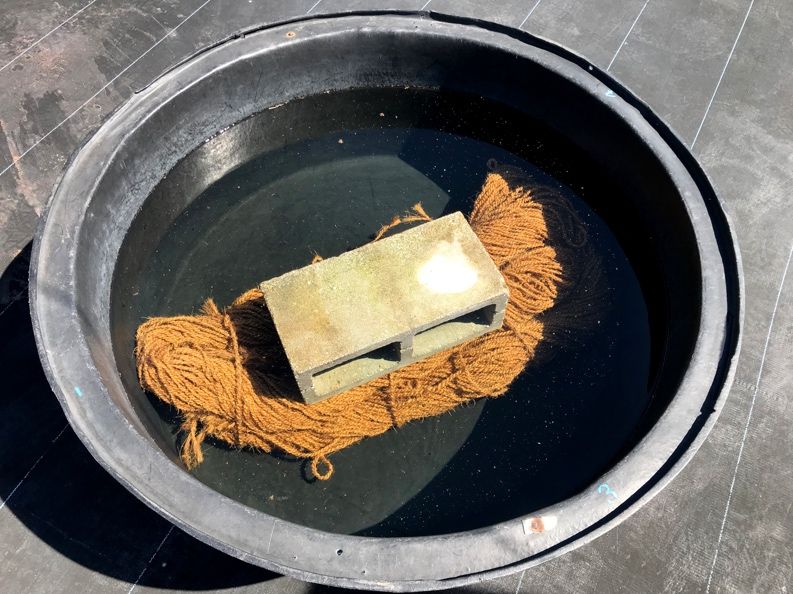
Credit: Shinsuke Agehara, UF/IFAS
Twine Installation
Depending on plant age, trellis design, and hill spacing, 1 to 4 twines are typically installed for each hill, although 2 twines per hill are most common in commercial hopyards. At the UF/IFAS GCREC, we install 2 and 4 twines per hill for straight and V-trellises, respectively, regardless of plant age. For the configuration of the two trellis systems, see https://edis.ifas.ufl.edu/hs1354 (Agehara, Acosta-Rangel, Deng, et al. 2020).
The first step of twine installation is to tie twines to the top cable of the trellis. This step requires a scaffolding system or scissor lift. In commercial hopyards, scaffolding systems that can be pulled by a tractor are often used (The University of Vermont 2019). At the UF/IFAS GCREC, we use a scissor lift (Figure 3). A simple hitch knot called a cow hitch is commonly used (Figure 4). Twines need to be spaced according to the hill spacing.

Credit: Shinsuke Agehara, UF/IFAS
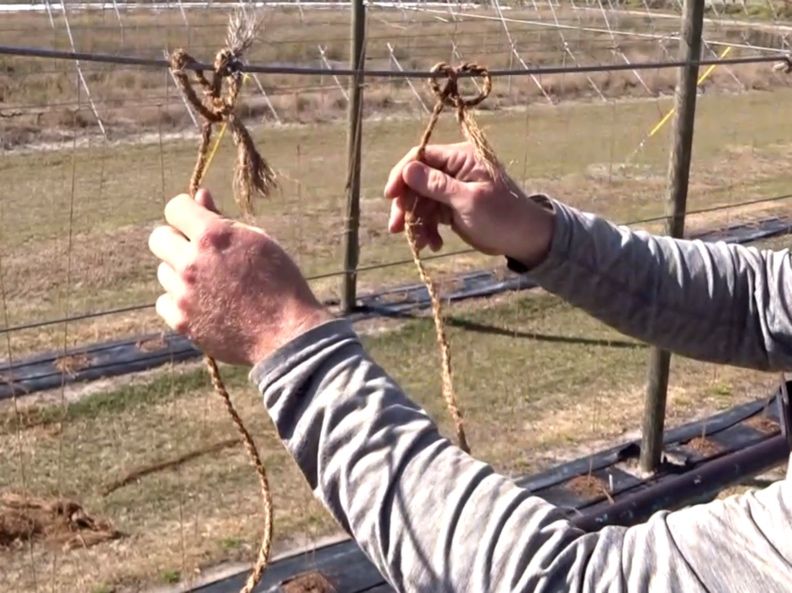
Credit: Mariel Gallardo, UF/IFAS
The second step is to secure twines into the ground. The installation process is as follows: (1) insert a W clip into the groove on the tip of the W clip applicator (Figure 5A), (2) pinch the twine in-between the two bottom points of the “W” (Figure 5B), and (3) insert the twine into the ground by stepping on the footpeg of the W clip applicator (Figure 5C).
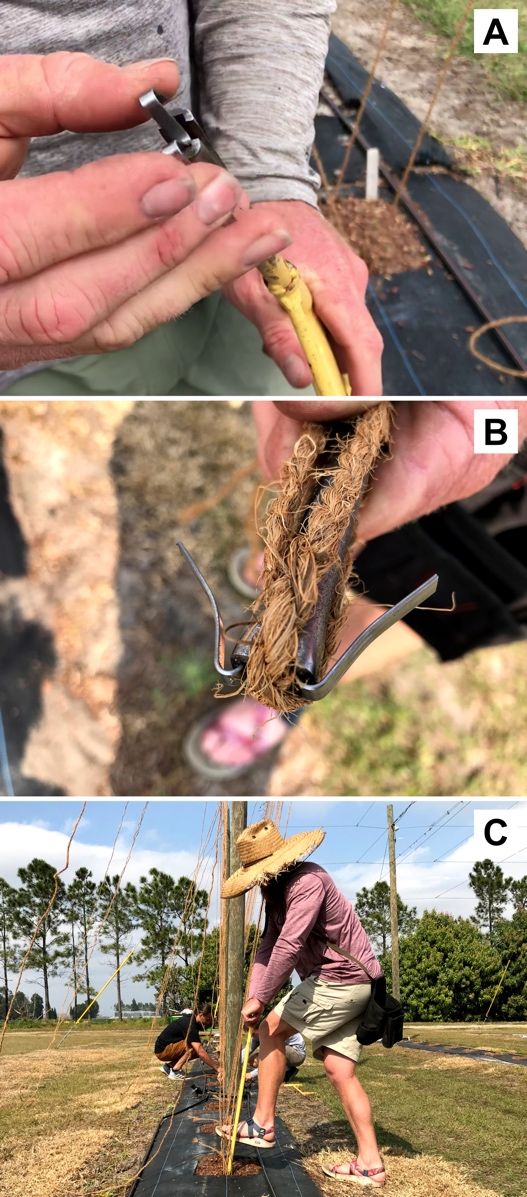
Credit: Shinsuke Agehara, UF/IFAS
Importance of Proper Installation
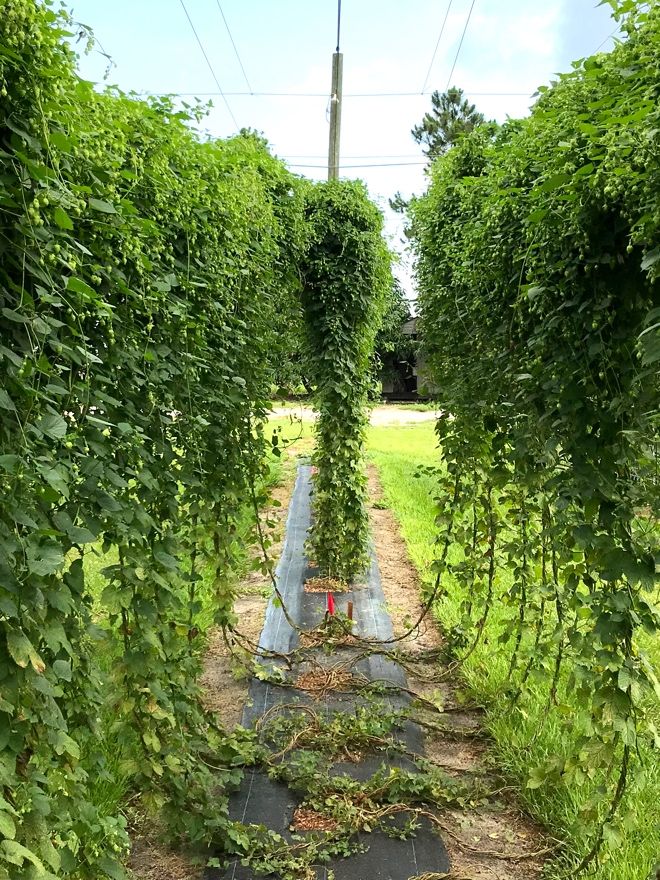
Proper installation of twines is critical to prevent sagging during the growing season. Excessive sagging will damage bines and make crop management (e.g., bine training, herbicide spray, mowing, etc.) and harvesting difficult (Figure 6). To prevent sagging, make sure trellis cables are properly installed with sufficient tension before twine installation, and then install twines with sufficient tension.
Credit: Shinsuke Agehara, UF/IFAS
Literature Cited
Agehara, S., A. Acosta-Rangel, Z. Deng, J. Rechcigl, and S. Bollin. 2020. “Hop Yard Establishment and Trellis Construction in Florida.” EDIS 2020 (1): 7. https://doi.org/10.32473/edis-hs1354-2020
Agehara, S., M. Gallardo, A. Acosta-Rangel, Z. Deng, J. Rechcigl, T. Luo, and Q. Qiu. 2021. “Crop Management Practices and Labor Inputs for Hop Production in Florida.” EDIS 2021 (2). https://doi.org/10.32473/edis-hs1409-2021
Neve, R. A. 1991. Hops. Berlin: Springer Science & Business Media.
Sirrine, R. 2014. “Growing Hops.” Michigan State University Extension. E3210.
The University of Vermont. 2019. “Stringing and Training Hops.” Accessed February 27, 2021. https://blog.uvm.edu/hoppenin/2019/05/23/stringing-and-training-hops/