How the Tensiometer Works
A tensiometer is a simple and relatively inexpensive tool that can be used to schedule irrigation in Miami-Dade County vegetable crops. Tensiometers continuously measure soil water potential or tension, which is a measure of soil moisture or soil water content. This is generally expressed in centibars (cbar) on a tensiometer vacuum gauge (Figure 1). If the tension in the soil is high, plants have to use more energy to extract soil water. If tension in the soil is low, then plants have lower energy requirements to extract soil water.
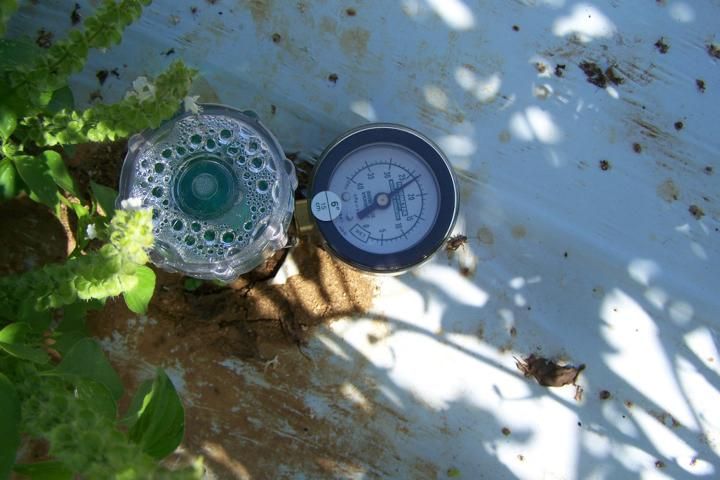
Credit: Tina Dispenza, UF/IFAS
A typical tensiometer is a water-filled tube with a porous ceramic cup at the lower end (Figure 2). After it is installed in the soil, water moves from the tensiometer through the cup into the unsaturated soil. This process continues until the negative pressure inside the tensiometer equals the negative pressure in the surrounding soil. The pressure inside the tensiometer is then in equilibrium with the pressure in the soil and can be measured by reading a vacuum gauge on the tensiometer.
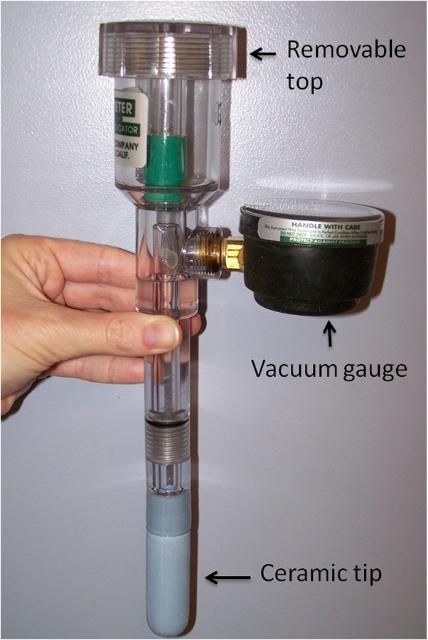
Credit: Tina Dispenza, UF/IFAS
Tensiometer Selection
Tensiometers can be purchased in different lengths and tensions. Tensiometer lengths vary from 6 inches to 48 inches. A tensiometer needs to be long enough so that the ceramic tip is in the root zone of the irrigated plant, with the top and gauge near the soil surface. For most vegetable fields in South Dade, a 6-inch tensiometer is appropriate. However, if root depths are greater than 6 inches, a tensiometer of greater length can be used. In soil depths greater than 6 inches, tensiometers of various lengths can be used to capture soil tension at different depths. Tensiometers also are classified by their tension range. High tension (0–100 cbar) and low tension (0–40 cbar) are available commercially, and both are suitable for use in vegetable fields.
Preparation
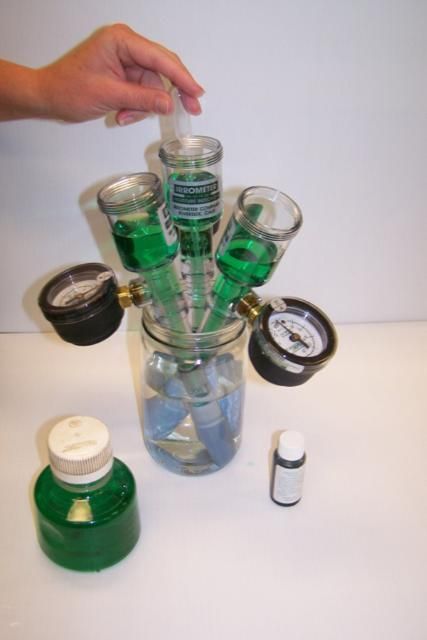
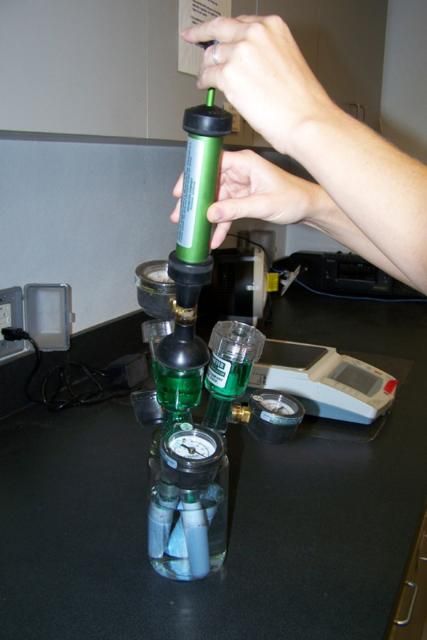
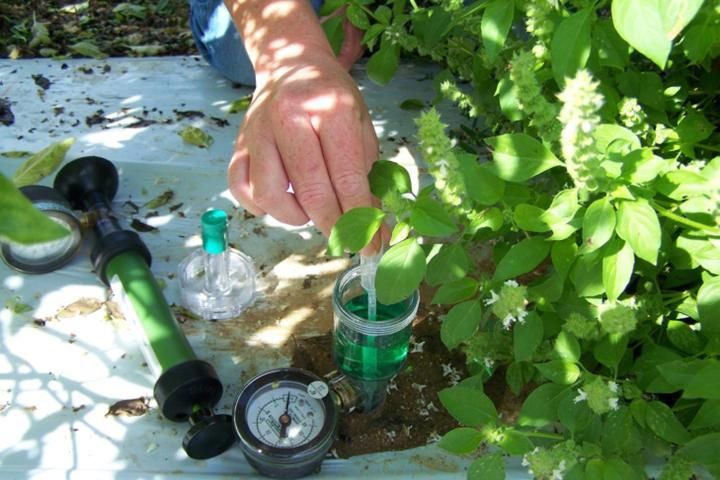
Tensiometers require some preparation before being installed in the field. Each manufacturer will supply specific directions for their device. Generally, tensiometers must be soaked in clean water overnight (Figure 3). Then the tensiometers are filled past the rubber stopper seal point, filling the reservoir (Figure 4). It is recommended that the clean water be mixed with a biocide (usually available from the tensiometer manufacturer). A clean poker should also be used to ensure that the column has filled and air bubbles are not trapped (Figure 5). Next, pressure is applied to make sure the tensiometers are working correctly. A pump with a vacuum gauge is ideal to do this so that the two gauges can be compared (Figure 6). If the tensiometer can hold pressure and no bubbles appear, the tensiometer is functioning properly. If bubbles occur, there is an air leak and the tensiometer needs further maintenance. The tensiometers should be stored with the caps on and ceramic tips in water until they are installed to prevent draining.
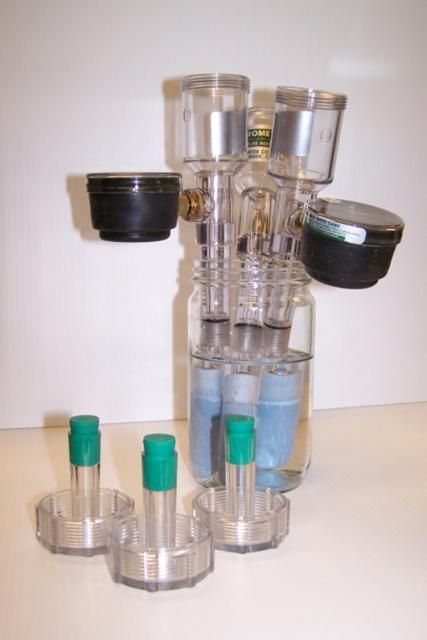
Credit: Tina Dispenza, UF/IFAS
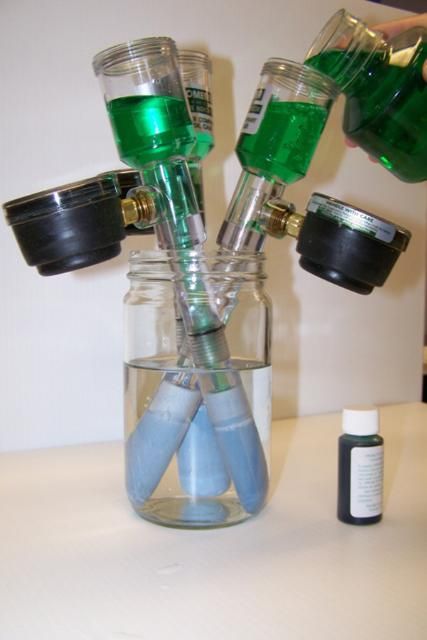
Credit: Tina Dispenza, UF/IFAS
Credit: Tina Dispenza, UF/IFAS
Credit: Tina Dispenza, UF/IFAS
Site Selection
Tensiometers should be installed at sites that are representative of the soil types and crop conditions in the field. If soil types vary considerably in the field, you should install a separate tensiometer in each of the soil types. For example, if you have marl and Krome gravelly soils in the same field, install one tensiometer for each soil type.
Field soil moisture characteristics should also be considered during tensiometer installation. Fields often have wet spots and dry spots, and they often have areas that typically are wetter or drier than the rest of the field. Tensiometers should be placed to monitor these extreme areas to prevent yield loss.
If two different crops are planted in the same field, install at least one tensiometer for each crop. Tensiometers should be located in the active root area in the wetting zone of the irrigation system. For vegetables grown on beds with drip irrigation, place the tensiometers in the plant row between two plants in the wetting zone of the drip tape.
Installation
Proper installation is critical to assure effective contact between the ceramic cup of the tensiometer and the surrounding soil. Follow these steps to install a tensiometer:
- Remove any grass, weeds, or other obstructions from the soil surface where you will install the tensiometer.
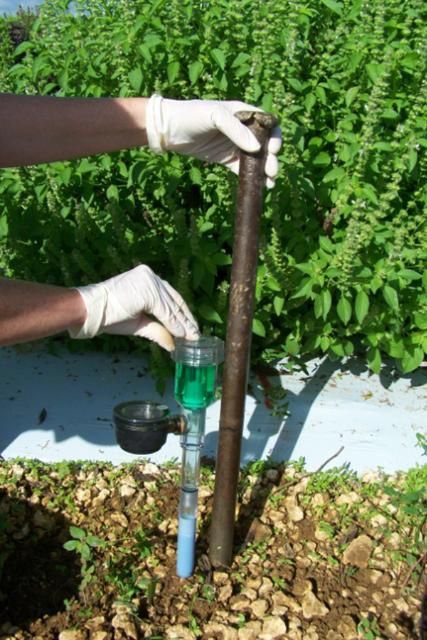
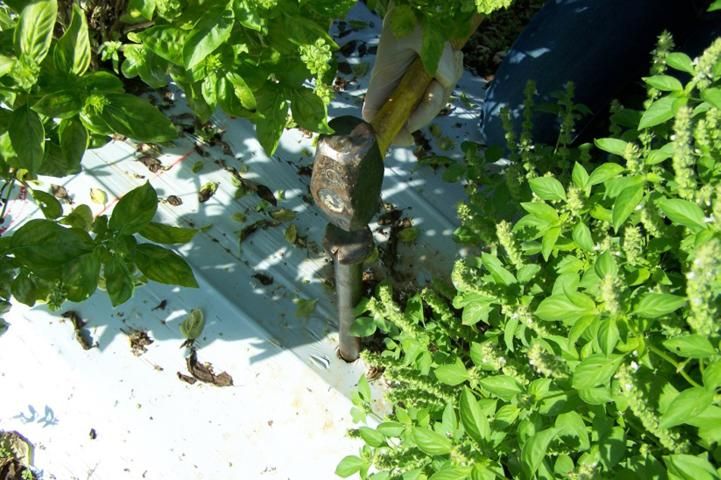
- Use a hammer and a steel rod with a diameter slightly larger than the tensiometer's ceramic tip to make a hole deep enough for the ceramic tip to be in the root zone of the plants (Figures 7 and 8).
Credit: Kati Migliaccio, UF/IFAS
Credit: Kati Migliaccio, UF/IFAS
3. Prepare a thick slurry by collecting soil from the surrounding area and sieving it through a 1/8-inch screen, and then mixing the soil with water (Figures 9 and 10).
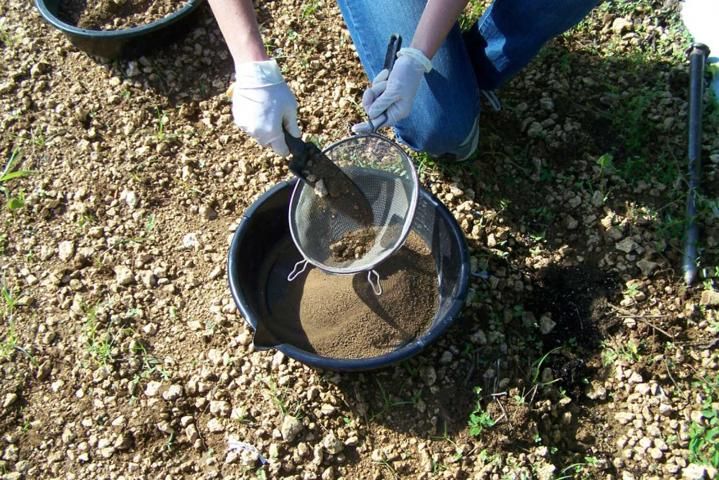
Credit: Kati Migliaccio, UF/IFAS
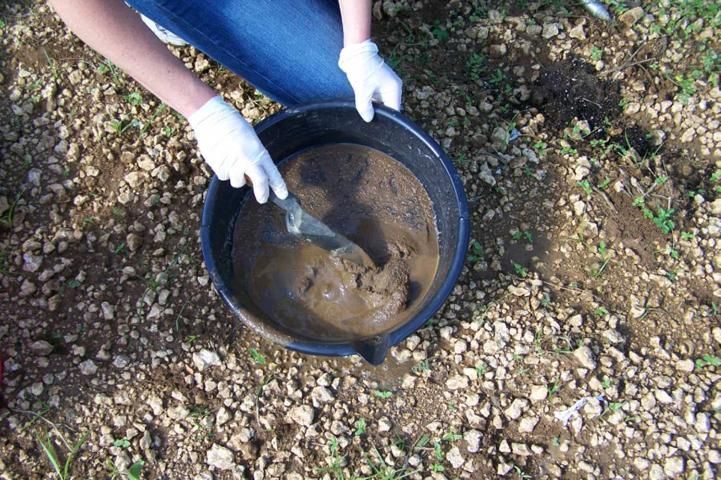
Credit: Kati Migliaccio, UF/IFAS
4. Place some of the slurry in the bottom of the hole (Figure 11), and then carefully place the tensiometer in the hole.
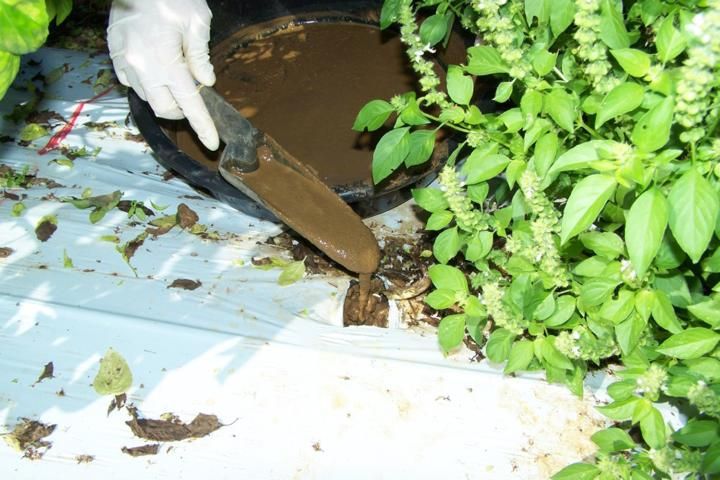
Credit: Kati Migliaccio, UF/IFAS
5. Add the rest of the slurry around the ceramic cup and the plastic tube of the tensiometer (Figure 12). Continue adding enough slurry until it overflows. Gently move the tensiometer back and forth a few times to assure the tensiometer achieves good contact with the soil.
Credit: Kati Migliaccio, UF/IFAS
Taking and Recording Tensiometer Readings
Tensiometer readings should be taken at the same time each day, ideally in the early morning before irrigation. Record the readings in a notebook along with the rainfall and irrigation amounts and dates. Make sure to identify the location of each tensiometer station by recording the site number, the depth of the tensiometer being read, and the date and time of the reading.
Irrigation Scheduling
In general, use the following guidelines to interpret tensiometer readings to schedule vegetable irrigation in gravelly or sandy soils.
- Readings of 0–5 cbar: Soils are saturated or nearly saturated as a result of irrigation or rain. Discontinue irrigation to prevent wasting water and leaching nutrients from the root zone.
- Readings of 10–15 cbar: Crops should be irrigated as soon as possible. Irrigation should be initiated at 10 cbar during the flowering and fruit set, and at 15 cbar for the rest of the growing season.
- Readings of 25 cbar and higher: Plants probably show symptoms of water stress. Irrigate immediately! The tensiometers may soon lose vacuum and require servicing to restore accurate performance.
Maintenance
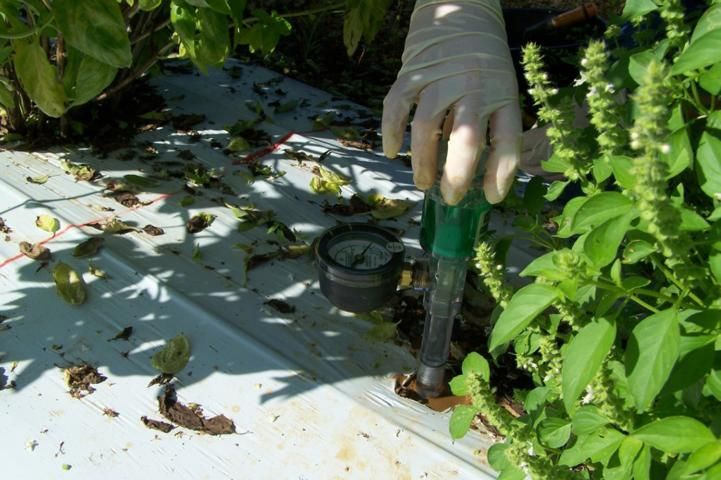
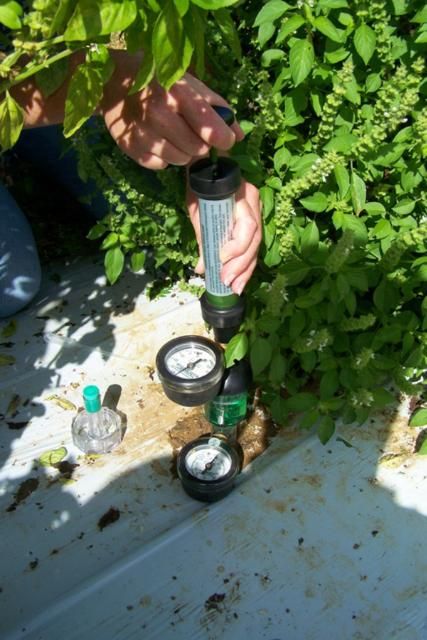
Although tensiometers are simple instruments, they require regular maintenance to provide accurate readings of soil water status. During the growing season, all tensiometers should be topped off with clean water periodically (especially after long periods without irrigation or rain). This will prevent losing suction because of low water levels in the plastic tube. In addition, weekly checks are recommended to ensure that tensiometers have not drained and are operating correctly. During these inspections, check the water level in the tensiometer, purge any bubbles that may be present (Figure 13), and test the suction with a vacuum pump (Figure 14).
Credit: Tina Dispenza, UF/IFAS
Credit: Tina Dispenza, UF/IFAS
When opening a tensiometer for maintenance, hold the bottom portion of the unit steady with one hand while removing the top. This helps maintain connectivity between the ceramic tip and the soil. If the bottom portion moves, this can cause air pockets to occur around the ceramic tip, which affects the functionality of the tensiometer.
All tensiometers should be removed from the soil every six months or at the end of the growing season and washed to remove soil, algae, bacteria, and other debris from inside and outside the ceramic cup and plastic tube. A mild household detergent and small bottle brush can be used for cleaning. The ceramic cup should be soaked in a chlorine solution (1/4 cup of household bleach in a gallon of water) to kill bacterial growth. After cleaning, fill the instrument with clean water and add a mild biocide (such as a solution supplied by the manufacturer or some chlorine bleach) to prevent algal growth. To reinstall, follow the procedures outlined in the preparation section.
Troubleshooting Tips
1. The tensiometer gauge always reads zero.
If correct, a zero reading means that the soil is saturated from irrigation, heavy rainfall, or very poor drainage.
Possible Problems
- There may be no water in the tensiometer, or it lost suction because of a low water level. Solution: Remove, prepare, and reinstall the tensiometer.
- The gauge is faulty. Solution: Remove and replace the gauge. Check carefully for air leaks, and then prepare and reinstall the tensiometer.
- A connection is leaking. Solution: Check the general assembly, including the ceramic cup and O-ring seals. Fix the leak, prepare, and reinstall the tensiometer.
2. The tensiometer does not seem to record the true soil moisture content.
Possible Problems
- There is poor contact between the ceramic cup and the surrounding soil. Solution: Reinstall the tensiometer following the directions provided.
- The gauge is faulty. Solution: Check the gauge using a vacuum pump with a gauge. Prepare and reinstall.
3. The tensiometer needs frequent refilling with water.
Possible Problems
- The ceramic cup or seal is leaking. Solution: Replace the seal or cup. Check other seals for leaks. Prepare and reinstall the tensiometer.
- The surrounding soil is too dry, and the tensiometer cannot hold water. If this happens, the tensiometer is likely not in a location that represents field conditions or the plants are severely drought-stressed.
4. The tensiometer responds too slowly to irrigation.
Water is slow to infiltrate between the ceramic cup and the soil.
Possible Problems
- The ceramic cup may be clogged by salts or algae. Solution: Clean or replace the cup. Prepare and reinstall tensiometer.
- The gauge sticks (from minor damage). Solution: Tap to test, and replace the gauge if faulty. Prepare and reinstall tensiometer.