An increasing percentage of vegetable crops in Florida are grown from transplants. The primary reasons for the increasing use of transplants are the rising cost of hybrid seed and a quest for earliness. Additional benefits conferred by the use of transplants include speed and ease of stand establishment through the use of transplants, avoidance of adverse environmental conditions, and reduction in pest and disease issues. See Table 1 for representative seed costs.
The production of vegetable transplants is big business in Florida. Currently there are approximately 10 major transplant operations that produce over 1 billion vegetable transplants per year. The transplant industry supports Florida's $10 billion vegetable industry and ships vegetable transplants to other east coast and mid-west production areas, including Canada.
For commercial producers, a good vegetable transplant should be stocky, green, and pest-free with a well-developed root system. Once transplanted, the plant should tolerate environmental challenges and continue growth to optimum yield. Overly hardened or under-fertilized transplants may not establish quickly, which can lead to delayed maturity and reduced yields.
Vegetable transplants are affected by many factors, but the most important are water, temperature, fertilization, sunlight, cell size, and length of stay in the greenhouse. These factors must be managed to produce a product that is acceptable to the customer (Figure 1).
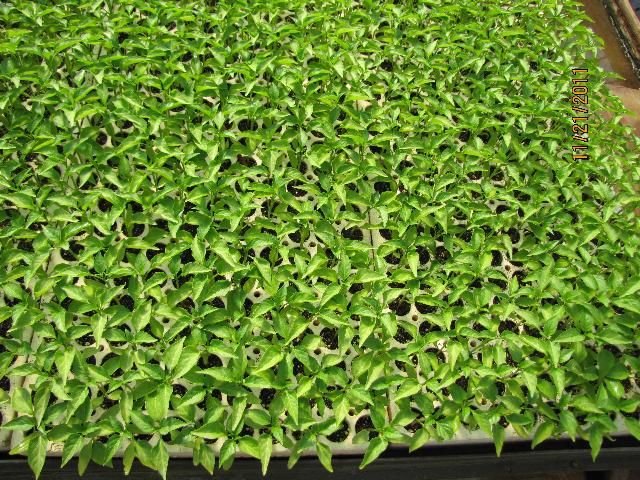
Credit: Gene McAvoy, UF/IFAS
Management of transplant production depends on knowledge and experience. The ideal technique for growing transplants involves raising the plant from start to finish with slow, steady, uninterrupted growth and with minimal stress. Since ideal growing conditions rarely exist, plant growth may need to be controlled through the manipulation of water, temperature, and fertilizer.
Some of the main factors involved in transplant production are summarized in Table 2.
Structures
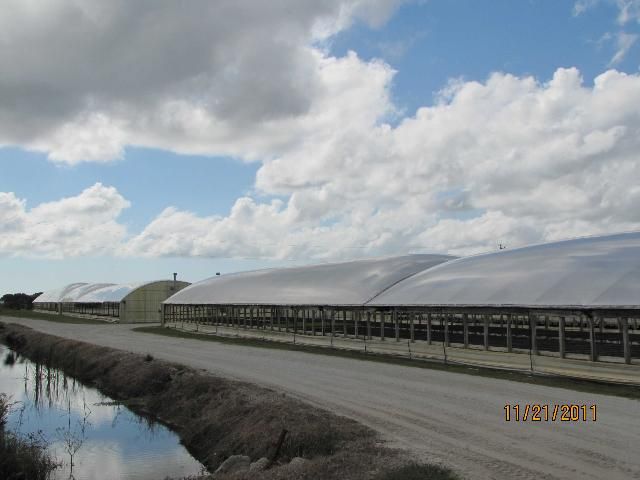
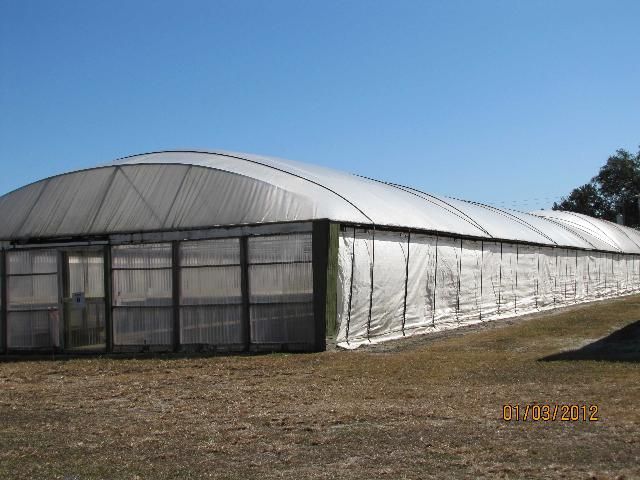
Due to the relatively mild weather conditions that persist throughout the year, most vegetable transplant "greenhouses" in Florida are a modified Quonset-style structure, with metal trusses and metal or wooden sidewall support structures covered with polyethylene film (Figures 2 and 3).
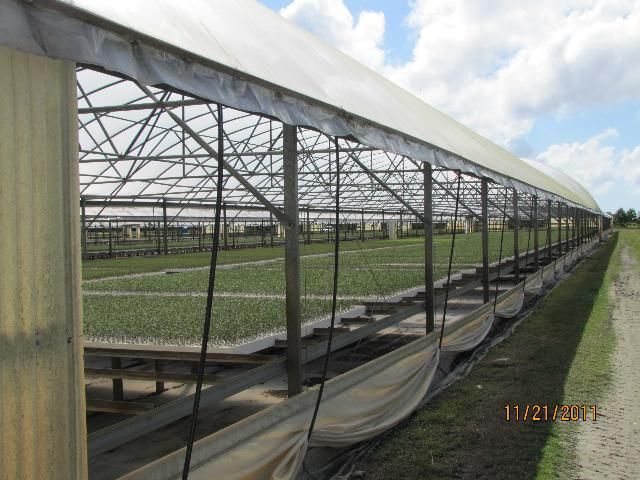
These are equipped with movable sidewalls (often called curtains) that can be moved up (opened) to allow cross ventilation or down (closed) to conserve heat and provide protection from wind and rain. This style of construction is inexpensive and allows for optimal cooling (Figure 4).
Credit: Gene McAvoy, UF/IFAS
Credit: Gene McAvoy, UF/IFAS
Credit: Gene McAvoy, UF/IFAS
Benches
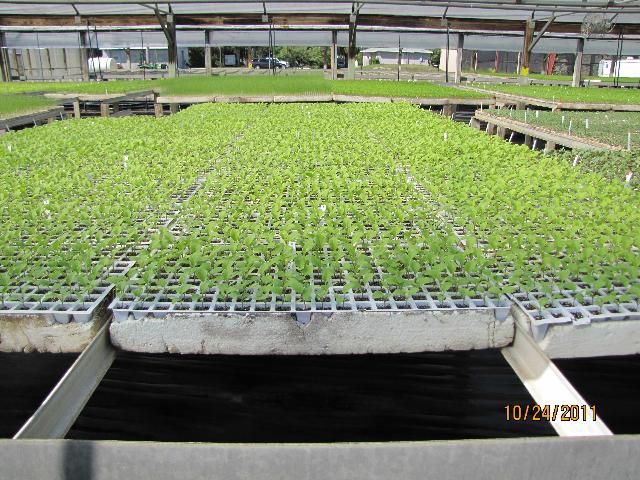
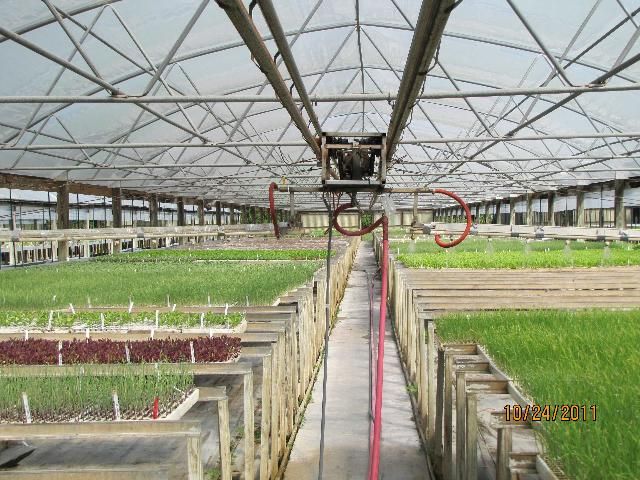
Florida vegetable transplant growers do not use traditional benches. Instead, most growers use the T-rail system for bench construction. The transplant flats are slid between (and supported by) pairs of the T-rails (Figures 5 and 6).
Credit: Gene McAvoy, UF/IFAS
Credit: Gene McAvoy, UF/IFAS
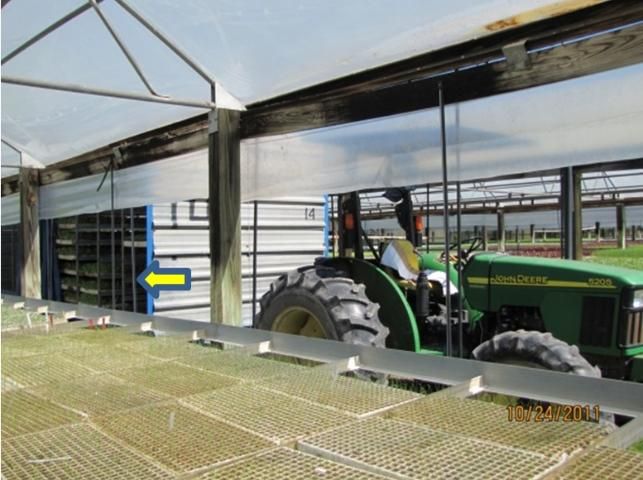
The T-rail system is also used in trailers and trucks for transporting flats of transplants (Figure 7).
Credit: Gene McAvoy, UF/IFAS
The Tray or Flat
Composition
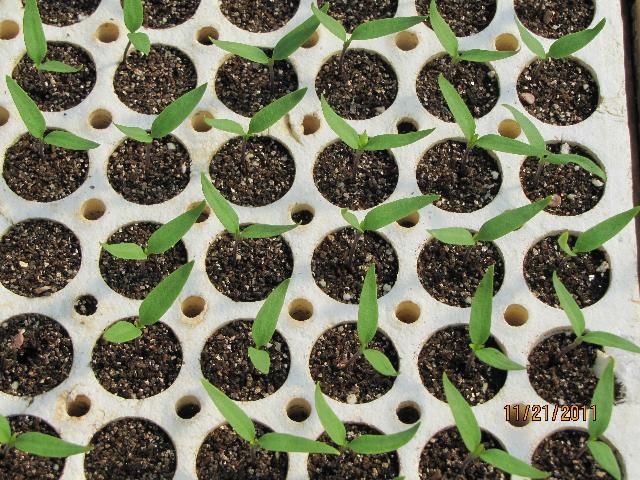
There is a vast variety of production trays, composed of materials ranging from molded polystyrene to vacuum-formed plastic. Expanded polystyrene (EPS) trays generally are considered the standard in the Florida industry (Figure 8). Most growers use EPS or plastic trays with various cell shapes including inverted pyramid, truncated cone, and assorted beveled shapes. However, age cracks from extensive use may result in fertilizer penetration and uneven growth or root penetration leading to root damage upon pulling. Plastic inserts for EPS trays are presently available, which alleviate the fertilizer and root penetration effects and can extend tray life.
Credit: Gene McAvoy, UF/IFAS
Growers should be aware that changing from EPS trays to plastic trays will necessitate a change in water management, as plastic trays generally allow for greater water availability, resulting in a reduced ability for height control.
Drainage
The hole in the bottom of the cell should be sufficiently large to allow good drainage when watering from overhead and provide for good capillarity (upward movement of water through the spaces within the medium) when utilizing ebb-and-flow irrigation.
The Cell
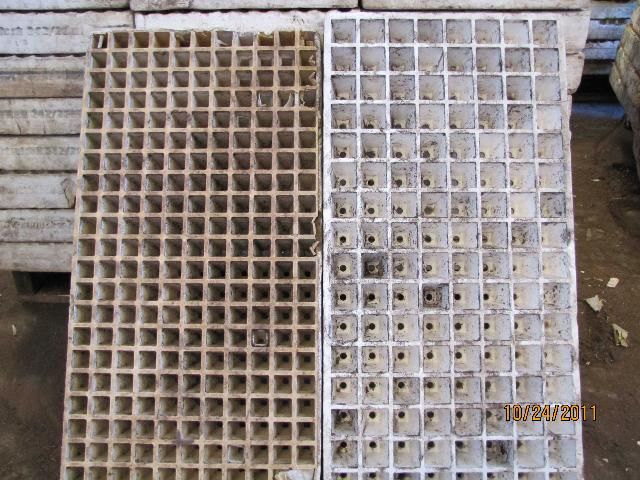
Cell shapes include the inverted pyramid, cylinder, rectangle, and hexagon. While no research exists to indicate which shape will produce the best plant, cell size does affect field performance (Figure 9).
Credit: Gene McAvoy, UF/IFAS
In general, larger cell sizes result in earlier and larger yields in the field. Therefore, smaller growers who produce their own plants may wish to use large cell sizes if greenhouse space is not a consideration.
The standard cell size in the industry is 1"x1", or approximately 242 plants per tray. Different cell sizes can create trays of 96, 128, 162, 242, 396, etc. cells per tray (Figure 10).
Credit: Gene McAvoy, UF/IFAS
In many instances, economics and duration of stay in the house may dictate cell size. For crops where plants per acre number in the tens of thousands, flats with small cells are preferred because more plants can be grown in less space.
For example, an onion crop mandates about 100,000 plants per acre. This would require 400 standard trays, but if grown in trays containing 500 cells, only 200 trays would be needed, leaving more space available for other production.
For short-cycle crops (leafy greens, cucurbits), smaller cells may be called for as root growth may not completely fill a large cell during the shorter production time. Transplants with insufficient root growth almost always pull from the cell with a loss of medium and many broken roots, reducing their ability to establish well in the field.
Media
All but the largest transplant production facilities in Florida utilize a readily available commercial soilless medium product. Self-prepared media often result in uneven distribution of the component materials. This will affect germination and plant growth and, as a consequence, lead to plant variability.
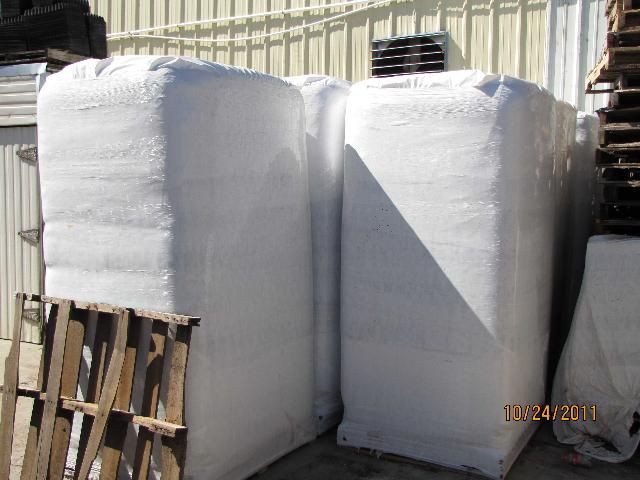
Most operations use a commercial pre-blended, soilless mix composed of varying proportions of peat, perlite, and fertilizer. These mixes will include phosphorus, lime, micronutrients, and a surfactant to improve wetting capabilities of the mix. Wetting agents degrade rapidly (3–6 months), so it is important not to order more media than can be used within this time frame. Changing media may necessitate changing growing practices (Figure 11).
Credit: Gene McAvoy, UF/IFAS
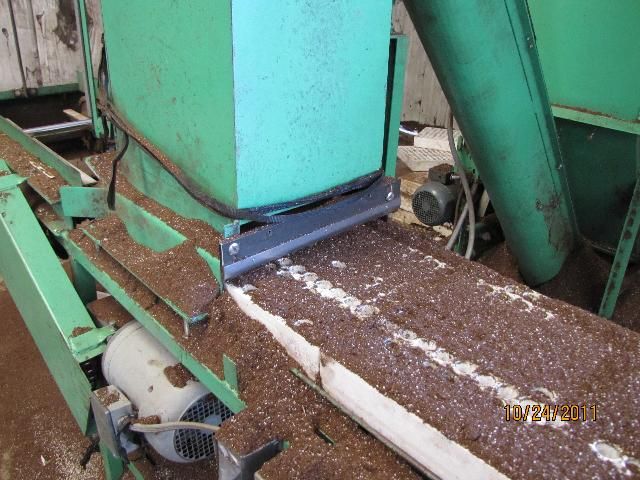
Most large transplant operations employ mechanized handling and filling of trays with media. After seeding, trays may be top-dressed with vermiculite to retain moisture (Figure 12).
Credit: Gene McAvoy, UF/IFAS
Seed
"Good seed doesn't cost, it pays." This old adage applies especially in greenhouse transplant production. Quality seed ensures good germination, rapid emergence, and vigorous growth.
In general, vegetable growers provide their own seed to the transplant grower, who then produces the desired number of transplants on a contractual basis.
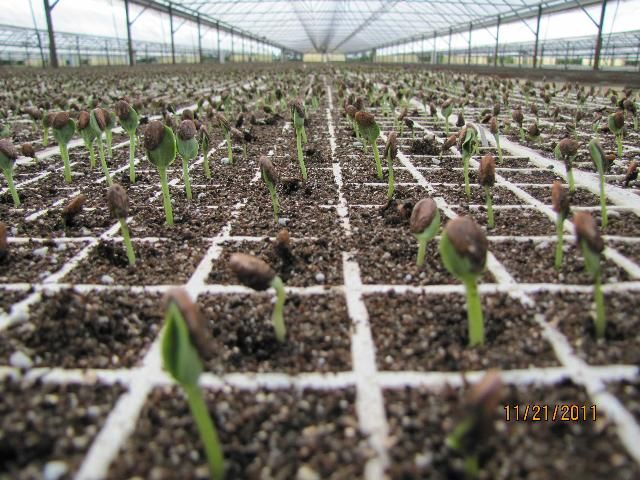
In many cases, pelletized seed is used for ease in mechanical seeding (Figure 13). Pelletizing increases speed of seeding and allows singulation (one seed per cell) within the flat (Figure 14). Fungicides and fertilizers may also be incorporated into the coating. In rare instances, coated seed can result in slower germination should water availability be a problem, and it may reduce oxygen availability to the seed with extended storage.
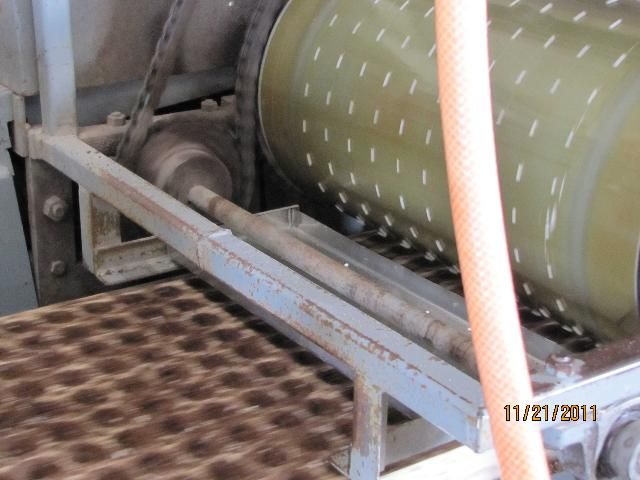
Credit: Gene McAvoy, UF/IFAS
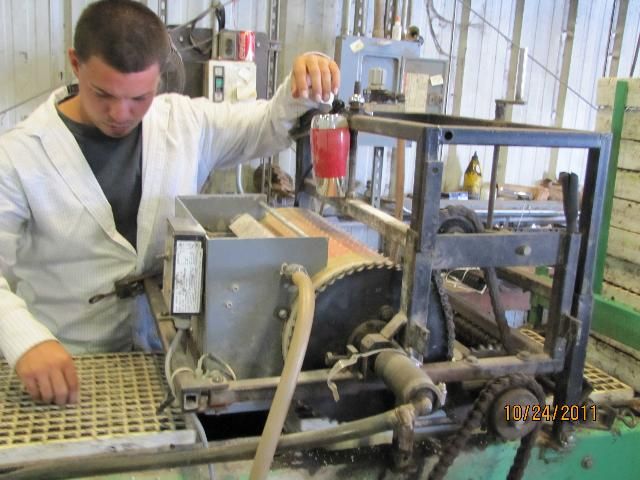
Credit: Gene McAvoy, UF/IFAS
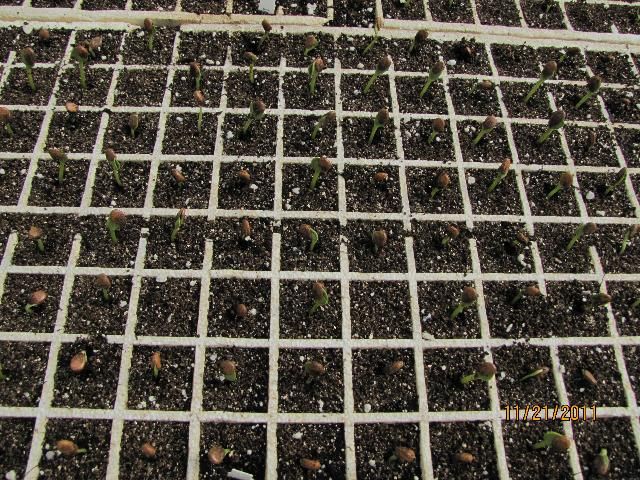
Once seeded, the cell generally is top-dressed with vermiculite (Figure 15). Vermiculite holds water in, thereby reducing losses to evaporation, and it resists large shifts in temperature, providing for a more uniform germination environment. For uniformity of germination, flats generally are stacked and held in a controlled-temperature room or environment until seeds begin to germinate (Figure 16). At this time they will be placed on benches in the transplant production house (Figure 17). With some cool-season crops, storage in a cool air-conditioned room may be necessary.
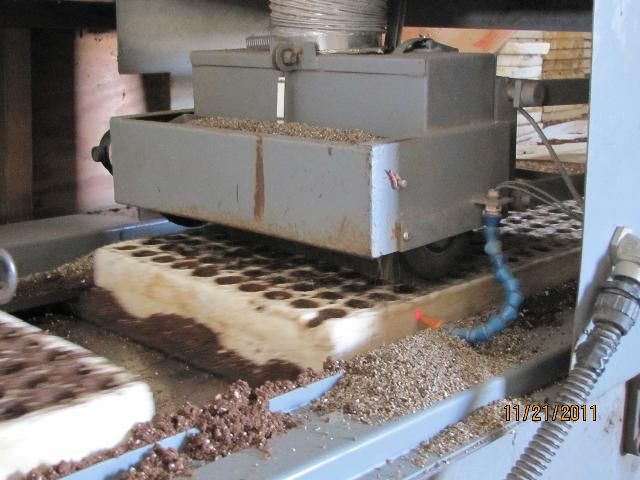
Credit: Gene McAvoy, UF/IFAS
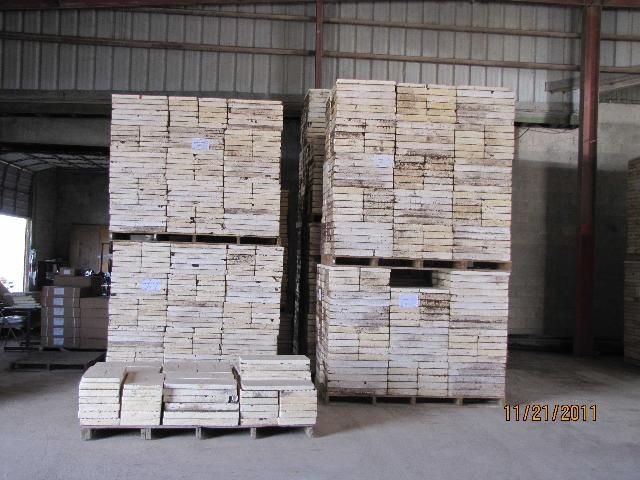
Credit: Gene McAvoy, UF/IFAS
Credit: Gene McAvoy, UF/IFAS
Fertilizer
The goal in transplant production is to produce a sturdy, compact plant that, when transplanted, will grow rapidly and yield well. In general, too much fertilizer, especially if applied too early in the growth process, will result in a leggy plant that may not establish rapidly in the field. Too little fertilizer will result in stunted plants which are slow to grow when field planted. Therefore proper fertilization directly impacts field performance.
No generalized fertilizer program is available for all transplant crops or all environmental conditions. Growers develop their own blends and application schedules based on experience. A generalized blend sometimes used on tomato might be a 20-10-10 formulation applied twice per week at 200 ppm (3/4 lb per 100 gallons).
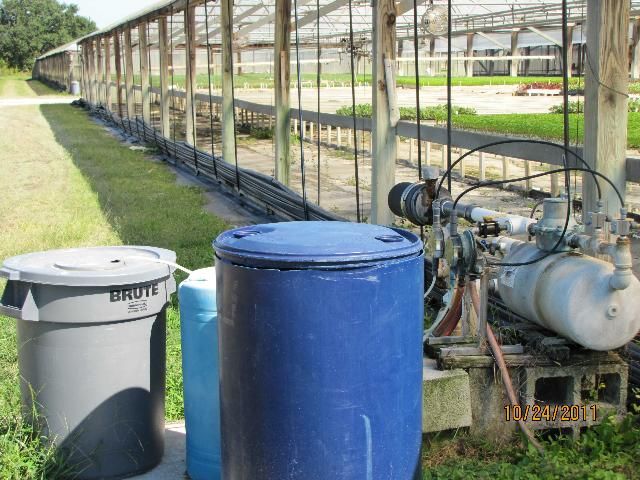
The majority of growers prefer to apply nutrients through liquid fertilization to provide for greater control of plant growth (Figure 18). If leaching of fertilizer is necessary to slow excessive growth, liquid fertilizers are more easily washed out of a mix than are granular fertilizers.
Credit: Gene McAvoy, UF/IFAS
Fertilizers used for liquid feeding of transplant crops should be 100% soluble in water.
University of Florida research has shown that lower N rates (20–30 ppm) under ebb-and-flow irrigation applied during fall tomato production result in greater early and overall yields. The multiple irrigations required during this time of year may preclude use of this low fertilizer rate with overhead irrigation.
Nutrients should be delivered as needed by the plant and growing conditions. Growers must learn to adapt to the weather and not simply fertilize by routine. For example, fertilizations should be suspended or at least reduced during conditions of extended cloudiness.
Fertilization, watering, temperature, and sunlight interact in plant height control. Flexibility in fertilizer application scheduling will result in plants of greater acceptability for commercial use.
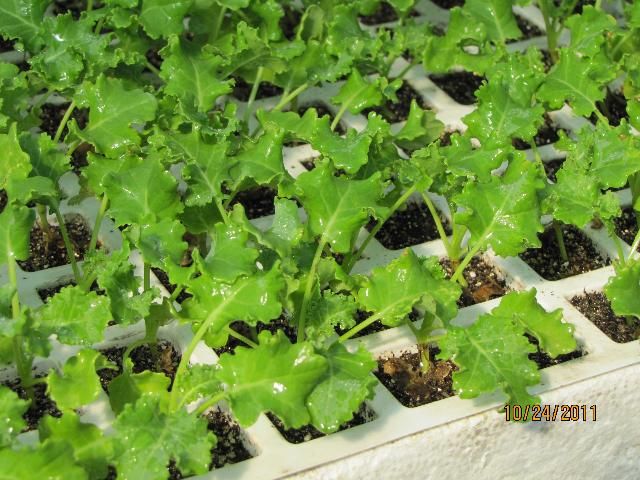
The ultimate goal in vegetable transplant production is to produce a sturdy, compact plant that when transplanted will establish and grow quickly and produce an optimum yield (Figure 19). A good rule of thumb is to begin fertilization only after the first true leaf has expanded.
Credit: Gene McAvoy, UF/IFAS
Irrigation
Water management is the dominant factor in controlling plant height. Knowing when to water generally is determined by experience. Transplants should be watered only when needed, and the plug should be allowed to dry sufficiently before additional watering. The media should be kept moist but not continually wet. Excessive watering leads to succulent plants with restricted root growth.
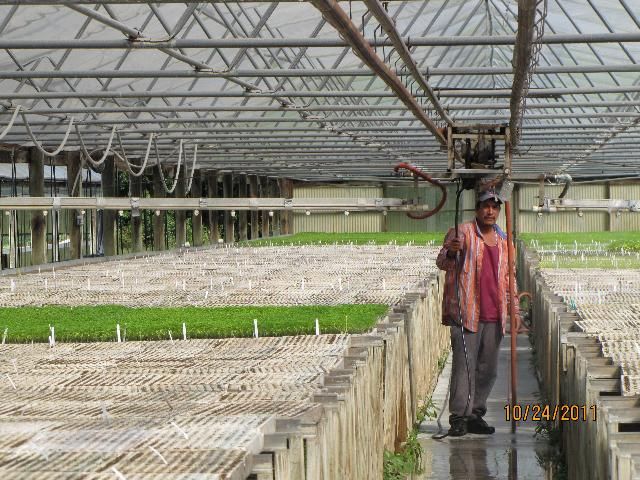
Most transplant production relies on overhead irrigation and uses automated irrigation systems that move the length of the greenhouse on elevated tracks and irrigate via a boom system, which typically are equipped with an additional boom for pesticide application (Figure 20). When watering, gauge application of overhead irrigation to allow for water leachate to occur throughout the tray. Overhead irrigate during the day and allow for sufficient time for the foliage to dry, as prolonged periods of wet foliage are conducive for disease development.
Credit: Gene McAvoy, UF/IFAS
With ebb-and-flow irrigation, allow for contact with the trays for at least 30 minutes. Continuous flotation of vegetable transplants will result in total loss of height control under Florida conditions.
Water quality should include a pH of 6.0–7.0, adequate filtration to remove organic particles, low conductivity (dissolved salts), and possibly chlorination (1 to 2 ppm Cl-) to reduce bacterial contamination. High carbonates and bicarbonates in the water will result in rapid upward pH swings in the plug and often result in micronutrient deficiencies (particularly Fe and B).
Hardening
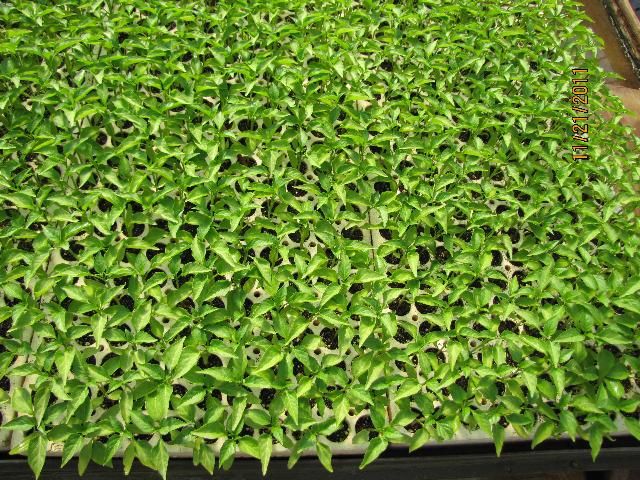
Most Florida transplants will be sufficiently hardened for field setting if water and fertilizer are used to maintain plant height (Figure 21). Should additional hardening be required, reducing the amount of water and/or fertilizer applied during the last week or so of production, or lowering greenhouse temperature 5–10°F at daybreak in north Florida, can accomplish the hardening process.
Growers typically harden plants by letting them acclimate to new conditions beginning about one week before anticipated delivery. Over-hardening can result in slow field establishment and reduced yield.
Credit: Gene McAvoy, UF/IFAS
Delivery
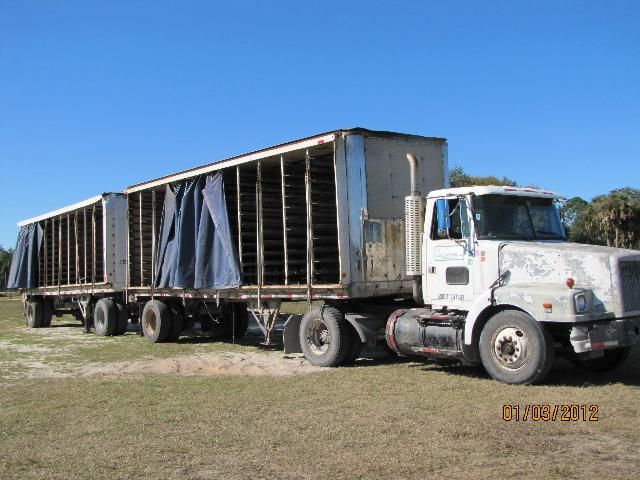
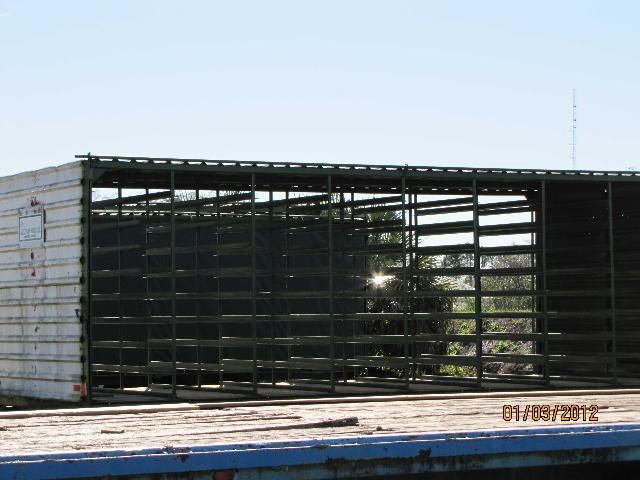
For local delivery within the state of Florida, most transplant producers use covered trailers equipped with a T-rail system that allows stacking of transplant trays (Figures 22 and 23).
Credit: Gene McAvoy, UF/IFAS
Credit: Gene McAvoy, UF/IFAS
Transplant Depth
Sufficient research has been conducted in Florida to confirm that setting tomato, pepper, and watermelon plants to the depth of the first true leaf when transplanting results in earlier yields and larger fruit size. These attributes are the outcome of greatly improved plant growth over the first 30 days of establishment in the field, imparted by the depth of planting. Additional studies have confirmed a reduction in lodging also associated with deeper planting.
Pest and Disease Control
Strict sanitary practices are the foundation of an effective pest- and disease-management program. Touching and handling transplants should be minimized and avoided unless necessary.
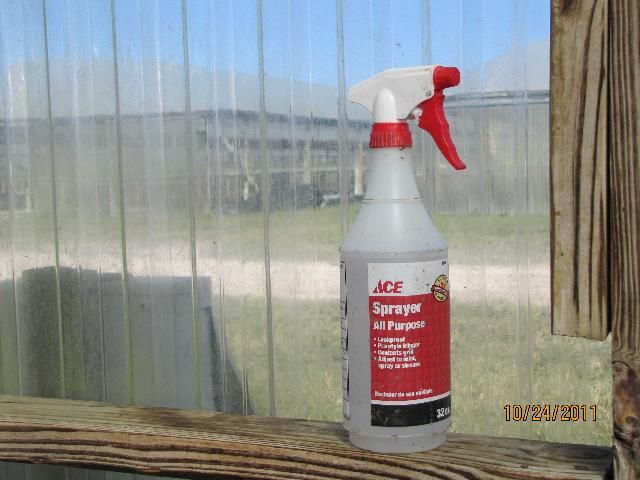
Sanitation is a key component of effective pest and disease management and cannot be stressed enough. Spray bottles containing an approved sanitizer should be used frequently to clean hands if plants and flats need to be handled (Figure 24). Use only clean tools and uncontaminated or sterilized materials when filling flats.
Credit: Gene McAvoy, UF/IFAS
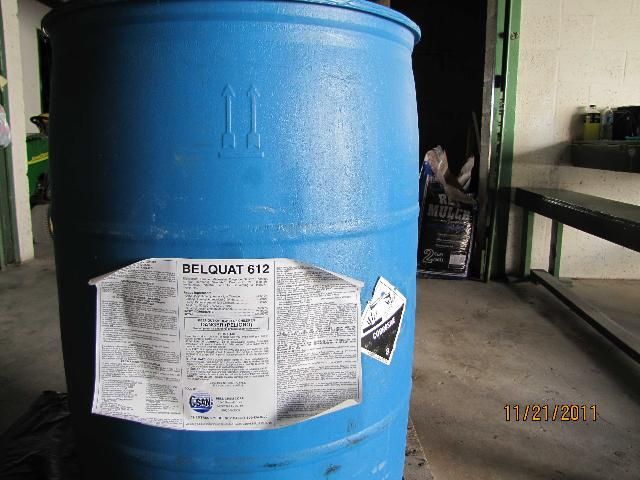
Spray growing areas with chlorine solutions or other sanitizers (according to label specifications) between production cycles to sanitize benches, walkways, and so forth (Figure 25).
Credit: Gene McAvoy, UF/IFAS
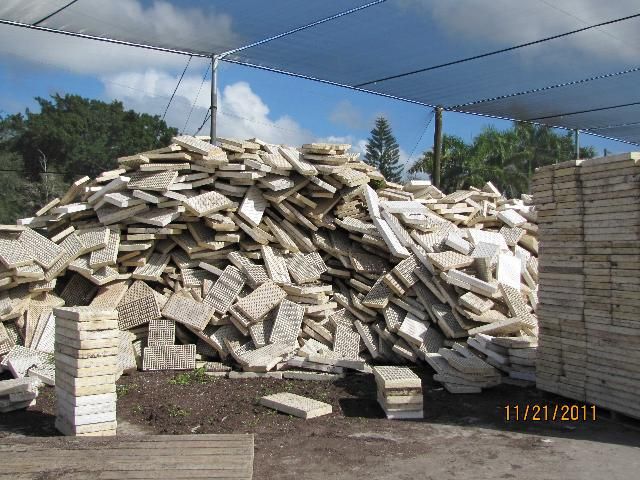
Once used, trays should be cleaned and sterilized to avoid a buildup of soil-borne diseases, especially those introduced from the field (Figure 26). All organic matter should be thoroughly rinsed from the trays prior to any chemical sanitization process. A washing procedure with soap and water should be followed by either an ammonium (2–5%) or chlorine solution (5–10%) soak for at least five minutes.
Credit: Gene McAvoy, UF/IFAS
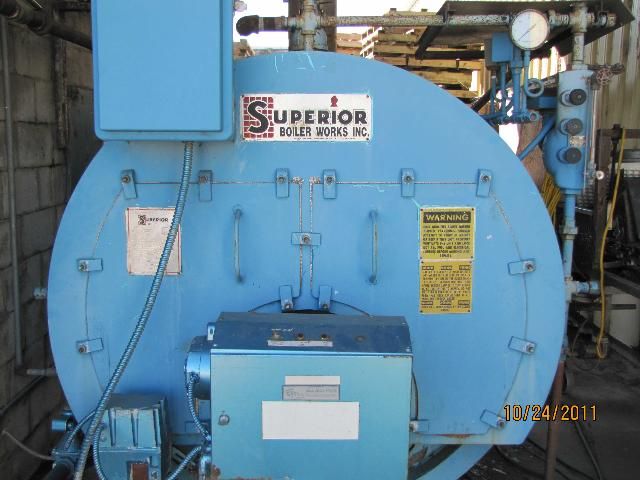
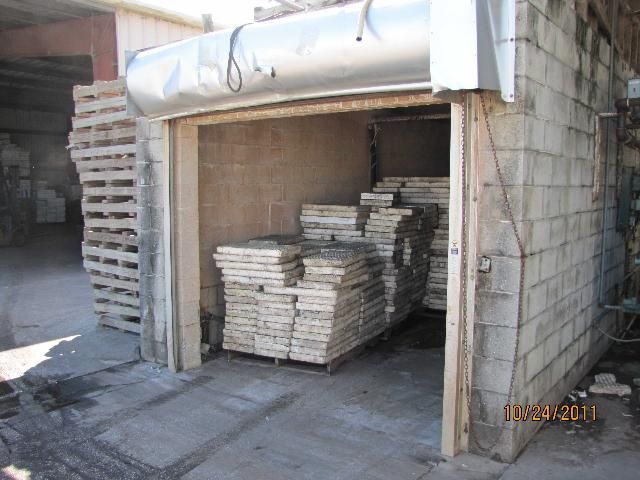
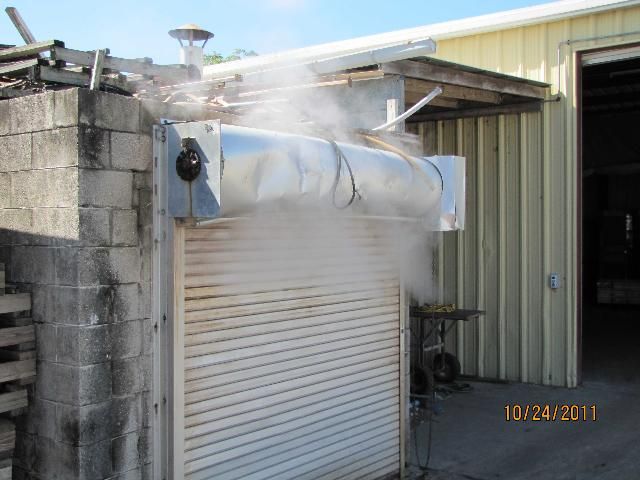
Most commercial operations further steam-sterilize trays at 160°F for 45 minutes. University of Florida research has shown that steam sterilization is the most effective method of tray sanitation (Figures 27–29).
Credit: Gene McAvoy, UF/IFAS
Credit: Gene McAvoy, UF/IFAS
Credit: Gene McAvoy, UF/IFAS
Control of diseases on greenhouse transplants is an essential step for preventing their spread into the field. Exclusion is often one of the most effective tactics in an integrated disease-management strategy.
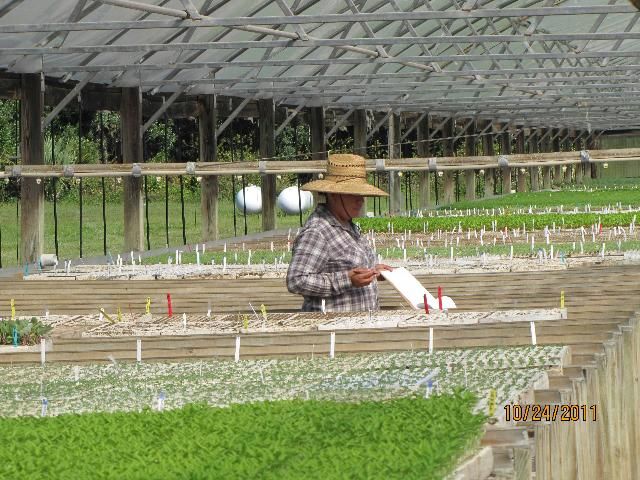
Regular scouting is essential for the early detection of insects and diseases. Transplants should be scouted regularly to identify symptomatic seedlings (Figure 30).
Credit: Gene McAvoy, UF/IFAS
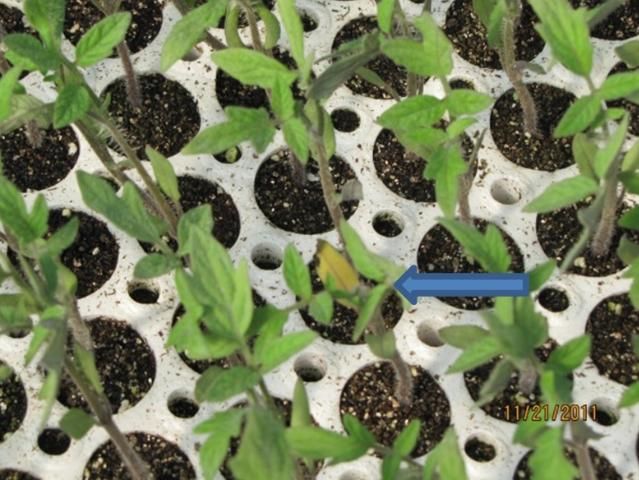
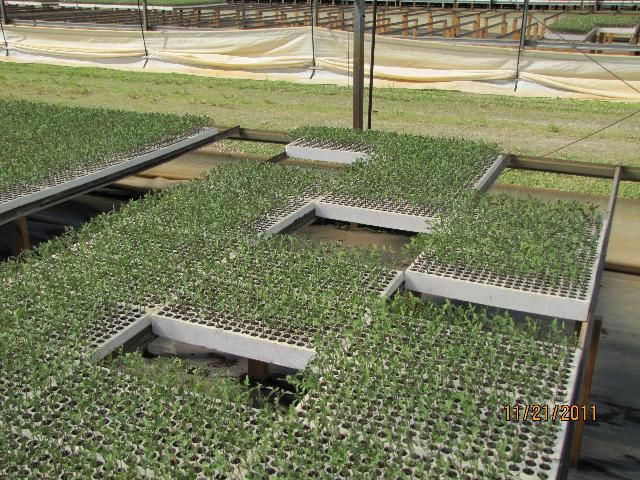
Transplants with symptoms should be removed and destroyed (Figures 31 and 32).
Credit: Gene McAvoy, UF/IFAS
Credit: Gene McAvoy, UF/IFAS
Growers should keep transplant houses clean and weed free, as weeds can harbor pests and diseases (Figures 33 and 34).
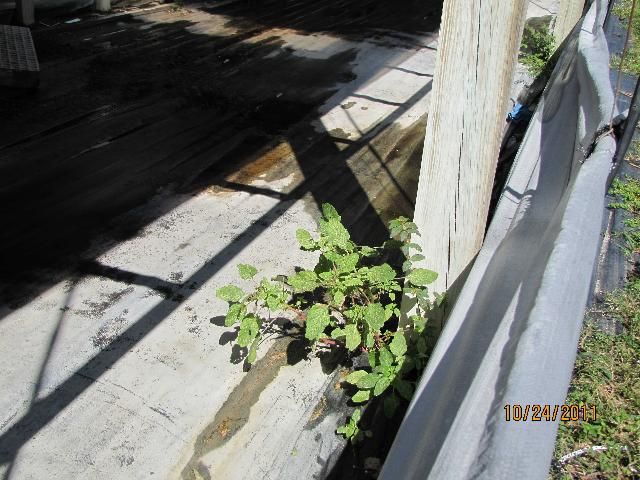
Credit: Gene McAvoy, UF/IFAS
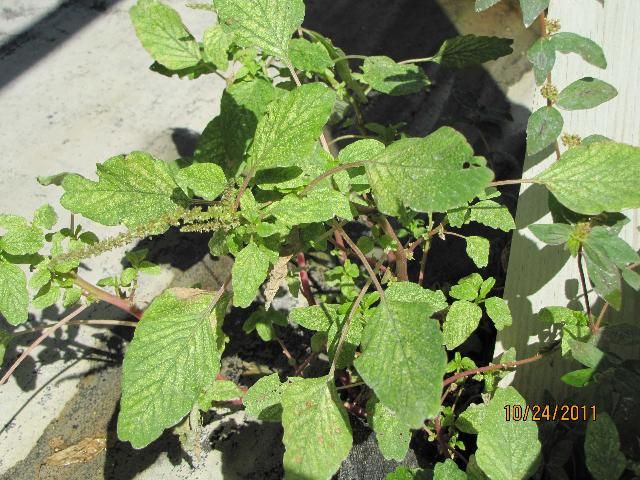
Credit: Gene McAvoy, UF/IFAS
Spray Schedules
Transplants may be sprayed for insects and diseases up to three times per week. In addition to regular preventative applications, sprays against insects and diseases should be based on scouting reports. Growers must be certain to use only labeled fungicides and insecticides and, due to the need for frequent irrigation, should select products with short re-entry times of 12 hours or less. To assist in this regard, many growers are moving toward the greater use of bio-rational pesticides (see Table 3). It is important to practice resistance management; growers should be certain to alternate modes of action to prevent the build-up of resistance in target pests and diseases. Coverage is particularly important on older plants as it becomes difficult to penetrate the canopy in a closely planted tray.
Organic Transplant Production
Organic Transplant Production
Organic transplant production is a small but growing segment (currently only 3–5%) of the transplant industry that poses unique challenges to growers. Due to the small size of many organic farms, transplant growers often have to contend with the issue of producing small mixed lots of transplants for organic growers (Figure 35).
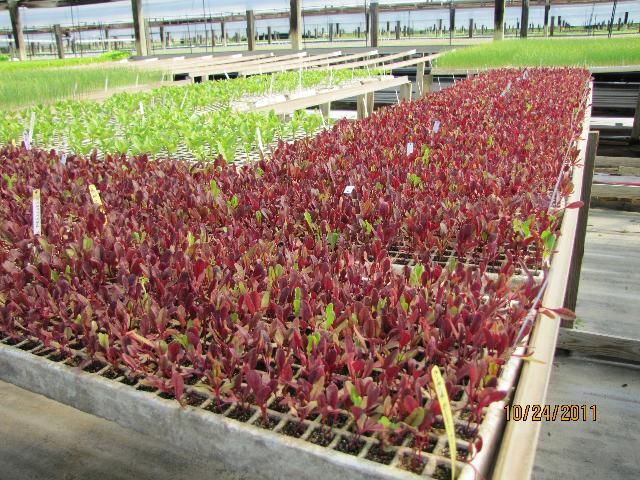
Credit: Gene McAvoy, UF/IFAS
As with organic seed, record keeping and certification are required for all organic producers that sell any products, such as transplants, which are labeled "certified organic." Production of organic transplants involves more than using organic fertilizers and rooting media or avoiding the use of non-approved pesticides; regulations also extend to greenhouse building materials and methods of phytosanitation (Figure 36).
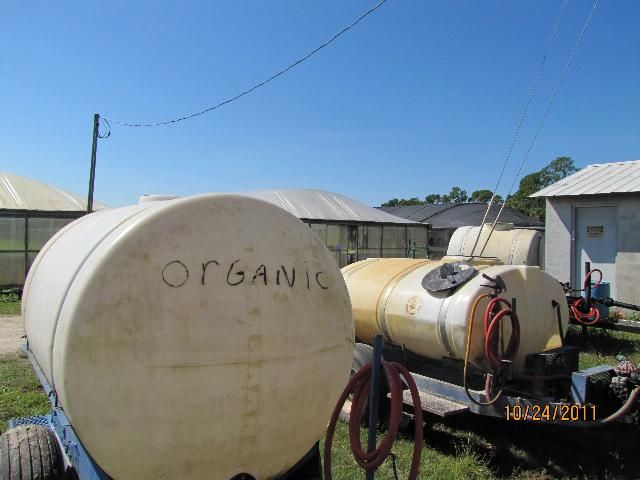
Credit: Gene McAvoy, UF/IFAS
Supplying adequate nutrition and obtaining steady growth and uniformity can be problematic in the production of organic transplants. Growers report success incorporating well-composted turkey manure in the planting media and using liquid fish emulsion to supply nitrogen.
Some circumstances exist in which conventionally produced transplants can be used in organic production.
Grafted Transplants
Tomato, eggplant, watermelon, and other crops can be grafted onto disease-resistant rootstocks. This is a common practice used in other countries in place of soil fumigation to manage soil-borne diseases. Some companies that sell seed in these countries have active breeding programs to improve rootstock characteristics, and named cultivars are available. Grafted plants also are increasingly used in greenhouse vegetable production. Grafting occurs at the seedling stage when plants (scions) are grafted onto rootstocks to gain disease resistance. Additional advantages can include improved cold hardiness, increased plant vigor, fewer plants per acre, and improved post-harvest quality (Figure 37).
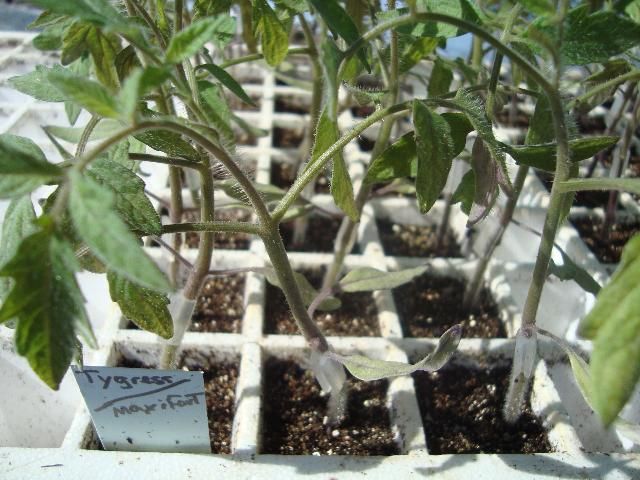
Credit: Monica Ozores-Hampton, UF/IFAS
Currently the use of grafted transplants is not widespread in Florida primarily due to the greater cost per transplant. Other disadvantages include difficulty of grafting and in some cases reduction in earliness. Grafting robots are being employed in some places that can produce 650–900 grafts per hour with a 95% or better success rate. Perfection of such equipment may bring down the cost of plants and allow more widespread use of this technique (Figure 38).
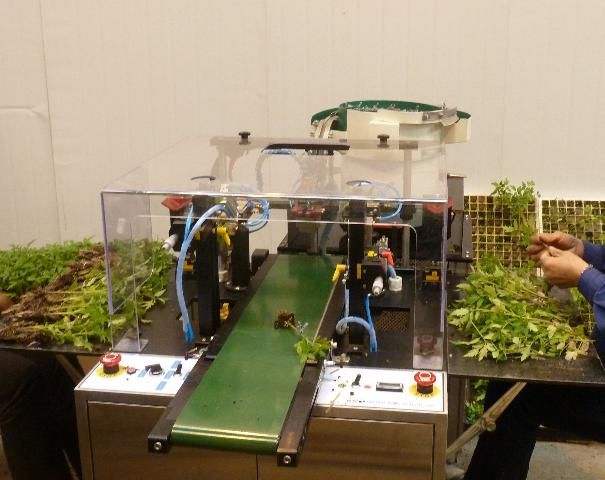
Credit: Xin Zhao, UF/IFAS
Food Safety
While it may be difficult to envision a pathogen surviving on a transplant until harvest of the mature crop, in recent years food-safety audits have begun to include transplant production in the overall food-safety farm audit. Such audits focus on employee training, sanitation and hand washing, production on raised benches, pesticides employed, and rodent control. To comply, growers must develop standard operating procedures (SOPs) and produce extensive documentation demonstrating compliance.