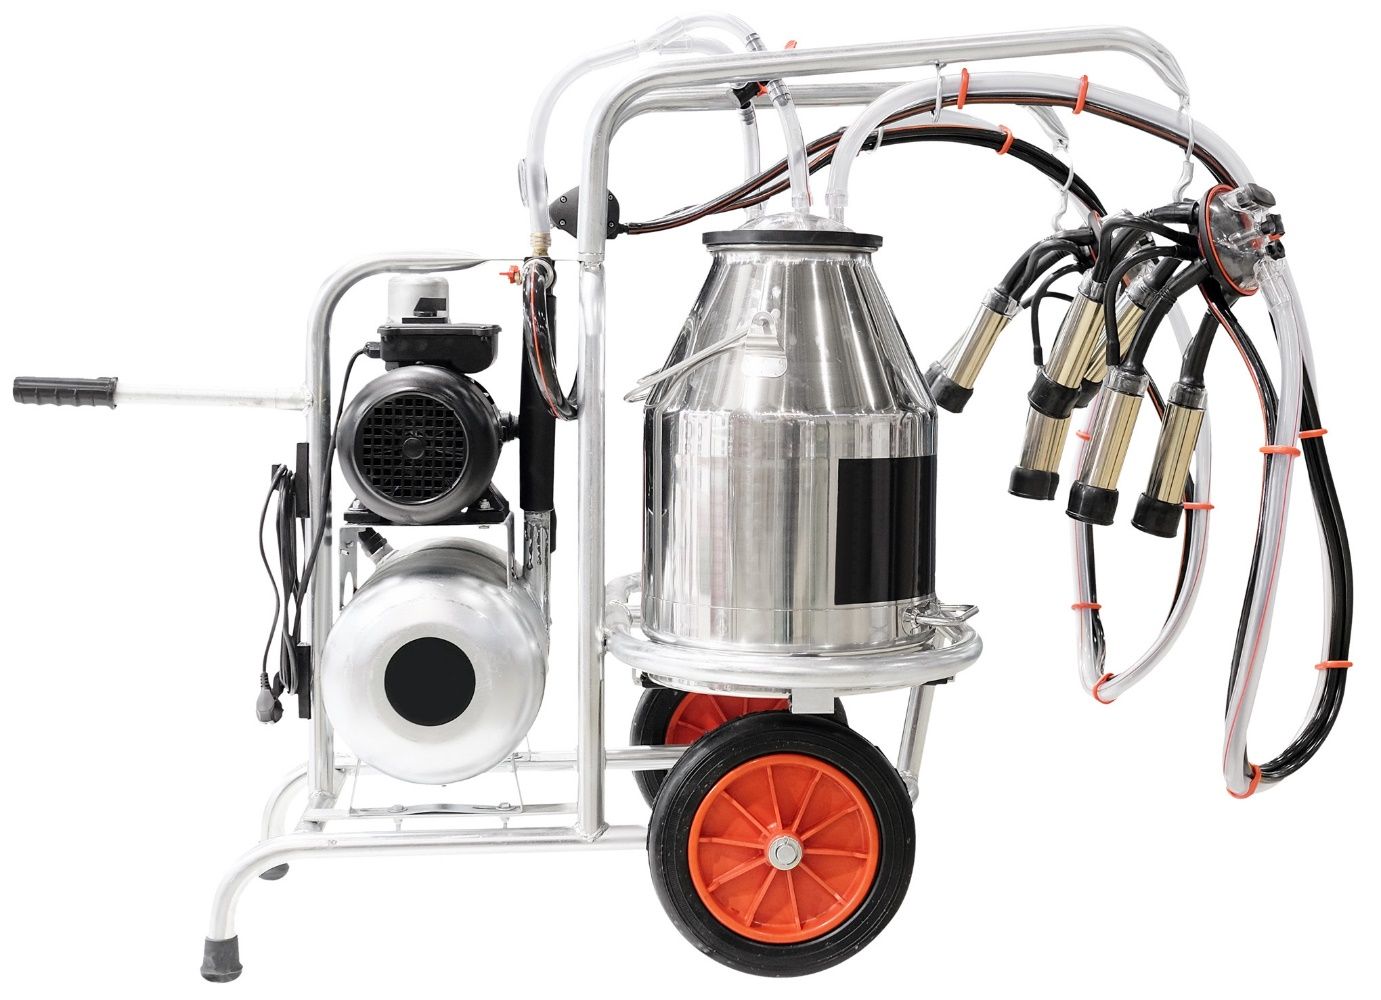
This article aims to help small dairy producers learn how to properly clean portable milking machines so they can improve milk quality and prolong the life of milking equipment. This article may be used as a training tool for small producers, farm employees, and 4-H members. This publication is accompanied by one brochure that aims to summarize the steps for proper cleaning of portable milking units.
Consistent and efficient cleaning of portable milking machines can improve milk quality. The main goal of properly cleaning milking machines is to remove residual milk solids, eliminate residual microorganisms, and prevent microbial growth.
Having a proper and efficient cleaning routine for milking equipment contributes to high milk quality and prolongs the life of milking equipment.
After every milking, all milking equipment and utensil surfaces that come in contact with milk, dirt, or manure must be thoroughly cleaned and sanitized before the next milking.
Residual Milk Solids
The residual milk solids, also called “soils,” contain both organic and inorganic materials. Soils provide nutrients and areas for bacteria to grow and result in reduced efficacy of cleaning and sanitizing compounds.
Organic soils consist of milk components such as fat, protein, and sugars, while mineral soils consist of inorganic salts of various minerals (usually calcium, magnesium, or iron) that are normally present in milk or water.
The term “milkstone” is used to describe the deposit formed by precipitated minerals on surfaces of milking equipment or milk storage equipment, combined with organic soils.
Cleaning Steps
- Physical cleanliness: Remove all visible dirt from the surface of the milking unit.
- Chemical cleanliness: Remove not only all visible dirt from the surface of the milking unit, but also microscopic residues that are not visible to the naked eye but can be detected by smell.
- Bacteriological cleanliness: Remove microorganisms using disinfecting solutions.
- Sterile cleanliness: Use the proper solutions to destroy all microorganisms.
Pre-Cleaning Preparation
Regardless of the type of milking system, the following will be necessary for proper cleaning of milking equipment:
- Supply of potable water (water free from fecal contamination)
- Efficient water heater
- Thermometer
- Chemicals
- Gloves and protective clothing
The milking system is cleaned by the physical action of cleaning solutions assisted by temperature and chemicals. No matter what system is used, the milking unit will not be cleaned unless the solutions come in contact with all soiled parts of the equipment. It is important to hose down any external surfaces in the milking area prior to cleaning the inside of the milking equipment.
Step-by-Step Cleaning Procedures
It is important that all operators responsible for cleaning the portable milking units follow a consistent routine and go through all the recommended cleaning steps in the proper order.

Credit: © Dmitry Vereshchagin / Adobe Stock
1. Rinse
Start by disassembling all parts that must be hand-washed. Rinse all surfaces immediately after milking with lukewarm (100°F–110°F) water to remove milk solids. When done properly, this rinse removes more than 70% of the soil load.
Use a thermometer to monitor the temperature of the rinse cycle. Rinse water temperature below 93°F will allow milk fat to deposit on milking equipment surfaces. Rinse water temperature above 120°F will denature any remaining protein and create protein films. These films are colorless at first but develop a yellow color as they build up. Protein films provide contact areas on surfaces where bacteria can grow.

Credit: Izabella Toledo, UF/IFAS
2. Wash
For the wash cycle, you will need a chemical cleaning solution to remove any soils that have built up in the machine during milking. Most dairy operations use a chlorinated alkaline detergent solution in either liquid or powdered form. Follow manufacturer specifications regarding the amount of detergent that must be added to the wash water.
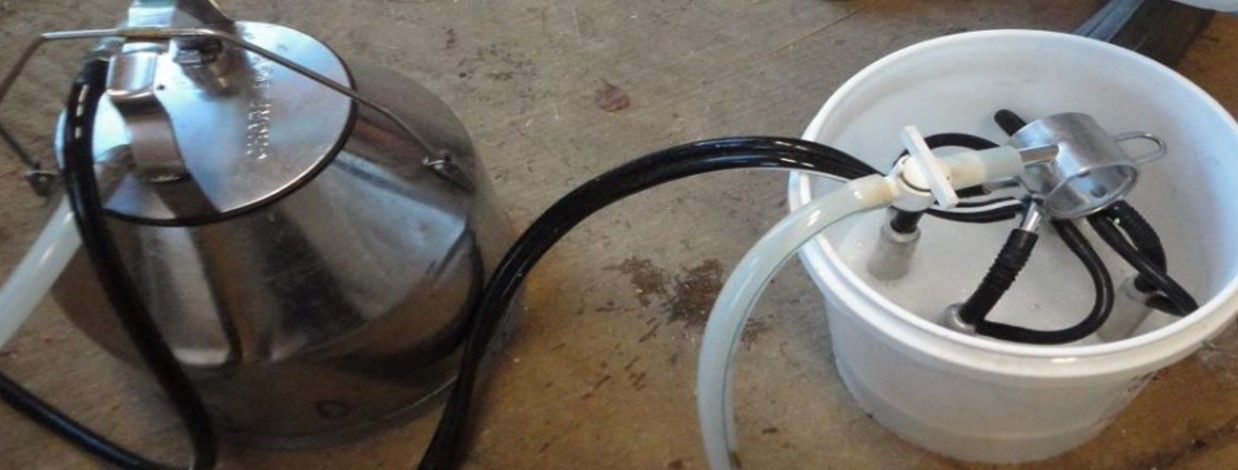
Soak all parts of the milking machine in the detergent/water solution at a temperature of 120ºF–135ºF for at least 5 minutes. Once the entire claw is inside the detergent/water solution, turn on the pump to get the solution into the claw, tubes, and milking bucket. This will wash the entire milking unit. It is essential to properly drain all chlorinated alkaline detergent wash solution before beginning the next step.
During this step, the alkaline detergent breaks up any remaining milk fat into tiny droplets, suspending the fat in the detergent wash water. The chlorine increases the solubility of any remaining protein and helps to remove it with the detergent wash during the wash cycle.
3. Post-Rinse
Rinse the milking equipment thoroughly (inside and outside) with clean, lukewarm (100°F–110°F) water before proceeding to the next step. After finishing the post-rinse, visually inspect the milking unit to make sure it has been properly rinsed.
4. Acid Rinse
Rinse all of the milking equipment with cold acidified water (pH of 3.0 to 4.0) for 2–3 minutes, then drain the equipment. The acid rinse prevents any milk minerals from accumulating on the surfaces of the milking equipment.
This step helps to prevent the development of milkstone and decreases the chances of bacterial growth within the milking system. The acid rinse also neutralizes the chlorine and alkaline residues from the wash cycle and helps prolong the life of any rubber parts of the equipment.
Acid rinses are readily available in stores that sell dairy supplies or online. Use the manufacturer’s recommendations for mixing and use.
5. Sanitation
Most dairy operations soak the milking equipment in a solution of chlorine-based sanitizer in lukewarm water (100°F–110°F). It is crucial to make sure that the all hand-washed parts of the milking unit are sanitized and drained.
Cleaning reduces bacterial numbers on surfaces but does not eliminate all types of bacteria. The sanitizing of surfaces within 30 minutes of the next milking destroys nearly all lingering organisms when a thorough cleaning precedes the sanitizing step, and the sanitizing solution is of sufficient strength.
All surfaces of the milking equipment, teat cup liners, and other rubber parts that come in contact with milk must be thoroughly cleaned after each milking and sanitized before the next milking.
Maintenance of the Milking Equipment
Liners and other rubber parts must be replaced according to the manufacturer recommendations when the parts become soft, cracked, or rough, or when they develop holes. Pores and cracks in rubber parts house soil and microorganisms and reduce the beneficial effects of cleaning and sanitizing.
Summary
Consistent and efficient cleaning of portable milking machines is necessary. This process involves removing residual milk solids, eliminating residual microorganisms, preventing microbial growth, and prolonging the life of the milking equipment to increase milk quality and to help ensure milk is safe for human consumption. It is important to always milk clean, dry, and well-stimulated teats and to ensure that milking equipment is well sanitized and operating properly.