Introduction
When proper environmental conditions are met, Begonia can be propagated from plant material with ease. Vegetative propagation allows the breeder to produce a new generation of clones with the exact same traits as the mother stock, allowing nursery producers and enthusiasts alike to retain favorable traits with little difficulty. Vegetative propagation can be accomplished using shoot cuttings and leaf cuttings (Figure 1). When it comes to tuberous and rhizomatous begonias, they can be propagated via tuber and rhizome cuttings as well. Details of these methods will be covered in A Beginner’s Guide to Begonia: Tuberous Begonia and Rhizomatous Begonia.
This EDIS publication is written for Florida nursery operators, landscape professionals, and individuals interested in propagating their own begonias. This guide will go into detail on how to multiply begonias via vegetative propagation. If you would like to learn more about seed propagation of begonias, go to A Beginner’s Guide to Begonias: Seed Propagation. There are two methodologies for vegetatively propagating your own begonias: through shoot cuttings and leaf cuttings. For more information on begonias in Florida, check out A Beginner’s Guide to Begonias: Classification and Diversity.
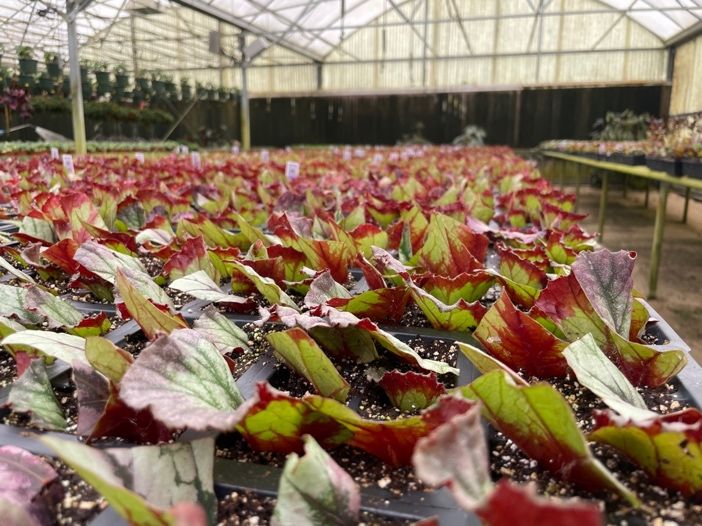
Credit: Matthew Creech, UF/IFAS
Shoot Cuttings
Begonia cuttings can be taken at any time throughout the year. Applying rooting hormones, such as auxins, is not necessary but does promote rapid root development. It is important to note that the growth habit of the cuttings will vary depending on multiple factors including but not limited to ontogenetic aging and topophysis (Davies et al. 2018). Propagate your shoot cuttings of begonias using the methods outlined below:
- Collect shoot cuttings from the begonia of interest. Be sure to take into account the location the cutting is taken from and ensure there is a meristem (apical or lateral) at the tip of the cutting. A meristem is a specific tissue on the plant that cells areactively dividing (Figure 2).Cuttings should be 3 to 4inches (8–10cm) long with 2 to 3 leaves. It should include 2–3 nodal sections. The cut should be just below the bottom node, because this is where they will root the best. If leaves are too large for the cutting, cut them back to a manageable size (Figure 3).
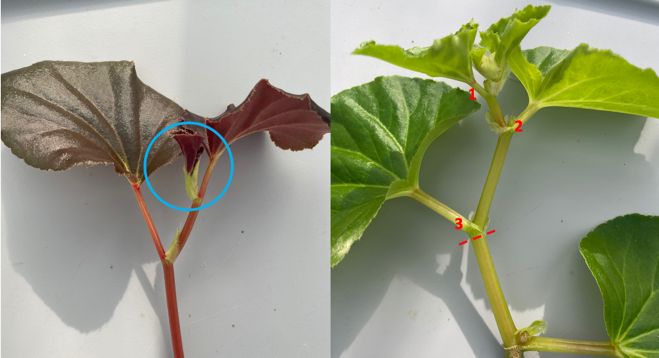
Credit: Julian Ginori, UF/IFAS
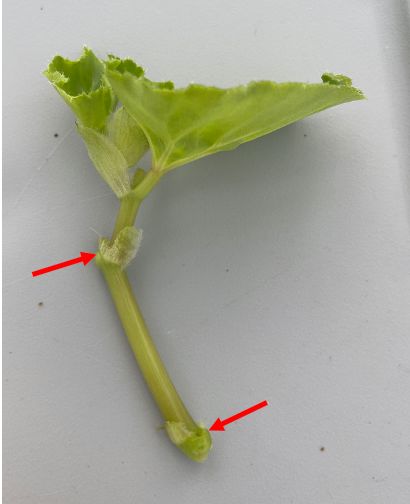
Credit: Julian Ginori, UF/IFAS
2. Dip the end of the cutting in rooting hormone. Ensure the exposed end of the shoot is fresh prior to coating with rooting hormone. See Figure 4 for details. Typical rooting hormone has an IBA concentration of 0.1% and can be found at any nursery supply store. The rooting hormone can be purchased in liquid or powder form. Though not necessary, dipping the end of the cutting in rooting hormone such as IBA or NAA can speed up adventitious root development.
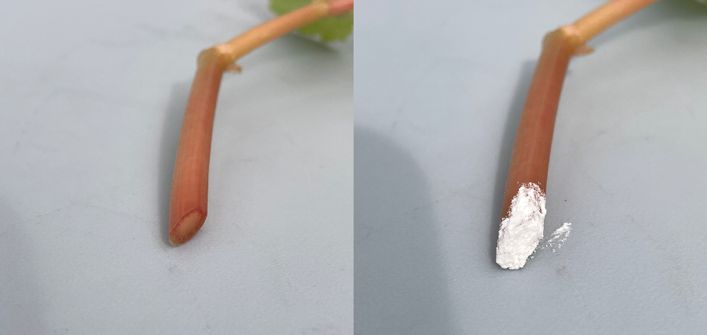
Credit: Julian Ginori, UF/IFAS
3. Place cuttings in moist/wet media and cover with a humidity dome to prevent cuttings from drying out(Figure 5).It may be beneficial to carefully water the cuttings prior to placing the dome to cool the leaves and prevent stress due to drying out. Alternatively, a mist system can be used for a large-scale propagation.
4. Allow at least two weeks for roots to form. Occasionally check the rooting progress by lightly tugging on the stems of the cuttings. If roots have formed, you will feel slight tension as you lightly pull the cutting.
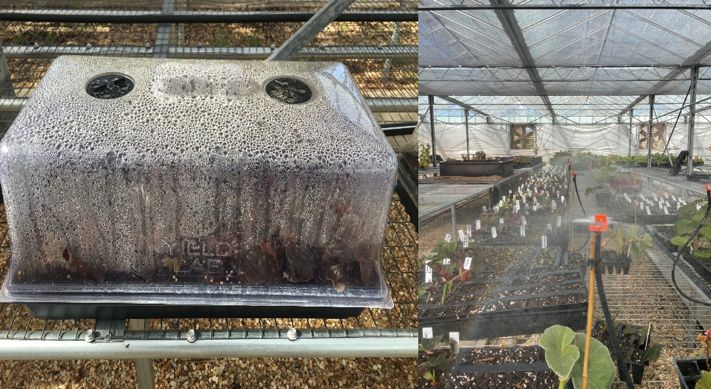
Credit: Julian Ginori, UF/IFAS
Leaf Cuttings
When propagating begonia via leaf cutting, the leaf or the leaf with petiole are used to produce clones. The important factor is the development of both roots and shoots from either the base of the petiole or the major veins in the leaves. Two methods for propagating begonias from leaf cuttings are using the leaf blade and petiole or using the leaf blade alone. See Figure 6 to see what the major veins and the leaf petiole are.
Leaf Blade and Petiole
- Collect healthy leaves and petioles from the begonia of interest (Figure 7).
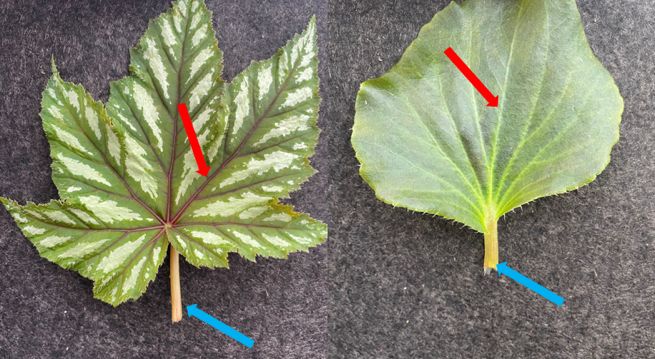
Credit: Julian Ginori, UF/IFAS
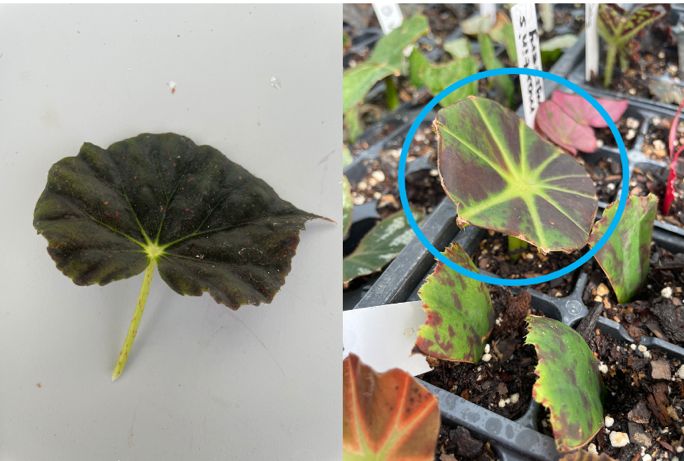
Credit: Julian Ginori, UF/IFAS
2. Place the petiole in moist/wet soil and cover with a humidity dome to prevent the leaf cutting from drying out.
3. After rooting has occurred, you should notice new shoots sprouting up from the base of the petiole (Figure 8).
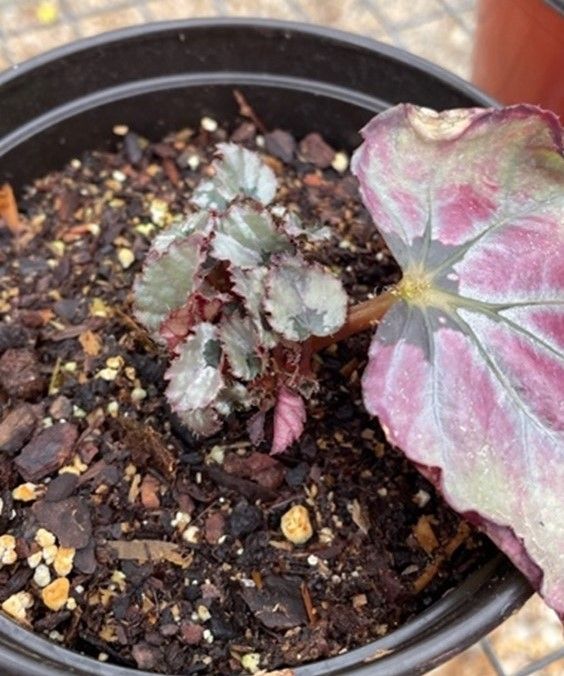
Credit: Julian Ginori, UF/IFAS
Leaf Blade Only
- Collect fully grown, healthy leaves from the begonia of interest.
- Cut the leaves into small sections, being sure to include primary veins in each section. Typically, sections are made into triangular shapes with the primary vein at one tip. Avoid making the leaf cuttings too small or they will be unsuccessful. Refer to Figure 9 for cutting size.
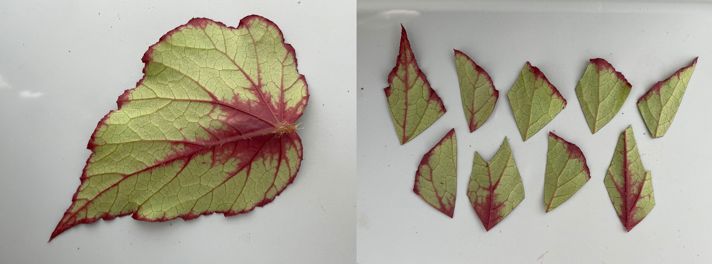
Credit: Julian Ginori, UF/IFAS
3. Gather the leaf cuttings made in step 2 and insert them vertically into the soil with the primary vein tip entering the media (Figure 10). Be sure not to bury the cutting too deep in the soil, as to avoid rotting the leaf. Approximately half an inch in the soil should be enough.
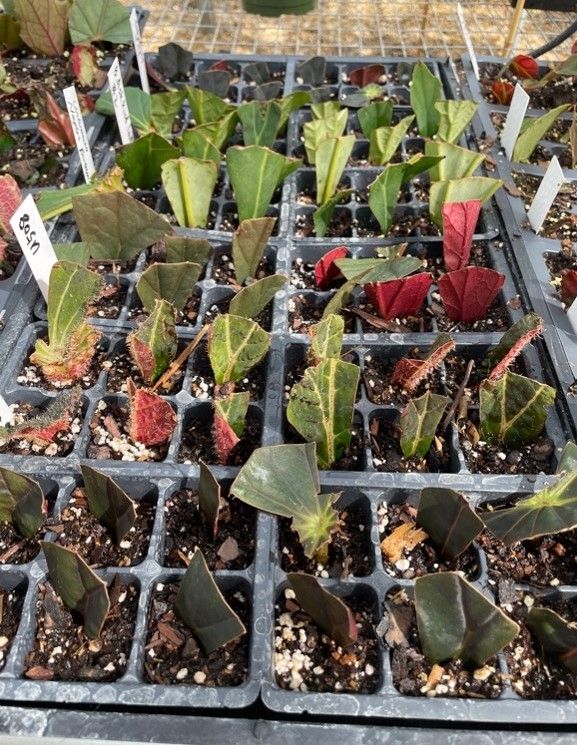
Credit: Julian Ginori, UF/IFAS
4. Place cutting under a humidity dome or misting bed to prevent the leaf cuttings from drying out.
5. After 3–5 weeks, roots will develop from the main vein, and a shoot will develop shortly after (Figure 11).
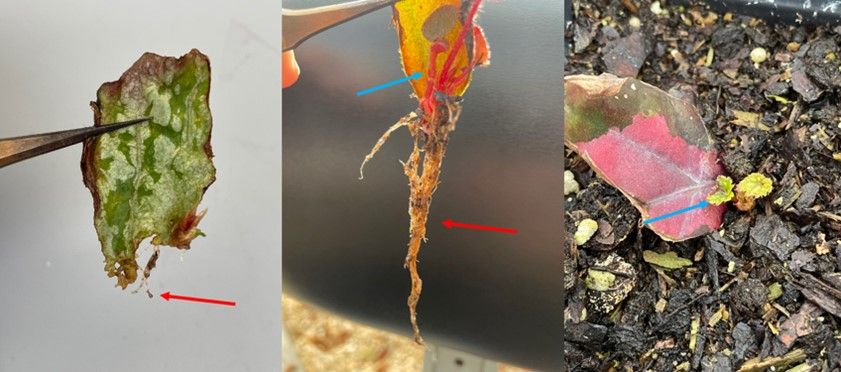
Credit: Julian Ginori, UF/IFAS
Problems with Vegetative Propagation
Vegetative propagation is the dominant method for begonia propagation because it produces identical clones. On rare occasions, chimeras, or “bud sports” can develop due to mutations that can occur in the shoot apical meristem (Davies et al. 2018). Additionally, vegetative propagation is faster than sexual seed propagation, as you do not have to wait for seeds to germinate and grow, a process that can take months. However, vegetative propagation may require a significant amount of adult plant material, which could be an issue if you only have a small amount of parent plants. Fungal disease is also an issue that is commonly observed when the humidity is not well controlled, and it can easily lead to the death of vegetatively propagated plant material.
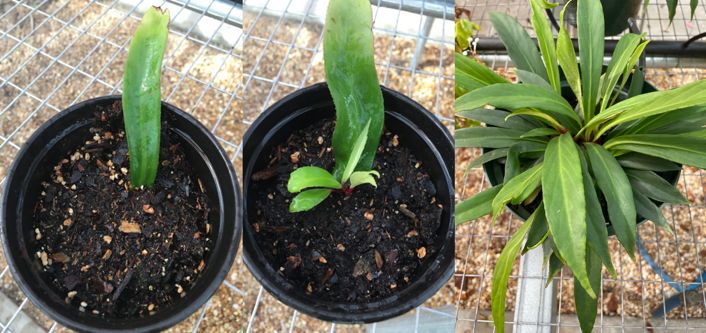
Credit: Julian Ginori, UF/IFAS
References
Davies, F. T., R. L. Geneve, and S. B. Wilson. 2018. Hartmann & Kester’s Plant Propagation: Principles and Practices (Ninth edition). Pearson.
Ginori, J., H. Huo, Z. Deng, and S. Wilson. 2022. “A Beginner’s Guide to Begonias: Seed Propagation.” EDIS 2022 (3). https://doi.org/10.32473/edis-EP619-2022
Ginori, J., H. Huo, and C. R. Warwick. 2020. “A Beginner’s Guide to Begonias: Classification and Diversity.” EDIS 2020 (1). https://doi.org/10.32473/edis-ep581-2020
Haba, S. R. 2015. “Conservation of Begonia Germplasm through Seeds: Characterization of Germination and Vigor in Different Species.” Master’s thesis, Ohio State University. http://rave.ohiolink.edu/etdc/view?acc_num=osu1420040181
Pounders, C. T., H. F. Sakhanokho, and L. M. Nyochembeng. 2015. “Begonia ×semperflorens FB08-59 and FB08-163 Clonal Germplasm.” HortScience 50 (1): 145–146. https://doi.org/10.21273/HORTSCI.50.1.145