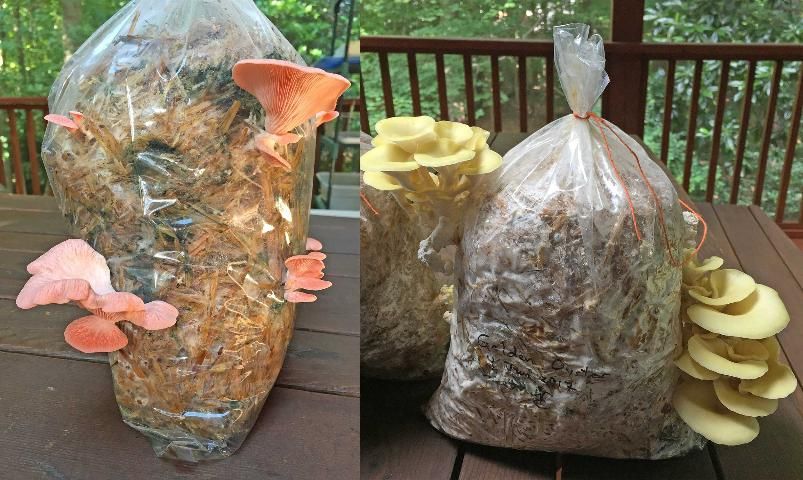
There can be so much joy in growing fungi. Oyster mushrooms (Pleurotus spp.) are one of the most common mushrooms found on hardwoods throughout the north temperate zone; they also occur on conifers. Many species of Pleurotus are commonly cultivated, including the most popular P. ostreatus and P. pulmonarius. (Petersen and Krisai-Greilhuber 1994; Stamets 2000; Vilgalys 1997). The oyster mushroom is a saprotroph, meaning it feeds on dead organic matter, mainly hardwood (Kuo 2005). They can grow on the dead wood inside living trees. Oyster mushrooms fruit throughout the year whenever conditions are favorable. The mature oyster mushroom caps (basidiocarps) are relatively large, ranging from 2 to 10 inches in diameter and shaped like oyster shells with branching lateral stalks. The cap is convex at the pinhead stage (a young mushroom when the cap is the size of a pin), but expands and becomes flatter at maturity. The color of the fruiting bodies may be white, yellow, brown, gray, blue, tan, or even pink (Figure 1), depending on the species and the ambient environment (e.g., the amount of light). Most oyster mushrooms produce copious amounts of white to lilac spores. Oyster mushrooms are edible, with a taste that varies from mild to strong, sometimes sweet with a scent described as anise or licorice. They have a subtle flavor that blends very well in sauces, soups, and stews, and can be a main ingredient in delicious stir-fry dishes as well. In addition to being delicious, oyster mushrooms are nutritious. They are a low-caloric food packed with nutrients such as protein, B vitamins, and minerals, and they are a good source of fiber. Some oyster mushrooms also contain statin molecules, such as lovastatin, which have cholesterol-lowering effects.
Credit: Van T. Cotter
Oyster mushrooms are relatively easy to cultivate on a variety of lignocellulose substrates, such as wheat straw and even paper. The cultivation can be performed at home, in small-scale mushroom houses, and at large commercial-scale mushroom farms. Mushroom cultivation is entertaining and can be carried out in small spaces without great effort, and it produces delicious products. The following instructions provide a step-by-step guide for oyster mushroom cultivation at home. The small-farm cultivators are recommended to read a related EDIS publication, "Isolation of Mother Cultures and Preparation of Spawn for Oyster Mushroom Cultivation" (https://edis.ifas.ufl.edu/ss663). A good reference for further information on cultivating mushrooms is the book Growing Gourmet and Medicinal Mushrooms (Stamets 2000).
There are three basic approaches to growing oyster mushrooms at home:
- Purchase a ready-made, already colonized kit. In this case, one simply sets the kit up in a suitable environment for fruiting.
- Purchase spawn and inoculate an appropriate substrate in bags or other containers.
- Produce your own spawn and then inoculate an appropriate substrate.
Path 1 and 2 are analogous to home gardening where seed is usually purchased rather than produced at home. If one is adventurous and wishes to produce spawn, instructions (Path 3) are provided in SS663.
Basic Materials for Path 2
Three main components are required to start oyster mushroom cultivation:
- Healthy, vigorous spawn
- Pasteurized lignocellulose substrate
- Containers, such as plastic bags (Figure 1)
Protocol
(A) Spawn
For home cultivation, short of buying a ready-made kit, the fastest and simplest approach to growing oyster mushrooms is to purchase spawn rather than produce it. There are many commercial producers of oyster mushroom spawn. Examples are listed in Appendix A.
(B) Lignocellulose Substrate
Using Straw as a Substrate for Oyster Mushroom Cultivation
Wheat straw is an excellent lignocellulose substrate to grow oyster mushrooms on. But one can use many other substrates, including rice stalks, corn cobs, coffee grounds, cotton pulp, peanut shells, some plant leaves (such as banana and plantain), and paper.
The lignocellulose substrate provides the food (organic carbon for energy, nutrients) for oyster mushrooms to grow on, supporting buildup of vegetative biomass which then allows production of the mushroom fruiting bodies.
(C) The Protocol for Using Wheat Straw for Oyster Mushroom Cultivation
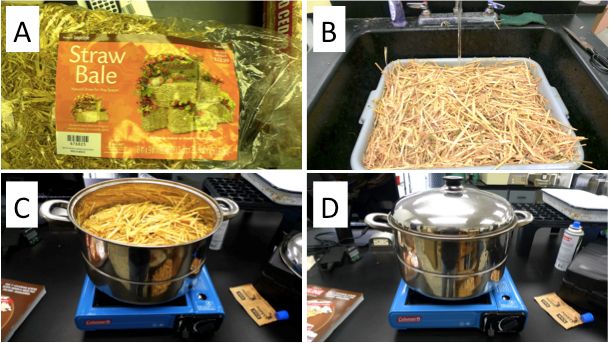
Step 1. Obtain straw and cut the straw into 4- to 5-inch-long pieces and then soak the straw overnight in water (Figure 2A and 2B).
Credit: Chih-Ming Hsu
Step 2. Pasteurization. Drain the excess water, then pasteurize the straw by keeping it at 165 °F in a water bath for 1–2 hrs (Figure 2C and 2D). Alternative methods to pasteurize the straw including using steam or a chemical bath in hydrated lime, but these methods will not be discussed here.
Step 3. Drain the excess water from boiled, sterilized straw for an hour. From Step 3 to Step 8, set up the working space in a clean environment to prevent the contamination (i.e., clean the working desk and room). It is important to inoculate the straw as soon as it has drained and cooled to reduce the risk of colonization by undesirable fungi.
Step 4. Inoculation. Inoculate the pasteurized straw by adding and mixing the spawn with this substrate at a rate of 5–10% volume/volume or weight/weight basis. The inoculation process can be accomplished by bulk inoculation and then filling the plastic bags, or by adding the straw and spawn in alternating layers directly into the bags. A suitable bag size is 25–30 cm by 50–60 cm (10–12'' by 20–24'').
Step 5. Tightly stuff each bag with inoculated substrate, leaving no big gaps inside. The bag should feel like a firm pillow. Close the bags and secure the tops with string or staples. Then carefully make small cuts (cross cuts of 1/2 cm [1/4"]) using a clean, sharp-pointed cutting tool such as a razor blade or trilobate arrow hood. Make about 10–15 holes about 4–6" apart in two whorls a few inches down from the top and a few inches up from the bottom of the bag.
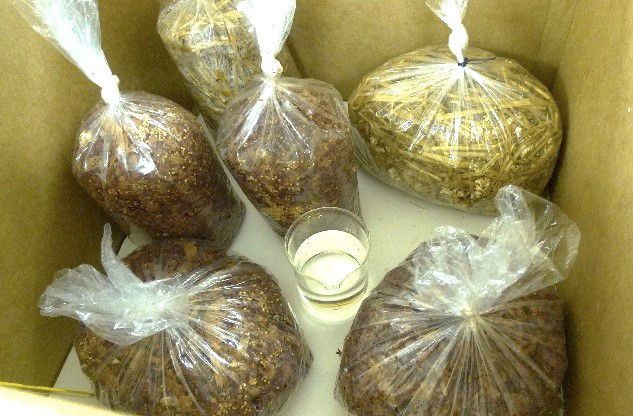
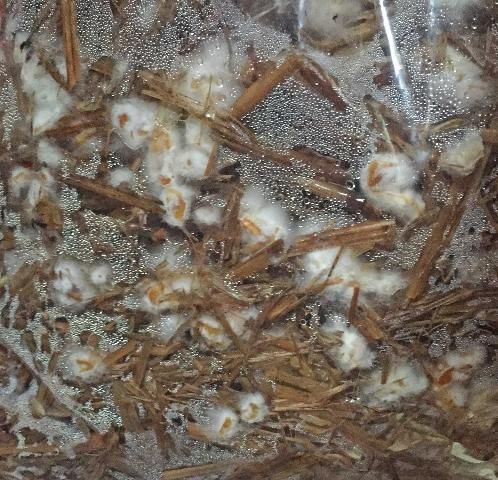
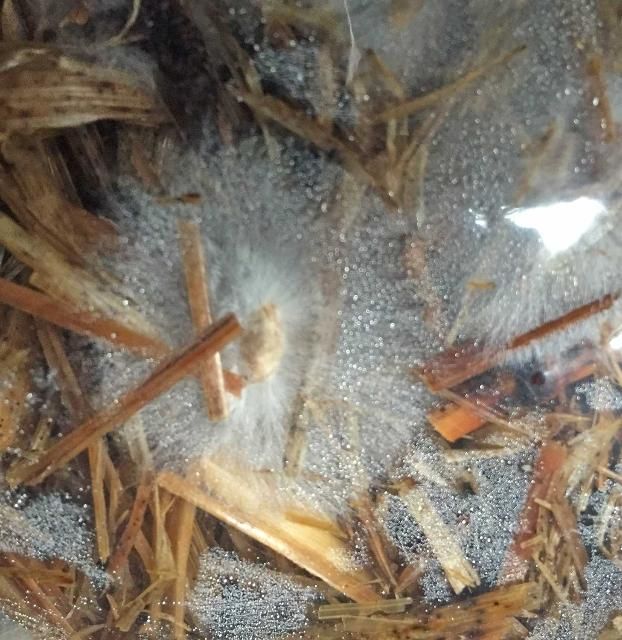
Step 6. Spawn Run. Incubate the filled bags inside a clean, dark place with high relative humidity. Raise the bags above the floor by placing them on concrete or wooden blocks, or they can be hung inside a small dark room at 24–25°C (75–77°F) and high relative humidity (80–90%). An alternative incubation space can be created using a cardboard box or by inverting a large plastic bin over the bags and keeping a good moisture supply from wet cloth towels or cups of water placed underneath (Figure 3). Under proper incubation, white mycelium of the oyster mushroom will grow out from the spawn particles and colonize the straw substrate (Figure 4).
Credit: Chih-Ming Hsu
Credit: Van T. Cotter
Step 7. Spawn Run, continued. Observe the fungal growth (spawn run) colonizing the straw substrate for the next two to three weeks until the whole bag becomes white indicating good fungal biomass production. The bags are then ready for fruiting, which is triggered by light and lower temperatures (Figures 5 and 6).
Credit: Van T. Cotter
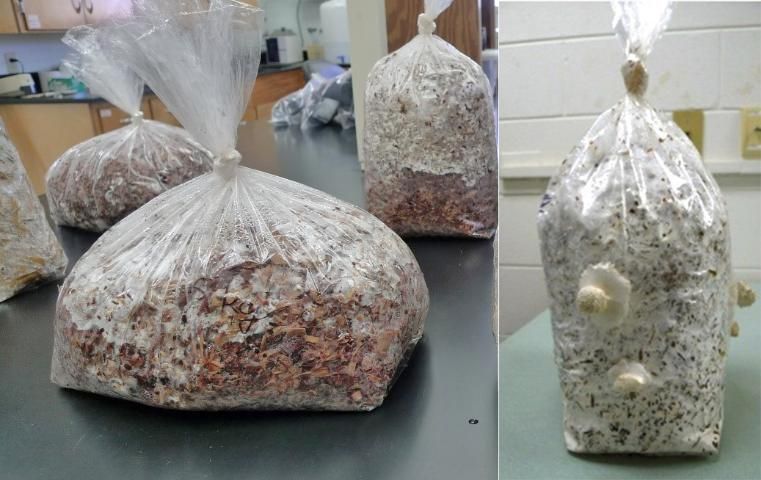
Credit: Chih-Ming Hsu
Step 8. Fruiting―Mushroom Production. Initiation of the fruiting phase of many oyster mushrooms requires a lower temperature of 20°C (68°F) and light. The completely colonized straw bags can be triggered into fruiting by transfer to a fruiting chamber. This chamber has ambient environment of about 20°C (68°F), controlled (if possible) by an air-conditioning system, 90% humidity controlled by humidifiers or foggers, and a cold source of illumination such as inflorescence or energy-saving light for periods similar to day and night interval (or it could be continuous for the whole fruiting period). In cases where the biomass buildup chamber is going to be used as fruit phase, then the ambient environment condition can be adjusted for that chamber keeping the colonized bag logs in place. Also, there should be good air exchange to avoid carbon dioxide buildup, yet it should not adversely affect or prevent maintaining high humidity (90%) around the bags. An example of a fruiting chamber made using a laundry hamper is shown in Figure 7. Mushroom primordial appear at the holes made in the plastic bags and develop into the "pinhead" stage. The pinheads expand into the first flush of oyster mushrooms if proper air exchange and humidity are maintained (Figure 8). Clusters of the developed mushroom are harvested by twisting and gently pulling or by cutting flush with the substrate with a knife. After this first flush of mushrooms, there should be 2–4 more flushes depending on the fungal strain and the ambient environment.
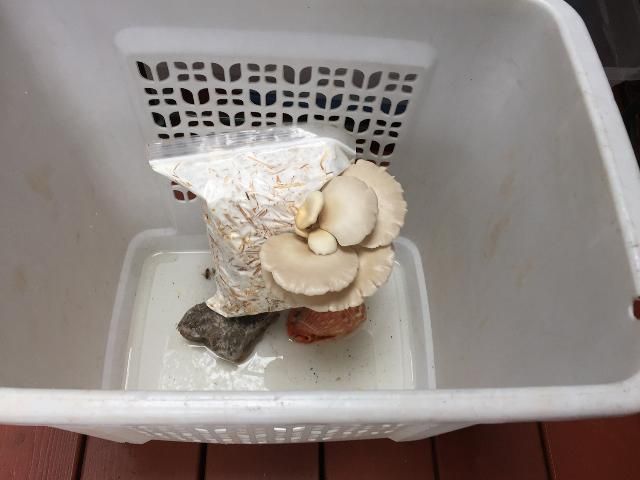
Credit: Van T. Cotter
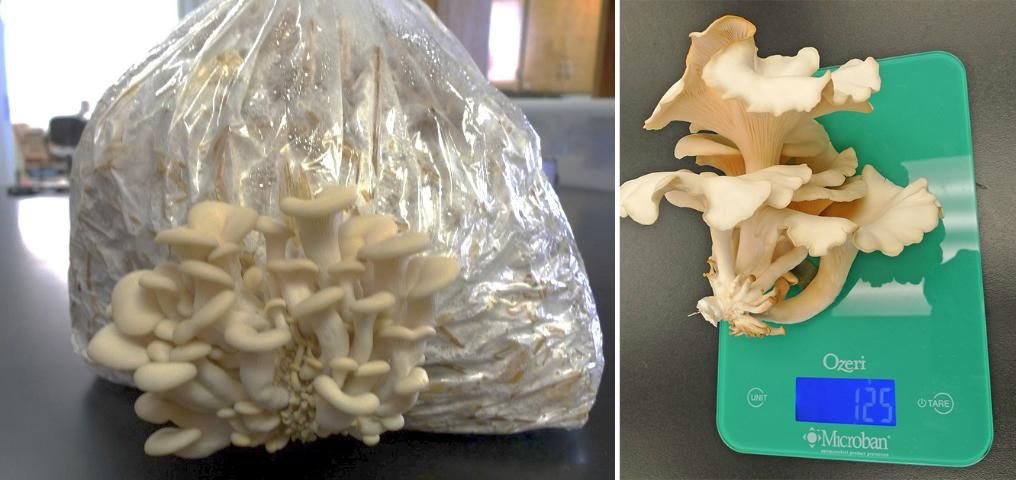
Credit: Chih-Ming Hsu
Note: Protect the bags from crawling and flying insects and rodents. Closely examine the bags for the presence of blue, green, black, or yellow spots, which are indications of contamination and presence of unwanted fungi and/or bacteria. For example, Trichoderma is one of the common contaminants and characterized by rapid greenish growth. Generally, contaminated bags, especially highly contaminated ones, are best removed and discarded. However, partially contaminated bags may yield at least one flush of oyster mushrooms.
Appendix A
Examples of sources to obtain oyster mushroom spawn or oyster mushroom growing kits. There are many others.
- Amazon
- Farmers markets
- Wal-Mart
- Field and Forest Products (http://www.fieldforest.net)
- Cascadia mushrooms (http://cascadiamushrooms.com)
- Fungi Ally (http://fungially.com)
- Fungi Perfecti (http://www.fungi.com/)
- Mushroom Mountain (https://mushroommountain.com)
- Mushroom Adventures (http://www.mushroomadventures.com)
- Unicorn Bags (https://unicornbags.com)
- Spore Trading Post (http://www.sporetradingpost.com)
- Everything Mushroom (http://everythingmushrooms.com)
- MycoSupply (https://www.mycosupply.com)
- Wylie Mycologicals (http://www.midwestgrowkits.com)
- Mushroom Shack (http://www.mushroomshack.com)
Appendix B: References Cited
Kuo, M. 2005. "Pleurotus ostreatus: The oyster mushroom." Retrieved from the http://www.mushroomexpert.com/pleurotus_ostreatus.html
Petersen, R. H. and I. Krisai-Greilhuber. 1996. "An epitype specimen for Pleurotus ostreatus." Mycol. Res. 100:229–238.
Stamets, P. 2000. Growing Gourmet and Medicinal Mushrooms. 3rd Ed. Berkeley, California: Ten Speed Press.
Vilgalys, R. 1997. "Biodiversity of the oyster mushroom Pleurotus." Mushroom News 1997: 32–35.