The tomato is a very popular crop for production in greenhouses. Tomatoes are relatively easy to grow compared to cucumbers and lettuce, and yields can be very high. Demand for tomatoes is usually strong because of the vine-ripe nature and general overall high level of eating quality.
Production of tomato is not without serious challenges, however. This chapter presents the production techniques specific to tomato. Techniques used with certain systems (bag, rockwool, or NFT) will be highlighted separately. The production information is presented as recommended procedures. Minor adjustments might be needed as individual growers require and as research indicates the need. Growers are encouraged to consult a knowledgeable expert prior to making adjustments.
Selection of Cultivars
Selection of the most suitable cultivar (variety) is a prerequisite for successful tomato culture in Florida. Tomato producers should have in mind the type of tomato desired by the buyer (direct to consumer, broker, retailer, etc.). Important considerations are size, shape, and color (red, pink, yellow, or many others in the heirloom category). Important characteristics relative to culture include flavor, high yields, freedom from cracking, disease resistance, high percentage of number one fruits, and freedom from green shoulder. More recently, however, specific production practices or systems have been used to grow determinate types to be grown for a shorter season, perhaps spring or fall only.
Generally, greenhouse tomato cultivars are indeterminate in growth habit (produce flowers and fruit continuously along the main stem as it grows). As a result, the greenhouse tomato plant may reach a length of 30 to 40 feet in a 10-month season.
Modern tomato cultivars are hybrids that are more disease resistant than older open-pollinated types. Hybrid cultivars have replaced open-pollinated cultivars in all large tomato producing areas in the United States. For tomato cultivars to perform well in Florida in a traditional August–June season, they must be able to set fruit well in the winter, have freedom from russet or other cracking disorders, and be free of greenshoulder (solar yellows). New cultivars are continually released by seed companies so growers are encouraged to contact a knowledgeable specialist to determine the availability of newest cultivars. Tomatoes grown in Florida greenhouses from 1980 to 2000 were generally separated into two categories, beefsteak or cluster (on the vine). Since about 2000, the diversity of tomato types grown in Florida greenhouses or other similar protected agriculture structures has increased. In addition to beefsteak and cluster types, a wide array of heirloom, grape, and small cocktail types are now grown. Since many heirloom and other types do not have resistance to common greenhouse diseases, such as Fusarium wilt, grafting onto disease-resistant rootstock has become a more common practice.
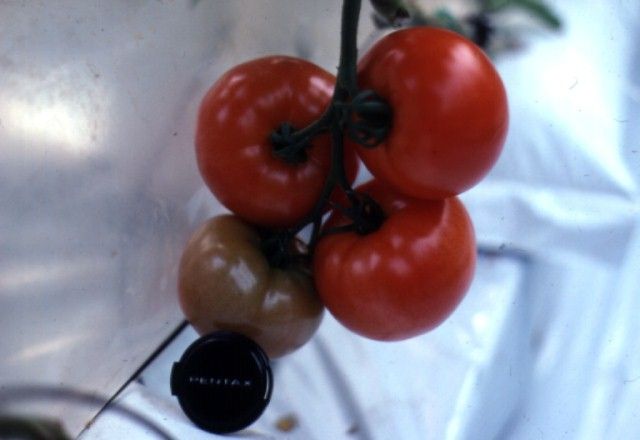
Cultivars in the beefsteak category produce large (6 to 8 ounce) fruit (Figure 1). The fruits are harvested individually and usually packed with the calyx still attached. Beefsteak cultivars have been used for nearly all of the Florida greenhouse tomato production until the late 1990s when a few growers began to produce cluster types.
A new and popular tomato product is a cluster of vine-ripened fruits still attached to the stems (Figure 2).
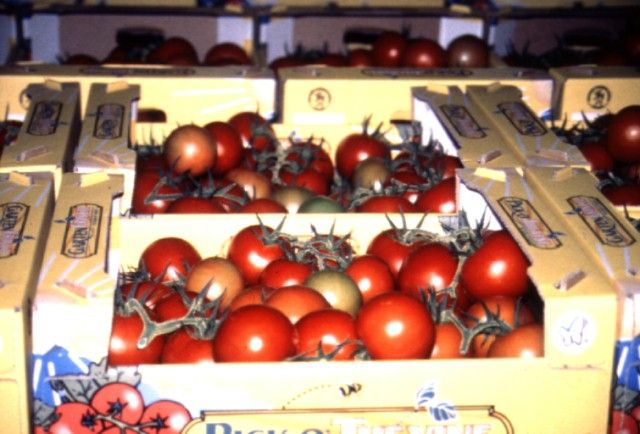
These products are known as cluster tomatoes, cluster-harvested tomatoes, truss tomatoes, or on-the-vine tomatoes. The term "truss tomatoes" is frequently used in Europe, and "cluster tomatoes" in the United States. Cluster tomatoes are currently grown as a greenhouse crop throughout the world. The product has gained preference among consumers because the calyx and stem remain attached to the cluster of fruit and the aroma from the stems gives the product a distinct fresh characteristic. This new way of marketing tomatoes is credited to Italian producers who first began testing in 1989. The popularity of this vine-ripened product quickly swept through the European greenhouse tomato industry, and more recently the North American industry. The large greenhouse tomato industry in Holland began its shift toward cluster tomatoes in 1992. Greenhouse culture of cluster tomatoes is similar to that used for traditional large beefsteak types. Most currently grown cultivars tend to have taller plants requiring very high trellis systems (Figure 3).
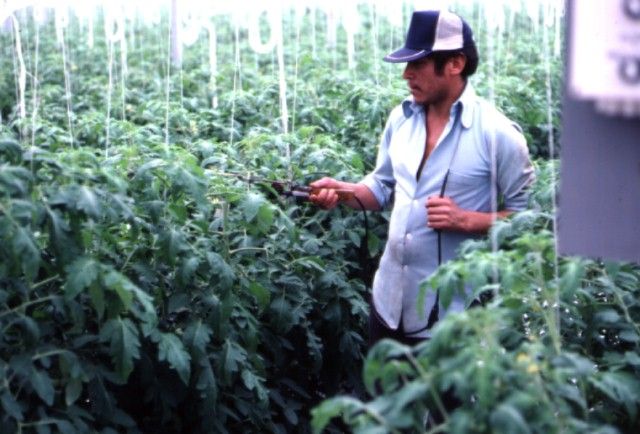
The clusters are harvested by clipping the main cluster stem from the plant. All tomatoes on the cluster remain attached and range in maturity from breaker to ripe. Harvested clusters are usually marketed in a mesh bag, tray pack, or in a single-layer box.
Many cluster tomato cultivars have outstanding flavor and appearance to compete with the best of the field vine-ripe tomatoes sold. Consumers also enjoy harvesting the fruit from the cluster themselves. Outstanding fruit quality and shelflife allow the consumer to pick tomatoes from the cluster over several days. The postharvest quality of the calyx is therefore an important characteristic in the appearance of the cluster.
Most greenhouse tomato crops are grown today with very little pesticide sprays applied to the crop. This is especially true in northern states in the United States and also in Canada. Environmental controls are important in managing diseases, and biological pest control has become a standard practice. Insect and disease management in Florida greenhouses is much more challenging because of the climate conditions and high pest populations. This is given special note because the presentation of the cluster of tomatoes means everything to the rise in popularity of cluster tomatoes. The clusters are generally free of any visible pesticide residue. If routine applications of pesticides are to be required in any production system, inside or outside of a greenhouse, the residue could be a significant detraction. At the least, it would face great competition from the current production free of visible residues. Washing of clusters of tomatoes to remove the residue from the stems and fruit would be very difficult.
The increase in demand for year-round, direct-to-consumer sales has driven the increase in acreage of other specialty types of tomatoes, such as heirloom, grape, and cocktail (small fruited types harvested on the vine). In most cases, the yields of these types are less than the more standard beefsteak or cluster types. However, much higher prices at local markets have caused an increase in production of these types in Florida, not only in standard greenhouses, but also in high tunnels, open shade structures, and even outdoor hydroponic systems with no protected structure. The heirloom category in particular is susceptible to root and crown diseases that have required many commercial operators to implement the use of grafted plants where the preferred cultivar plant top is grafted onto a disease-resistant rootstock. The wide array of tomatoes grown also provides a challenge in plant management in terms of trellising, leaning and lowering, and suckering. Cultivars with tall, open plant habits are much more susceptible to sun burning fruit and may need to be pruned and suckered differently to best manage the plants. As production is moved to outdoor culture, fall/winter seasons only, or in open structures, an additional consideration is to select cultivars with resistance to yellow leaf curl virus, which is transmitted by the silverleaf whitefly. The virus is usually less of a problem in greenhouse production because the whitefly populations can be reduced by excluding their entry into the production area.
The selection of a tomato cultivar for hydroponic production in a greenhouse or other protected culture has become a much more complex decision since early in this century. Making the correct cultivar choices and implementing the appropriate production and trellis systems are critical to success. New cultivars appear every year. Check with knowledgeable professionals or other growers to learn what you need to make the right choices.
Transplant Production
Greenhouse tomato crops are started from transplants to ensure uniform crop establishment (Figure 4). One of the keys to successful tomato crops is high quality transplants, and each grower must be careful that everything possible is done to ensure that the highest quality plants are set in the production house. Disease transmission is the biggest concern. The use of rooted suckers from one's own crop or from someone else's house is a very dangerous practice. The suckers may contain insects such as white flies or thrips or the suckers might be infected with a disease such as a virus. It is extremely risky to start a 9-month crop with questionable plants. Using suckers is a practice that will likely result in disaster sooner or later.
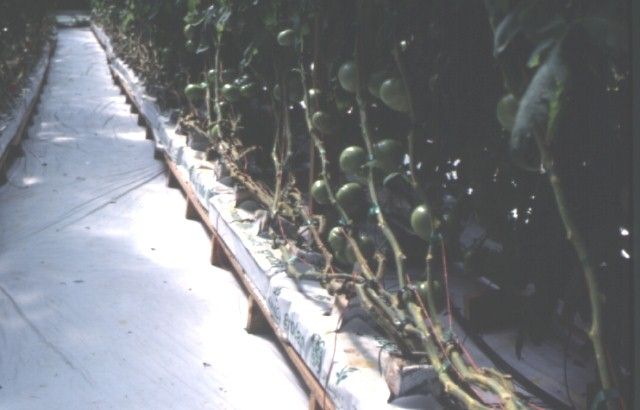
Tomato transplants should be started in a separate transplant house, growth room, or growth chamber. Smaller-size transplant facilities are more economical to heat, cool, and light than a small bench within the large production house. Disease and insect problems are easier to contend with in a small, separate space. All supplies and equipment must be new or completely disinfested of disease organisms prior to seeding.
It is a good idea for each grower to start his own transplants. However, for various reasons (time, space, know-how, facilities, etc.) some individuals might choose to have someone else produce the plants. If this is the case, then the grower needs to be sure that the transplant producer will be providing high quality plants.
For most cultural systems, the transplants can be produced in small cubes made of rockwool or foam material. The root ball can be successfully transplanted to most cultural systems. For peat trough and bag culture, the transplants can be started in peatmix in the containerized cell system.
For the rockwool or foam cube method, it is best to seed into slabs of cubes (75 or more cubes per slab). The slabs of cubes can be placed in plastic trays to facilitate handling. The trays should have drainage holes to remove excess nutrient solution. The cubes come pre-drilled with a seed hole into which to drop a single tomato seed. It is not necessary to cover the seeds; however, a thin covering of perlite or vermiculite might aid in wetting the seed and improving uniformity of emergence. Working only with dry cubes and dry seeds will help the seeding operation. Wet fingers, etc., leads to frustration in getting the seeds into the holes. Growers should plan to seed 10 to 15% extra seeds so that extra plants are available to replace unhealthy or damaged seedlings.
Once a tray is seeded, it should be watered with plain water adjusted to pH 6.0. The trays should be placed on a bench in the germination area taking care to see that all surfaces are clean. If the seeds are to be germinated in a lighted room (growth chamber), at least 1000 to 1500 foot candles of light, 75 to 80F temperature, and ventilation should be provided. All trays should be labeled carefully as to seeding date and cultivar.
Seedlings will emerge in about 7 to 10 days. The seedlings should be moistened with the nutrient solution (Table 1) until they are ready to be transplanted to the production house. About 3 to 4 weeks are needed to produce a minimal size plant (about 4 to 6 inches tall) ready for transplanting. Individual seedlings may need to be separated from the cube mat and spaced out in trays to prevent etiolation (spindly plants).
If the containerized peat-based system is to be used, the soilless mix must be sterile and the trays must have been disinfested with at least 10% bleach solution. Trays that produce plants with a 1-inch-square root ball are optimum for tomato plants (Figure 5).
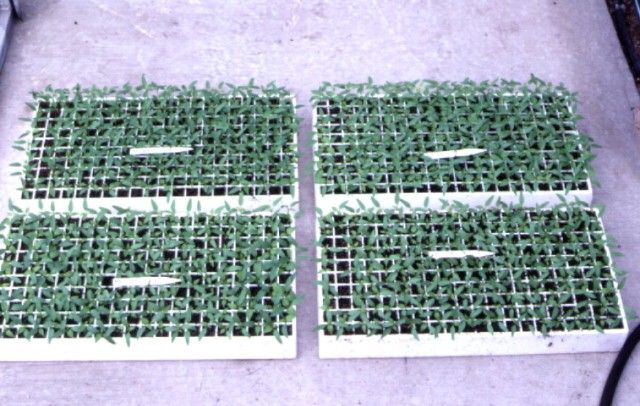
The trays are filled with peat mix and lightly tamped. Using a dibble or pencil, a slight depression ½ inch deep is made into which the tomato seed is dropped. The seed is covered by pinching the hole shut and the mix is dampened with the dilute nutrient solution. The tray is then marked and placed in the germination area. The soil is kept moistened with nutrient solution until the seedlings are ready to transplant.
For bag culture, the seedlings are sometimes removed from the trays and transplanted into a 3- to 4-inch "bottomless" plastic pot or other "bottomless" container and grown to a larger size. At the 6-inch stage, the plants are set into the bags.
Successful crops, however, can be obtained by transplanting the seedling from the tray directly into the bag or trough. This avoids the intermediate stage and handwork. The intermediate stage is used in northern climates to reduce the time in the large production house where it is more expensive to heat than a growth area. In Florida, heating costs are not a problem during the September planting period, so Florida growers can avoid the intermediate step. In fact, excessive temperatures during August in Florida can reduce or delay germination. Growers should place germinating trays near the cooling pad in the greenhouse or even germinate the seed in a cooler indoor location and then move to the greenhouse as soon as germination has occurred.
For the rockwool system, the small cubes need to be set into larger cubes that have a pre-drilled hole that accommodates the small seeding cube (Figure 6). Seeding cubes and planting blocks should be matched for size at the time of purchase so that the seeding cube fits well into the blocks. Blocks can be placed in trays or on a bench to allow for further development before transplanting into the production house. However, growers can avoid the extra growing phase by placing the cube into the growing block and then immediately setting the block onto the slab in the production house.
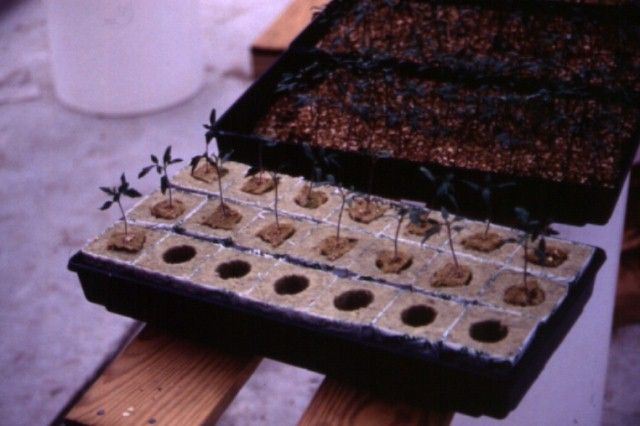
For NFT systems, transplants can be used directly from the seedling cubes without an intermediate transplant stage needed. Some growers produce their transplants in an NFT system instead of the cubes in the tray. The seeded individual cubes are placed on a corrugated surface over which nutrient solution flows, wetting the cubes. This system results in acceptable transplants but is less efficient than the tray system in terms of space and time.
For perlite bags, the transplant can be planted directly through a slit in the perlite bag into the media. The media should have been previously wet and the transplant seedling cube fully buried in the perlite media. Irrigation water from the emitter should be directed at the seedling cube so the cube is dampened until roots grow into the perlite media.
Transplants should be inspected regularly for disease or insects. If needed, only labeled chemicals are applied for control of diseases or insects.
Planting the Crop
Several production systems can successfully be used to produce tomatoes (see section on Production Systems). Crops for each system are started with high quality transplants. General aspects of transplanting tomatoes for each system will be described below.
For the peat trough system, or other similar soilless system (sawdust, rice hulls, etc.), transplants from the containerized trays can be planted directly into the mix in the production house. An average of 3 to 3.5 square feet of production area is provided for each plant. Usually, the production system is set up so that twin-rows of plants are grown with about 5 feet from center-to-center of 2 sets of twin-rows. If there are six sets of twin-rows in a 35 x 110-foot house (not counting the end walkways), then plants placed every 15 inches in a row will result in approximately 3.5 square feet per plant.
Before setting the plants into the soilless mix, water or dilute nutrient solution is applied to thoroughly wet the mix. This operation might need to be done several hours prior to planting. When setting the transplant, a hole is punched in the soil with a trowel or by hand, and the plant set in the hole with the mix firmed around the plant. Applying a cup of dilute nutrient solution to the plant will help firm the soil and provide nutrients to the plant.
After planting, the plants should be observed for any individuals that did not become established properly. They will need to be replaced. Plants will need to be irrigated with dilute nutrient solution as often as it is needed to maintain moisture in the mix. A good rule-of-thumb is to keep moisture at a level where the soil can be squeezed into a clump with only a few drops of water squeezed out.
For the bag-culture system, bags are placed on the cleaned floor of the house in twin-rows and the irrigation system laid out as described in the section on Production Systems. Dilute nutrient solution is applied to thoroughly wet the mix in the bags. It is helpful to apply the solution to bags before drainage slits are cut. The irrigation emitters are inserted and water is applied for several hours to soak the soil. Drainage slits are cut to remove excess water. Bags are then ready to plant.
Bags can be planted by inserting transplants from the containerized system directly into a crosscut made into the bag. The plant is set into a hole, and the media is firmed around the plant. If potted plants are used, then a hole is excavated in the mix to accommodate the lower one-third of the bottomless pot. The pot is set in and water applied to firm the mix around the pot. Roots will emerge from the bottom of the pot and grow into the bag mix. The pot method allows larger plants to be set into the production house, thus reducing the time that the production house cooling or heating systems are needed. This method has advantages in northern climates, but its merits are questionable in the southern climates. Transplanting directly from the seedling trays to the bags is satisfactory.
Once the bags are planted, the irrigation emitters are placed and checked for flow (Figure 7). Dilute nutrient solution should be applied for 20 to 30 minutes to dampen the mix near the plant (Figure 8). The plants should be checked to ensure that all have become established.
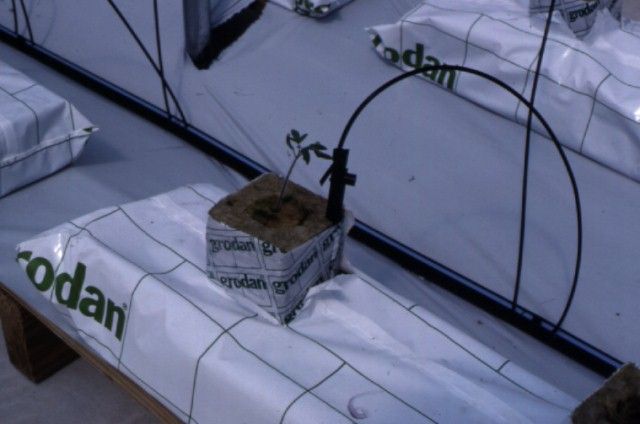
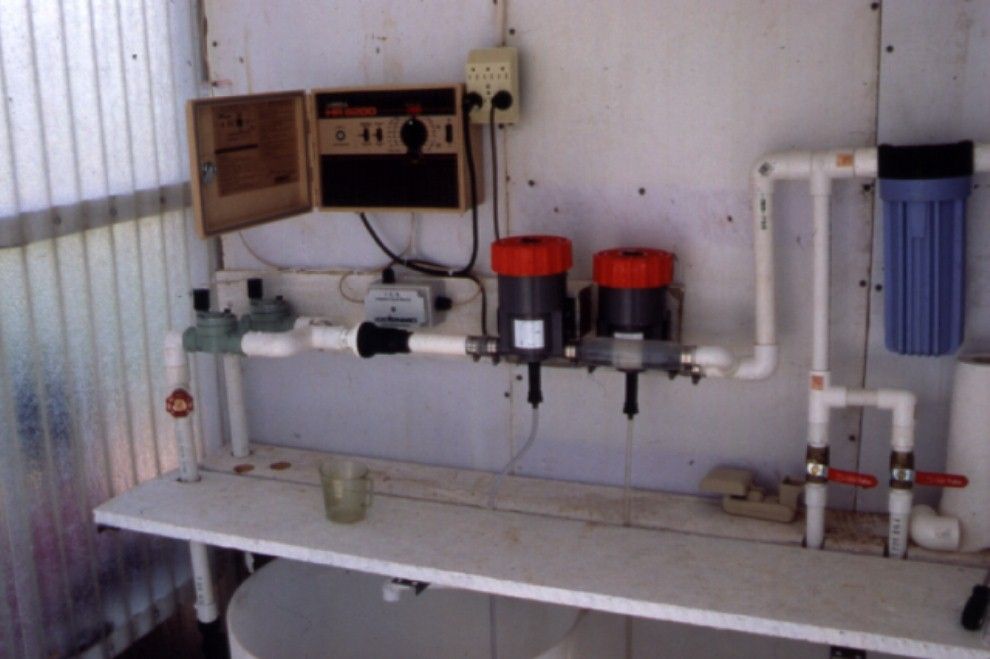
For NFT systems (true NFT and modified pipe NFT), transplants grown in rockwool or foam cubes are placed in the NFT channels. For true NFT, the plastic channel film is then wrapped up around the plant. In pipe NFT, transplants are placed through the round holes in pipes. Like the previously discussed systems, the NFT system should be arranged to provide 3 to 3.5 square feet per plant. Following planting, the plants should be observed to see that none have fallen over.
Irrigation should start when plants are set. Timers for the pipe system should be set for 9 or 10 minutes on and 5 to 6 minutes off. As plants develop, the time sequences will change (see section on irrigation).
Transplants for the perlite and rockwool systems should be about 4 to 6 inches tall. Before planting, the rockwool slabs and perlite bags should be positioned in the greenhouse in twin-rows with the irrigation system readied and the media thoroughly wetted. For transplanting, a cross slash cut is made in the perlite bag or rockwool slab cover where the plant will be placed. The flaps are pulled up to expose the rockwool slab on which the planting block is set. The irrigation emitter is then positioned so that nutrient solution flows through the block then into the slab. Plants set on slabs will develop roots into the slab in 7 to 10 days. Until plants are adequately anchored, spraying operations will require care not to knock over plants. For perlite, the transplant is placed in the perlite media with the seedling growing cube or block buried below the surface of the perlite media. Set the irrigation emitter so that nutrient solution is directed to the seedling media. Dry perlite media will wick moisture from the seedling cube and dessicate the seedling.
Early Season Care
Immediately following transplanting, efforts are directed at monitoring plant establishment and controlling the environment of the greenhouse to maximize plant growth. Since tomatoes in Florida are usually transplanted in September, focus will be on cooling. Greenhouse shading is very important and fans should be set to try to maintain 85°F to 90°F. After transplants have become established, the nutrient solution is changed to the first solution level for new plants. (See Tables 6 and 7 of the chapter on "Fertilizer Management for Greenhouse Vegetables" document number HS787.)
Plants will need to be observed for a tendency to become "bullish" where new growth is dark green, leathery, and rolls downward forming a tight ball of leaves. Plants set under hot, sunny conditions and that are over fertilized with nitrogen are most likely to become bullish. Reducing nitrogen rate to 70 ppm N usually reverses bullishness. Sometimes the tops of the plants curl up in the evening. However, this characteristic is not true bullishness, but is normal.
Plants should be checked frequently (daily) for insects and disease. Growers should learn how to identify the insect and diseases of importance to tomato culture. It is extremely important to control problems early in development, and proper identification is a key. Readers are referred to the section on pest management for information on disease and insect identification and control.
Environmental Control
Temperature management is very important for successful tomato crops. Poorly controlled temperature regimes can increase disease problems and lead to fruit color and quality problems. Tomatoes produce the largest yields of highest quality fruits when day temperatures are in the range of 80°F to 85°F and when night temperatures remain above 62°F, but below 72°F.
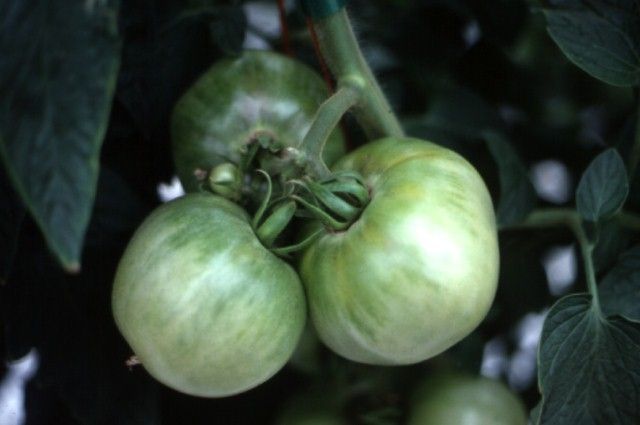
Excessively high temperatures can lead to poor fruit color (orange instead of deep red). High localized fruit temperatures (sun scald or sun burn) from excessive radiant energy on fruits can lead to yellow areas that never turn red. This symptom is referred to as "solar yellows." Unmarketable fruits result. On some cultivars that have the "green-shoulder" genetic background, excessive fruit temperature seems to enhance the greenshoulder expression (Figure 9). These fruits often will not develop uniform red color and the shoulders often become rough and cracked. High temperatures (above 90°F) also result in poor pollination and reduced fruit set.
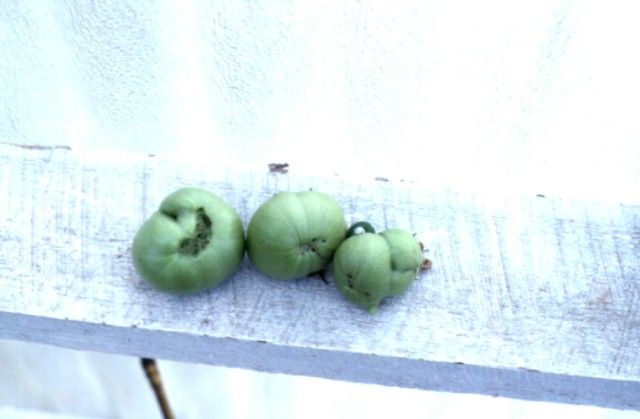
Low temperatures also cause problems with fruit quality. Fruit set and fruit smoothness are sacrificed when night temperatures are maintained below 62°F. Cat-facing is often more prevalent in houses where night temperatures are low (Figure 10). Low night temperatures and low light intensity have been associated with increased incidence of blotchy ripening where fruits fail to form uniform red color. Cool temperatures (below 60°F) enhance the activity of gray mold (Botrytis) disease. Temperatures allowed to drop below 50°F may result in fruit chilling injury where fruits are damaged by the cold temperatures. Low temperatures also reduce flower production.
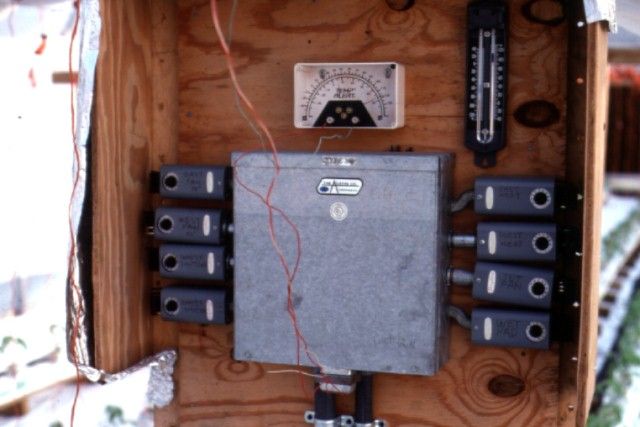
Temperature control is achieved by use of various systems including heating furnaces, exhaust fans, evaporative cooling pads, and shade cloths (Figure 11). Details of these systems are given in Volume 2 of this handbook.
Humidity control is relatively more difficult to achieve in Florida. First, the relative humidity is usually adequate or high in contrast to the extremely low humidity prevalent in northern and desert climates. Controlling humidity is made more difficult by the fact that Florida greenhouses are ventilated frequently, even in the winter. Increasing humidity in winter through the use of inexpensive humidistats that operate the evaporative pad has not been successful because of the poor quality humidistats. They usually are not accurate and are very prone to failure. Furthermore, when the evaporative pad is used for this purpose in the winter, there is often excess cooling because cool air from outside is drawn into the house. If more humidity is required, a fogging system would be a better choice.
Light is usually not a limiting factor for tomato culture except in December and January when cloudy weather can substantially restrict light availability to plants. Light intensity at or above 3500 foot candles should be adequate for winter tomatoes. The major problem in Florida is the associated excessive temperatures that result from excessive radiant energy in fall, spring, and summer.
Low light intensity in winter can lead to increased blotchy-ripening. Fortunately, in Florida these low light periods are usually short in duration so that lighting is not needed. It is a good idea to place white, reflective plastic on the floor of the greenhouse to reflect light back to the tomato plant canopy. This technique can significantly increase the light level in the plant canopy in the winter. In addition, the greenhouse covering film should be kept clean to maximize light reflectance. Another factor in reducing winter light levels is the formation of condensation on the inside of the plastic greenhouse cover. Condensation droplets reduce light transmittance. To combat this problem, growers can choose anticondensate films or use anticondensate chemical materials painted on the inside cover.
Excess light is not a problem in itself but the excessive heat associated with the high radiant energy can cause the high-temperature problems already discussed. During these problem periods, shading of the greenhouse should be practiced. Shading compounds can be painted on the outside of the house or shade cloth systems can be erected inside the house. A shade cloth system inside the house is a good choice since the cloth also reduces the volume of air that has to be exhausted to achieve cooling. Shade cloths can be manually opened and shut or they can be operated automatically through some type of controller operating through a pyronometer.
Shading in Florida can be a 2-tier system where a 30% to 40% shade cloth is used over the house or on the inside on cables following the contour of the ceiling. The second cloth would be a 10% to 20% cloth over the trellis at plant height. Shade systems inside the house on cables have the advantage of being movable so shading can be removed during cloudy periods.
Shade cloths can be made of knitted or spun bonded polypropylene for the least expense for small houses. Plastic sheets are not as desirable and they collect water from condensation. There are several very good commercial shading systems for installation inside a greenhouse, some of which can be automated.
Carbon dioxide (C02) enrichment of the winter greenhouse environment is a question many growers have. Research in northern climates has shown that raising the CO2 level from the normal ambient level of 350 ppm to 1000 ppm often results in increased yield. Effective use of this technology requires that houses be closed for long periods each day. The frequent need for ventilation of the greenhouse, even in winter in Florida, makes CO2 enrichment a very questionable practice. The problem is that high levels of CO2 cannot be maintained for more than an hour or so on most days before exhaust fans are needed.
Pollination
Tomatoes are self-pollinated; pollen from a flower pollinates the same flower. To accomplish pollination, pollen must be loosened from the anthers and dusted onto the stigma. Outdoors, wind assists in pollen dehiscence, but in the greenhouse, the flowers must be vibrated. Without vibration, poor fruit set, shape, and size could result.
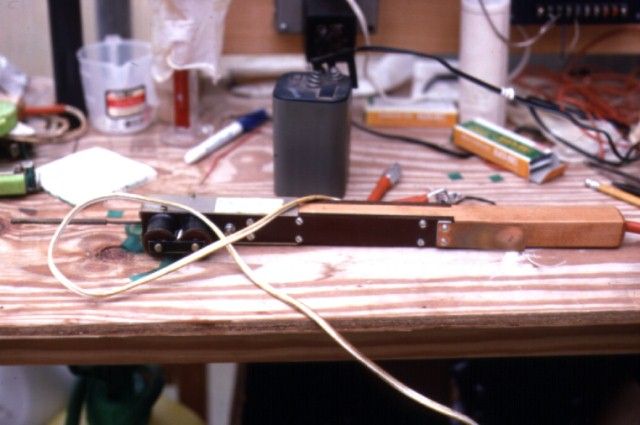
Pollination is achieved by vibrating the flower cluster for a second or two with some sort of electric vibrator. Some beginning growers use back massagers, electric toothbrushes, etc., but one of the most satisfactory tools is a pollinator (battery operated) made specifically for the purpose of pollinating (Figure 12). This equipment results in less physical damage to the flower clusters and young fruits than some of the homemade mechanisms. Another method that seems to work well is a handheld electric leaf blower. This is one of the quickest means to effect pollination. Since it is quick, growers are more likely to use it daily.
Pollination should be done at least every second day. Vibrating is not effective on cloudy days because the humidity prevents pollen dehiscence even with vibration. However, it might be a good idea to pollinate every sunny day in the winter. This will avoid missing several days on end if the "skip-day" is sunny but the next pollination day is cloudy. Therefore, everyday pollinating lessens the problems caused by cloudy days.
Pollination should be done during the daylight hours of 10 a.m. and 3 p.m. Greenhouse humidity is lower at this time so that pollen dehiscence is highest. In addition, fruit size seems to be maximized by pollination during these hours. This is probably related to the increased amount of pollen available during these hours. When pollinating a cluster, it is important to be careful not to touch developing fruits since the slightest scrape can result in a serious fruit scar as the fruit enlarges (Figure 13).
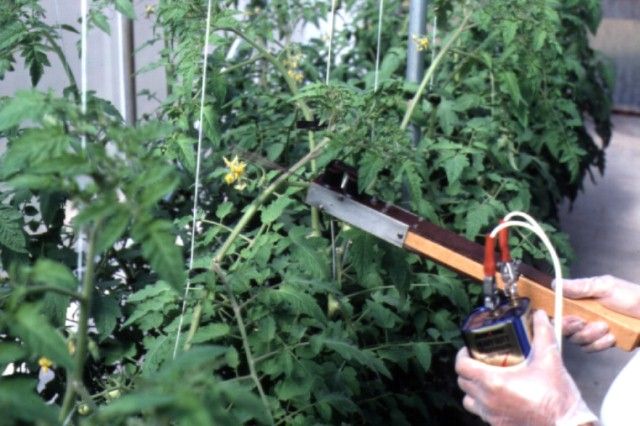
Pollination is time-consuming (about 20 to 30 mins for 1000 plants), and it needs to be accomplished during a fairly rigid time span and with regularity. These problems have caused some growers to devise automatic vibrating systems in the house that vibrate the whole trellis system.
For small-size tomato producers, an effective pollination method is the air-blast sprayer or leaf blower. These blowers can be directed at the flower clusters to vibrate them and loosen the pollen. The blower system is very fast and appears to be as effective as individual flower vibration.
This vibration technique usually consists of an electric cam vibrator attached to the trellis system through a common cable. Automatic vibration requires that extra strong (airplane) cable be used for the trellis so that it can withstand the vibration without snapping. Plants need to be fastened tightly to their strings so that vibration is efficient. The automatic system is then operated by a time clock. Vibration can be set for a few seconds (5 to 10) daily. Another option might be to vibrate once for a few seconds at 11 a.m. and then again at 2 p.m. This technique would help the pollination on days that are foggy in the morning but clear by noon.
Automatic vibration seems to work well for individuals who have tried it, but it has its drawbacks. Since the whole plant vibrates, all flowers on the plant get pollinated, even the very late flowers developing on the lower parts of the stem. These flowers are usually left behind in a hand-harvested house and do not form fruits. In an automatic house, these flowers will usually produce fruit but the fruit will small, poorly shaped, late in maturity, and likely to blotchy-ripen. These problems arise because of competition between these late fruits and the other larger fruits already set in the cluster. As a result, operators who use automatic pollination must pay much closer attention to cluster pruning to remove these undesirable fruits.
Another potential problem with automatic vibration is physical damage to the plant stem from scars where the string and stem rub together. Continual abrasion may provide wounded areas for disease organism attack. Excess vibration periods or violent vibrations also could snap tops out of tender plants. Plants vibrated excessively (more than 60 seconds per day) might slow down in growth rate since vibration is detrimental to the growth process.
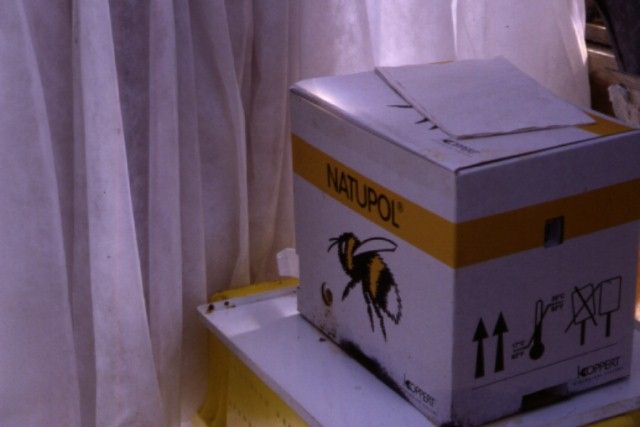
Recently, certain species of bumble bees have been used in greenhouses for pollination. These bees are commercially cultured and supplied to the grower. Bees are economical pollinators for growers with more than one-quarter acre of tomatoes. Hives are usually active for 6 to 10 weeks, and then must be replaced. Hives cost from $100 to $150 each, depending on bee population of hive (Figure 14).
Pruning and Training
Greenhouse tomatoes, as a result of their indeterminate growth habit, require continuous pruning and training to the trellis system (Figure 15). The trellis system consists of wire cable stretched from one end of the house to the other between two anchor posts. The anchors should be metal posts cemented into the greenhouse floor. A counter support, deadman will help strengthen the end posts. The cable is stretched tightly over each row of plants at a height of 8 to 10 feet and fastened on one end to a cable tightener. The downward pull exerted on the cable by a single tomato plant with five or six well-developed clusters of fruit might be 10 to 12 pounds. Therefore, extra supporting posts will be needed every 20 to 30 feet down the row of plants. Cable diameter should be at least 1/16 inch with 3/32 inch preferred.
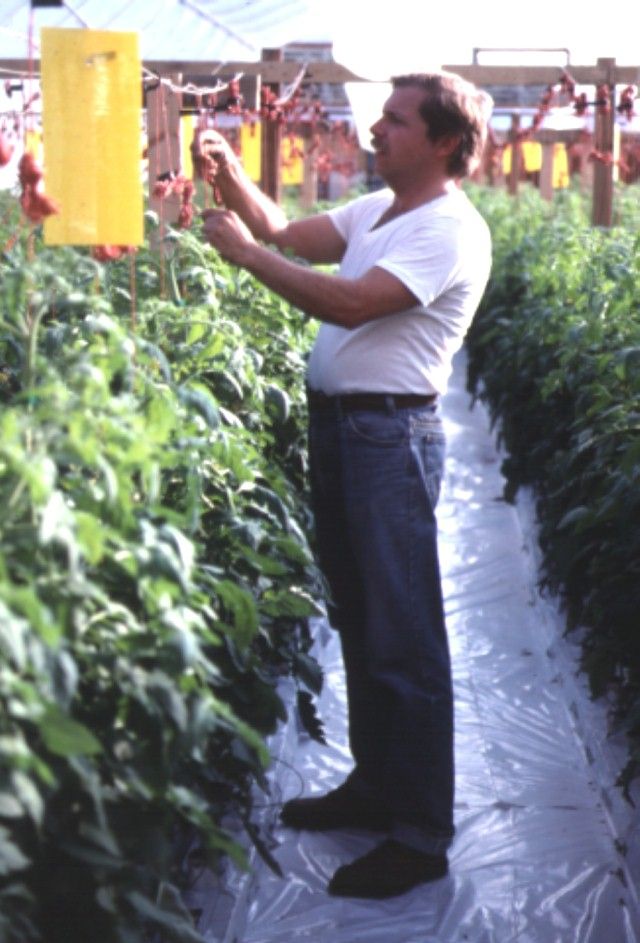
Plants are trained up a string attached to the cable above the plant and extending to the base of the plant. Trellis strings are made up ahead of planting, keeping in mind that a 10-month-old tomato plant might be 30 feet long. Different growers have individual preferences on the technique to use to attach the string to the trellis cable and the resulting facility for quickly releasing the plant to lower it. One system is to roll the extra "future" twine in a ribbon or ball and hang it over the cable with enough extra twine to enable the ribbon to dangle. The downward string is then clamped to the upward string by a plant clip. Another option is to attach the string to the wire via a slip knot that can easily be released. There are also commercially available metal string bobbins on which to wrap the twine and which also function as a hanger, or a notched spool with a hook.
String used for trellising should be strong plastic or polypropylene twine. Polypropylene hay baling twine and tomato staking twine work well and are about the least expensive products available. In addition, they can be secured locally.
To start the procedure of trellising the plant, the lower end of the twine is loosely fastened to the base of the plant. This operation usually starts when the plant has 6 to 8 large leaves and before the plants start to topple.
There are basically three methods to attach plants to the twine. The first method involves using plastic plant clips (1 inch size) available at most greenhouse supply outlets (Figure 16). The twine is clamped in the hinge of the clip, and the clip is snapped around the plant stem just below a large leaf. It is not a good idea to clip at the flower cluster node since the flower cluster stem might be crimped and damaged. Clipping is done every 3 or 4 leaves to keep the plant tops attached to the twine.
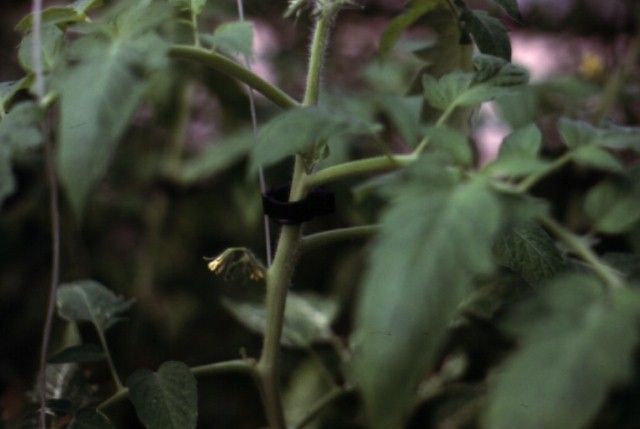
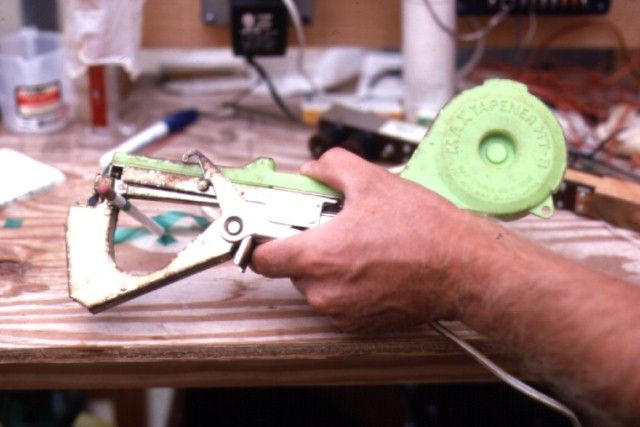
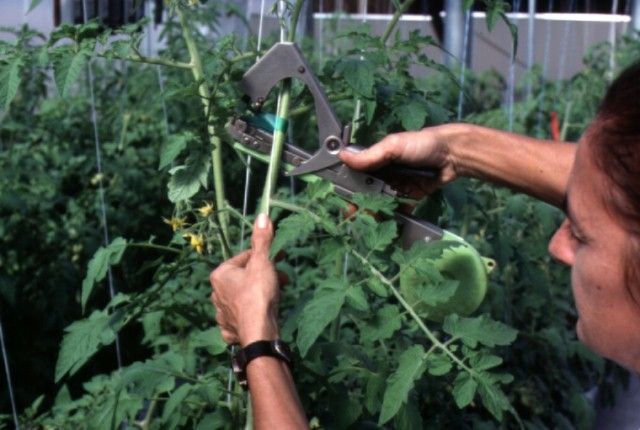
The second system involves the use of a plastic ribbon tape in place of most of the plastic clips (Figure 17). The ribbon can be applied by a hand fastener machine (tapener) that wraps the tape around the twine and plant stem and staples the ribbon (Figure 18). This method is much faster than the clipping method. However some clips still must be used since, in the tape method, the plant stem is free to slide down the twine. A clip fastened just below a leaf is used every three or four tapes to keep the stem anchored to the twine.
The third system involves simply wrapping the plant stem around the twine as it climbs the twine. This system avoids the expense of clips and tape, but is more likely to result in damage to the plant stem. This damage results from the pressure to force the stem to wrap the twine and from the abrasion of the string on the stem.
Greenhouse tomatoes require pruning of all lateral branches (suckers) as they develop to encourage a single leader (Figure 19). Pruning helps in the overall management of the long-term tomato crop. Pruning must be done on a frequent schedule (every 3 to 4 days) so that only small side shoots are removed. Excessive intervals result in large shoots that are difficult to remove, resulting in serious damage to the plant and increasing the likelihood of disease (Figure 20).
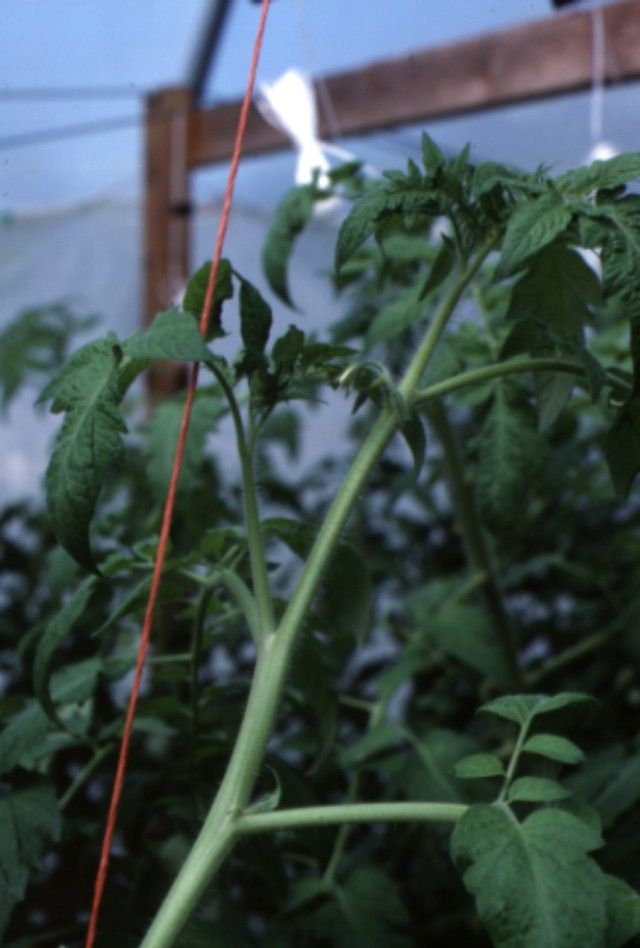
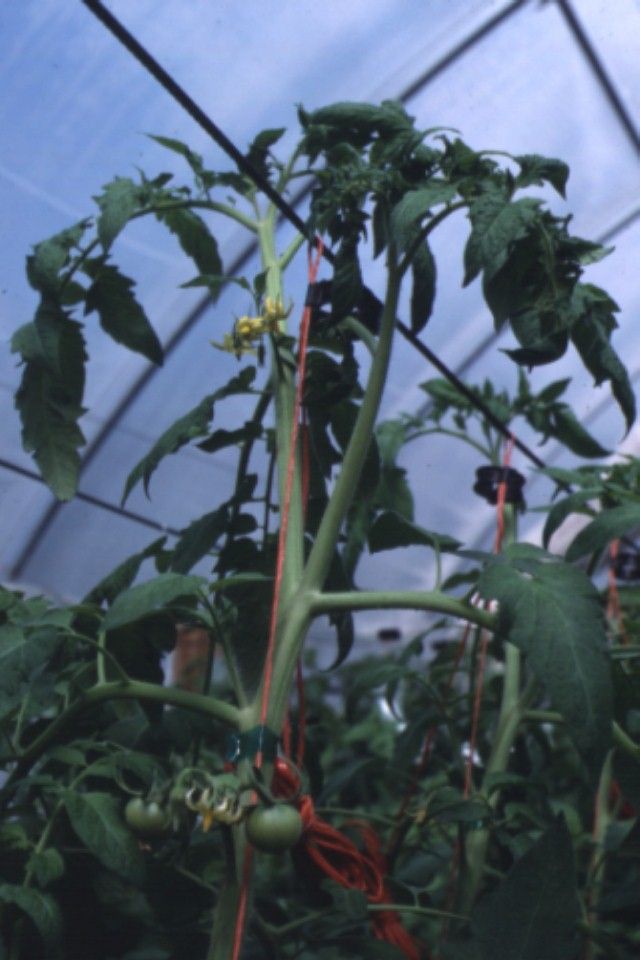
Pruning is best done early in the day when plants are turgid but dry. Suckers snap out of the leaf axils easily, resulting in a clean wound that heals easily. Growers need to be careful to remove only suckers and not the main terminal bud. Sometimes, this is difficult to do when several suckers are present in the top of the plant. During sucker pruning, any leafiness in the flower cluster should be pinched out. Pruning early in the day allows the wound to dry sufficiently during the day making it less susceptible to decay organisms. It is best not to prune during cloudy periods because drying of the wounds is not optimal.
The pruning time should be used to inspect plants for obvious problems, such as disease, nutritional problems, insects, etc. All pruned plant material should be placed in a container or bag and removed from the greenhouse.
Cluster Thinning
Tomatoes produce anywhere from one to about 10 flowers per flower cluster (Figure 21). Under good pollination conditions, about six to eight of these flowers might form fruits. For many cultivars, especially large-fruited cultivars, this is too many fruits to develop properly. If too many fruits are allowed to set on a cluster, fruit size, shape, quality, and uniformity are sacrificed. Shape is sacrificed because excessive numbers of fruits in a cluster cause compression damage to neighboring fruits as they develop. Quality is reduced because of the poor shape and because the small, later-setting fruits are prone to blotchy-ripening. Nonuniformity results because maturity occurs over a long period and may overlap fruits on higher clusters.
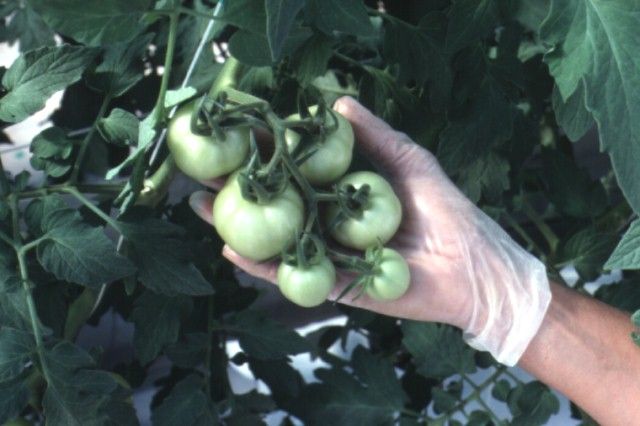
To alleviate these fruit problems, tomato clusters should be thinned to provide an optimum number of fruits per cluster (Figure 22). If the cultivar has the capability to produce high yields of large fruits, and this is the goal of the grower, then clusters should be thinned to three to four fruits. Cultivars with intermediate fruit size can be thinned to four or five fruits (Figure 23). Rarely will leaving more than five fruits in a cluster pay off with the large or medium-size fruiting cultivars. Clusters should be thinned to the lower number of fruits in winter period.
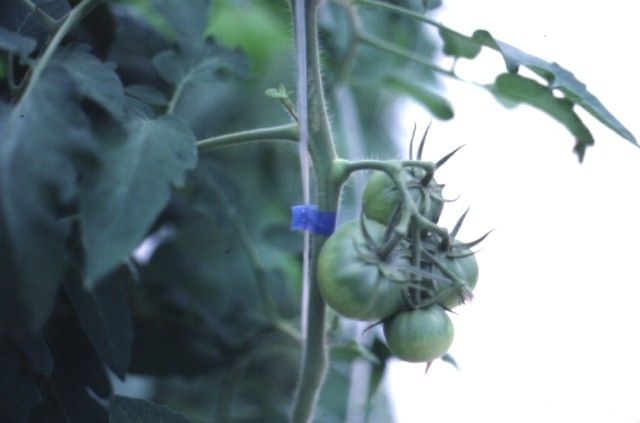
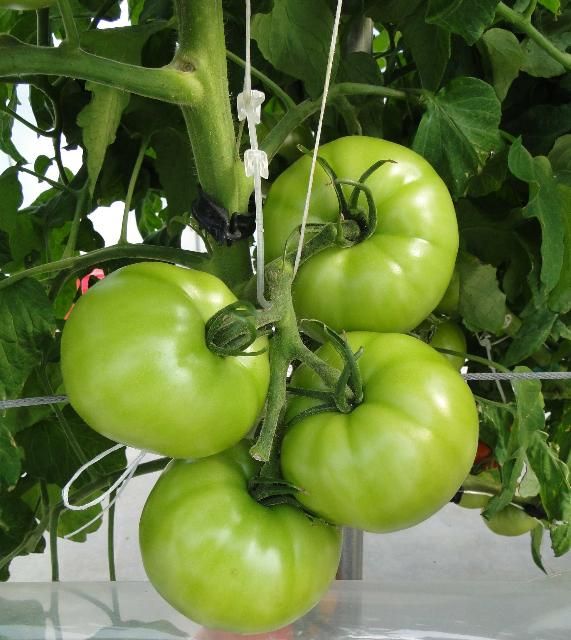
Those cultivars being grown for "cluster" tomatoes where the entire cluster is harvested at once may need some thinning to remove off shape of extra, very small fruits. Small fruited "cluster" tomatoes may not need thinning.
Cluster pruning should be done about once per week. This allows several fruits in a cluster to set so that a choice can be made regarding which to remove and which to leave. The objective should be to thin the cluster to a group of fruits that are most uniform in size and age. Cracked fruits and misshapen fruits should be removed no matter the size (Figure 24).
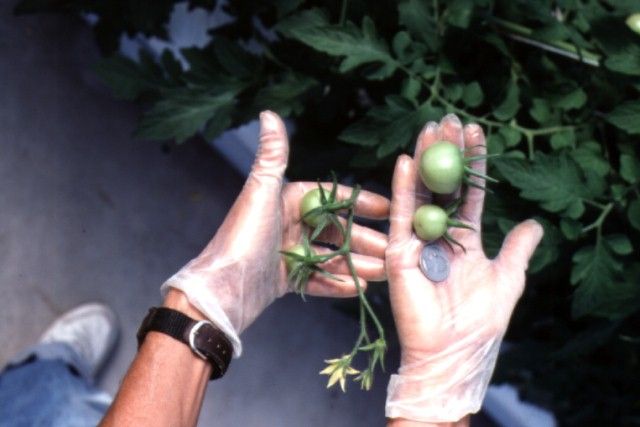
When cluster thinning, workers must be sure to take care not to rub or scratch fruits to be left. Small abrasions early in fruit development result in large scars at harvest. It is a good idea to check clusters a week or two later to remove any small fruits that developed since the previous thinning. If automatic vibrating pollination systems are used, cluster thinning will play a large role in achieving good fruit quality.
Fertilizer
Tomatoes require close attention to fertilizer programs so that high yields of high quality fruit result. Growers should learn to fertilize the crop by the parts per million (ppm) method rather than by the soluble salt method.
General principles of fertilizer management and specific recipes for tomatoes are found elsewhere in this volume. Fertilizer management is a part of the production practices that can be easily managed when the basics are understood. On the other hand, poor fertilizer management can lead to serious quality problems that take long periods to correct. Good management also applies to the methods growers choose to dispose of fertilizer waste water. Risks to groundwater from leaching of fertilizer is an actively debated issue, and greenhouse operations will not be exempted.
Irrigation
Greenhouse tomatoes require large amounts of water, using 1 to 2 quarts of water per plant per day during peak growing periods (Figure 25). Although tomatoes require large amounts of water, they also are extremely sensitive to flooding damage. If tomato roots are flooded (even if only for a few hours) damage to roots occurs and infection by the Pythium root rot organism is possible. Root flooding is an extremely common problem in greenhouses in Florida, especially in the NFT systems in north Florida.
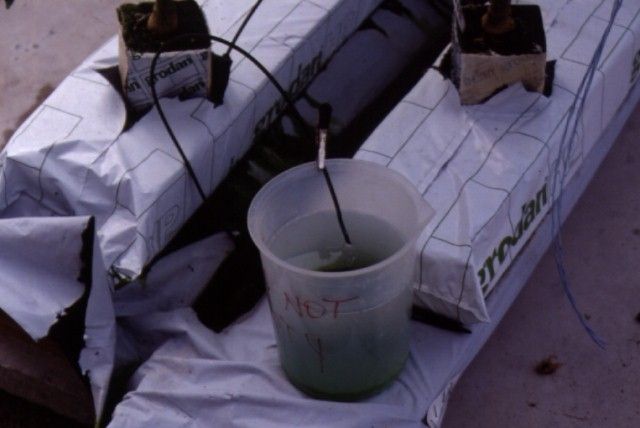
One of the keys to successful irrigation management is correct timing of water application. Amounts and frequency of application change through the season. In non-circulating systems (perlite, rockwool, bag, trough), water applications need to be more frequent as the plants develop. In NFT systems, irrigation frequency might actually need to be reduced, especially in the small 4-inch tubes because roots block the channels causing water to pool and rise up to flood the roots. This is a serious problem and a limiting factor in the 4-inch PVC system.
Details on specific irrigation principles and practices can be found in the section on irrigation elsewhere in this volume. Irrigation management problems need to be taken into account when deciding an investment in a particular growing system.
Root and Leaf Pruning
In addition to side shoot pruning, tomato plants require leaf pruning, and, if in the NFT system, some root pruning. The root pruning is done in the channel or tube discharge end. Roots will grow into the return system and may clog it if not removed. Roots should be trimmed back away from the discharge end of the growing channels.
Leaf pruning is required to remove old leaves from the lower part of the plant to improve air movement under the plants and to make the growing plants easier to manage (Figure 26).
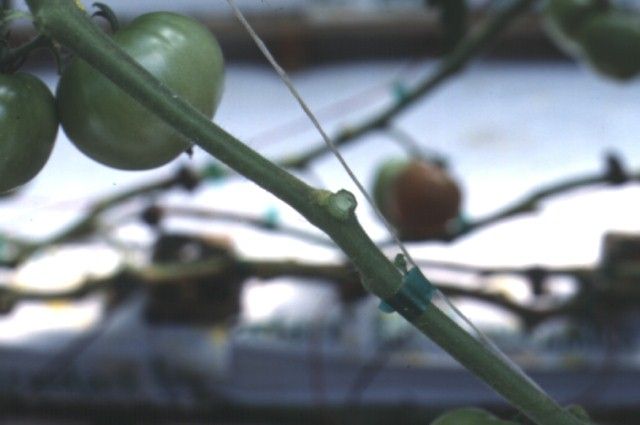
Leaf pruning is done in conjunction with "leaning and lowering" of the plants. As the plant grows, it soon reaches the trellis cable. At this time, the plant needs to be lowered so that it can be maintained within the trellis system. Prior to leaning and lowering, about four to six of the oldest leaves are removed. It is best to clip or hand-snap the leaves from the plant leaving a clean, smooth wound that will dry and heal fast. It is important that fleshy stubs or large wounds do not result because these are ideal areas for disease organism attack. At the same time, old "spent" fruit cluster stems should be pruned (Figure 27). After pruning the leaves, the plant is loosened from its cable clip or tie and dropped down, allowing new twine to dispense from the ribbon. The plant is lowered so that there is an 8- to10-inch air space between the floor of the greenhouse and the lowest leaves on the plant. Usually this results in lowering the plant 18 to 24 inches. The plant is reclipped at the cable.
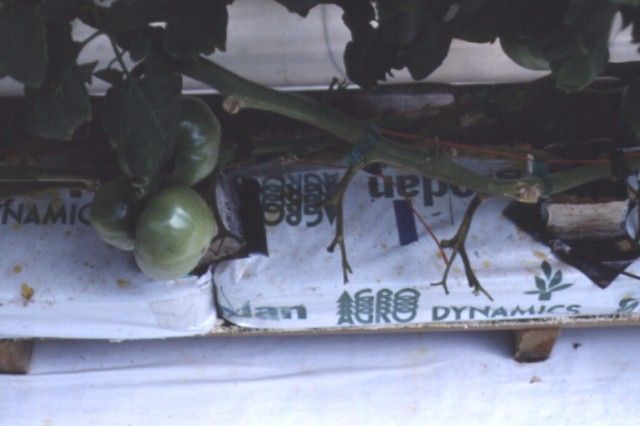
During the process of lowering, the plant is angled along the trellis system on a slant, referred to as "leaning" (Figure 28). After successive lowerings, the plant stems will begin to rest on the greenhouse floor. Leaning and lowering (and leaf pruning) is best done on a frequent basis so that large numbers of leaves do not have to be removed at any one time. Usually every 10 to 14 days will suffice.
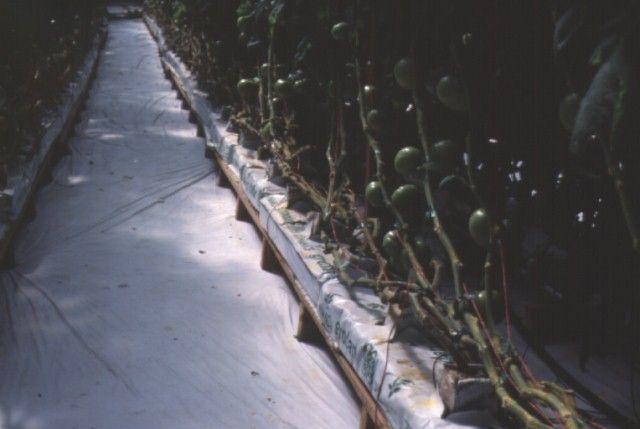
When leaning and lowering, workers must ensure that no damage occurs to the stems such as snapping or crimping. This is a problem as the plants are lowered and angled around the end posts in the trellis system. In addition, fruits should not be punctured by stems as the stems are lowered. After the pruning is complete, all leaves are removed from the greenhouse to a disposal pit away from the house. The floor should be swept clean of any trash and debris from the pruning processes. After leaf removal, but before lowering, is a good time to apply labeled pesticides (if needed) since good coverage can be achieved.
Temperature Control
Tomatoes grow and yield best when night temperatures are 62°F to 72°F and day temperatures are about 80°F to 85°F. For economic reasons, maintaining the night temperatures at 65°F is best. At this temperature, diseases such as Botrytis (gray leaf mold) are reduced, and tomato yields and fruit ripening are satisfactory. Night temperatures should not be allowed to drop below 60°F. At these low temperatures, Botrytis is favored and blotchy ripening is increased.
Growers need to watch the weather especially in the fall and late winter when heating requirements are sporadic. Heaters need to be checked to make sure the pilot lights are operating and that the heaters function properly, even during these sporadic heating periods. Heaters should be cleaned and checked at least yearly for operation efficiency.
Heating can be made more efficient through several factors that growers can control. First, the heaters must be operating correctly and ventilated properly. Improper operation can waste fuel and incomplete burning can produce ethylene gas that can severely damage greenhouse tomatoes.
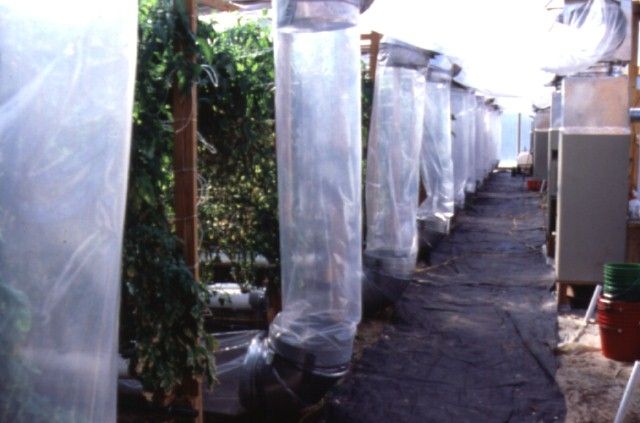
A second factor that can increase efficiency of heating is the installation of ground or floor air distribution of heat (Figure 29). Since heat rises, it does not make efficient use of heat to distribute it in a ceiling distribution tube. Growers can install a manifold duct on the fan and direct the heated air onto the floor via stove pipes and clear polyethylene tubes. The tubes can be placed under the plants between the twin rows. Another factor that can be included here is a heat retention cloth, similar to a shade cloth. The heat retention cloth is installed just above the trellis system and deployed during nights when heating is used. A 1.5 to 2.0 ounce per yard polypropylene cloth can be used for this purpose. Heated air will be trapped in the plant canopy instead of rising into the greenhouse ceiling. Shade/heat retention cloth deployment can be automated and controlled by a computer.
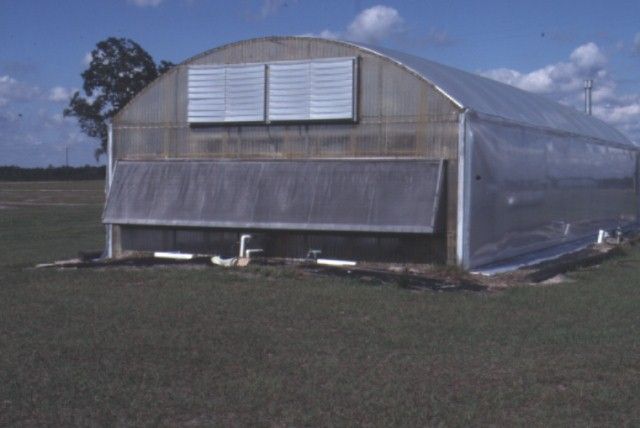
A third factor that helps obtain better growth is the installation of motorized shutter vents for winter ventilation (Figure 30). The shutter vents are installed in the end wall above the cooling pad. With the vents in place, the pad can be closed off completely in the winter and reduce cool air from entering the greenhouse. This helps make night heating more efficient even compared to situations where growers place plywood or styrofoam sheets loosely against the pad on cold nights.
Ventilation and cooling are needed for tomatoes to reduce heat scalding on fruits. Tomatoes perform best if the day temperatures do not rise above 85°F. This temperature is impossible to maintain in the fall and spring without some type of shading.
The majority of cooling on warm, dry days is achieved by exhaust fans and evaporative cooling pads. Shading by greenhouse shade paint or cloths is needed to reduce the heat load in fall and spring when temperature and humidity are high (Figure 31). Shade cloths (white or reflective cloths) installed in the house above the trellis are more flexible than the white greenhouse shading paint. Shading should be present for the planting of the crop and removed about November 1. Spring shading should be installed by the first of March.
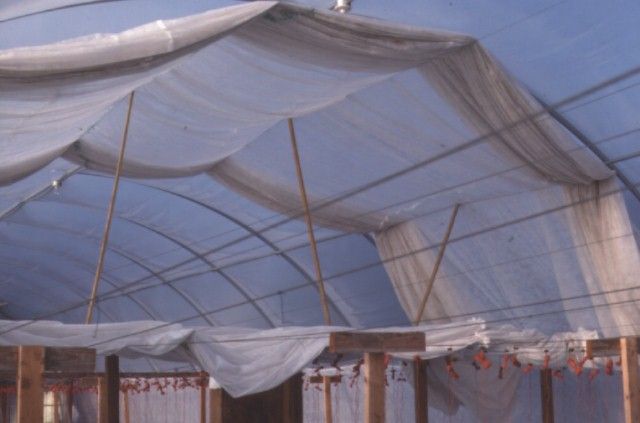
The degree of shading will range from about 20% early to about 50% during the hottest part of the season. The plastic greenhouse cover alone can shade anywhere from 10% to 20% depending on type and age. A system that has worked in Florida involves both a ceiling cloth and a trellis-height cloth. The ceiling cloth is a 30% polypropylene cloth that follows the inside contour of the ceiling suspended on cables. The second cloth over the trellis is a 20% polypropylene cloth. Shading can start with the trellis cloth in early March. By the middle or end of March, the ceiling cloth alone is used. Then both cloths will be needed by the middle or end of April.
Shade cloths can vary from white polypropylene materials to reflective, specially designed shading materials. Polypropylene "row covers," obtained locally, appear to function well and are inexpensive. They are satisfactory for the small grower. Larger growers may be more efficient with a computer controlled, specially designed shading system. A key to effective shading is to cover 100% of the crop area. Placing strips of a cover in the house does not effectively reduce fruit sunburn. Furthermore, complete cover installation reduces the amount of air the fans must exhaust to achieve cooling. This is because, with the cover in place, only air in the plant canopy (below the cover) is exhausted.
Ventilation of the tomato house is still required on most days in the winter. This is where the motorized shutter vents are very useful. During December, January, and part of February, the cooling pad can be closed off. The shutter vents are then opened by thermostat or controller just before the first fan comes on. Cool air from outside is drawn in through the vents rather than the cooling pad. The cool air is drawn in over the top of the crop instead of directly onto the crop if the cooling pad was used. Cold air drawn through the pad directly onto the crop reduces growth and seriously reduces the size and quality of fruits.
More information on heating and cooling system design, operation, and maintenance can be found in Volume II of this handbook. The key for successful tomato production is to begin heating and cooling on a timely basis. Tomatoes perform best when temperature regimes are uniformly controlled. Wide fluctuations in temperatures lead to fluctuations in growth rate and eventually give rise to poor fruit shape, color, and increased fruit cracking. Attention to efficient designs and operation of heating and cooling systems will pay off.
Additional Topics
Other factors in successful tomato production (pest control, costs of production, and marketing) are covered elsewhere in this handbook. Tomato growers should refer to these sections for help on these topics.
Cleaning Up Between Crops
Tomato crops are usually terminated in late June or early July, depending on marketing situations. About 40 to 45 days prior to termination date, the plants can be topped by cutting the plant top off at the trellis cable. Pollination can stop but fertilizer solution application is maintained. Fruits on the vine will continue to ripen and the last ones should be harvested by the projected termination date. Most growers prefer to have at least one month between crops for cleaning the house in preparation for the new crop.
Cleaning the house involves removing the old plants and disinfesting the house and growing surfaces. For all cultural systems, plants need to be removed from the house and dumped in an area away from the house to avoid reintroduction of insects and disease organisms. Burying the plants is best.
In the NFT system, the channels or pipes need to be cleaned of plant debris and roots and disinfested with a 10% bleach solution. Surfaces should be wiped clean of dust and insect honeydew, if present. The sump tank should be flushed and cleaned thoroughly.
For the trough system, all plant material should be removed and the irrigation system flushed and cleaned. Chlorination and/or acidification might be needed to clean out bacteria and/or calcium carbonate scale.
Mix in the trough should be replaced or sterilized with steam or fumigated where labeled chemicals are available for that purpose. Additional mix might be needed to replace that which was oxidized during the previous season.
In the bag system, the house needs to be cleaned and disinfested. The irrigation system needs to be flushed and cleaned as above for the trough system. Ideally, the bags should be replaced, however most research shows that the bags can be used for a second season as long as no disease problems are suspected.
In the perlite or rockwool systems, the bags or slabs are dried out by turning off the irrigation system and letting the plants absorb the remaining water from the media. Plants are then removed and the irrigation system cleaned as above. Rockwool slabs can be used for at least a second crop. Prior to reuse, the slabs are removed from the plastic sleeve and sterilized. New sleeves are placed around the slabs. Perlite bags also can be reused at least once, as long as no root diseases were present the year before. The greenhouse should be disinfested as for any of the above cultural systems.
Related Literature
Hochmuth, R.C., L.L. Leon, and G. J. Hochmuth. 1997. Evaluation of several greenhouse cluster and beefsteak tomato cultivars in Florida. Univ. of Fla. Coop. Ext. Report Suwannee Valley REC 97-3 11pp.
Hochmuth, R.C., G.J. Hochmuth, and M.C. Ross. 1993. Evaluation of Greenhouse Tomato Cultivars for Production and Quality in North Florida in the 1992 and 1993 Season. Univ. of Fla. Coop. Ext. Report Suwannee Valley REC 93-2. 12 pp.
Hochmuth, R.C., G. J. Hochmuth, M.E. Donley, and M.C. Ross. 1992. Evaluation of Ten Greenhouse Tomato Cultivars for Production and Quality in North Florida in the 1991 to 1992 Season. Univ. of Fla. Coop. Ext. Report Suwannee Valley REC 92-22. 17 pp.
Hochmuth, R.C., G.J. Hochmuth, M.E. Donely, and C.W. Morrison. Evaluation of Seven Greenhouse Tomato Cultivars for Production and Quality in North Florida in the 1989 and 1990 Season. Univ. of Fla. Coop. Ext. Report Suwannee Valley REC 91-15. 9 pp.
More Information
For more information on greenhouse crop production, please visit our webiste at http://smallfarms.ifas.ufl.edu [January 2012].
For the other chapters in the Greenhouse Vegetable Production Handbook, see the documents listed below:
Volume 1: Introduction • Financial Considerations • Pre-Construction Considerations • Crop Production • Considerations for Managing Greenhouse Pests • Summary
Volume 2: Physical Greenhouse Design Considerations • Production Systems • Other Design Information Resources
Volume 3: Preface • General Aspects of Plant Growth • Production Systems • Irrigation of Greenhouse Vegetables • Fertilizer Management for Greenhouse Vegetables • Production of Greenhouse Tomatoes • Greenhouse Cucumber Production • Greenhouse Nematode Management • Alternative Greenhouse Crops • Vegetable Insect Identification and Management