The purpose of this article is to help producers and herd managers improve milking management and produce high-quality milk. The article may be used as a training tool for new and existing employees. This publication is designed for dairy farm producers and herd managers. Consistent and efficient milking practices can improve herd performance and milk quality. The main goal of a proper milking management program is to harvest high-quality milk by gently, quickly, and completely milking clean and dry teats, while minimizing mastitis infections and reducing stress on both cows and parlor workers.
The first step in having a successful milking management program is to properly establish and understand a standard milking routine. Training parlor workers in following proper milking procedures is critical to maintaining maximum milk quality and can frequently prevent the inconsistent milking practices that can negatively affect production and udder health.
Cow Management and Mastitis
Proper environmental management and cleanliness of the cows, the parlor, and the milking equipment are major determinants of both milking efficiency and control of intramammary infections.
Mastitis infections can be caused by either contagious or environmental pathogens. Contagious pathogens can be transferred from cow to cow during milking, whereas environmental pathogens can infect cows immediately after milking, while the teat canal is still open. The use of gloves, pre- and post-milking disinfection of teats, single-service towels to dry teats, backflush systems, and proper wash and disinfection of milking equipment are recommended to decrease the spread of contagious pathogens and occurrence of new intramammary infections.
Environmental mastitis often affects herds that have controlled contagious mastitis infections. A clean environment is essential to prevent environmentally caused mastitis. Cows, pens, and bedding materials should be kept clean and dry to minimize the exposure to environmental pathogens and to reduce the risk of development of mastitis. Additionally, following proper milking procedures is a major step in reducing the occurrence of new environmental mastitis infections.
Cow Handling and Parlor Environment
Cow handling and the milking environment are important determinants of milking efficiency. The milking process starts as cows are moved from the barn to the milking parlor. Cows should be handled and brought into the parlor calmly and gently. The use of physical force or yelling will cause the cows to become stressed and afraid, resulting in rapid movement and increasing the chances of cows slipping and defecating. To decrease stress before milking, time in the holding pen should also be minimized. When cows are stressed, adrenaline is released into the bloodstream. The release of adrenaline within 30 minutes of milking interferes with the release of oxytocin and disrupts the normal milk letdown. Without normal, timely milk letdown, an increase in milking time is observed and the amount of milk harvest may be reduced.
Pre-Milking Preparation
Pre-milking preparation is the completion of the required steps to prepare the udder for milking and to activate the milk letdown reflex. Milk is stored primarily in the alveoli, the secretory tissue of the udder, and the efficient removal of milk is accomplished by coordinating milk letdown with milking unit attachment. Milk letdown is a combination of both oxytocin release and the stimulus from the mammary gland nervous system providing feedback to the muscles surrounding the secretory tissue of the mammary gland to release milk for subsequent harvest.
Step-by-Step Milking Procedures
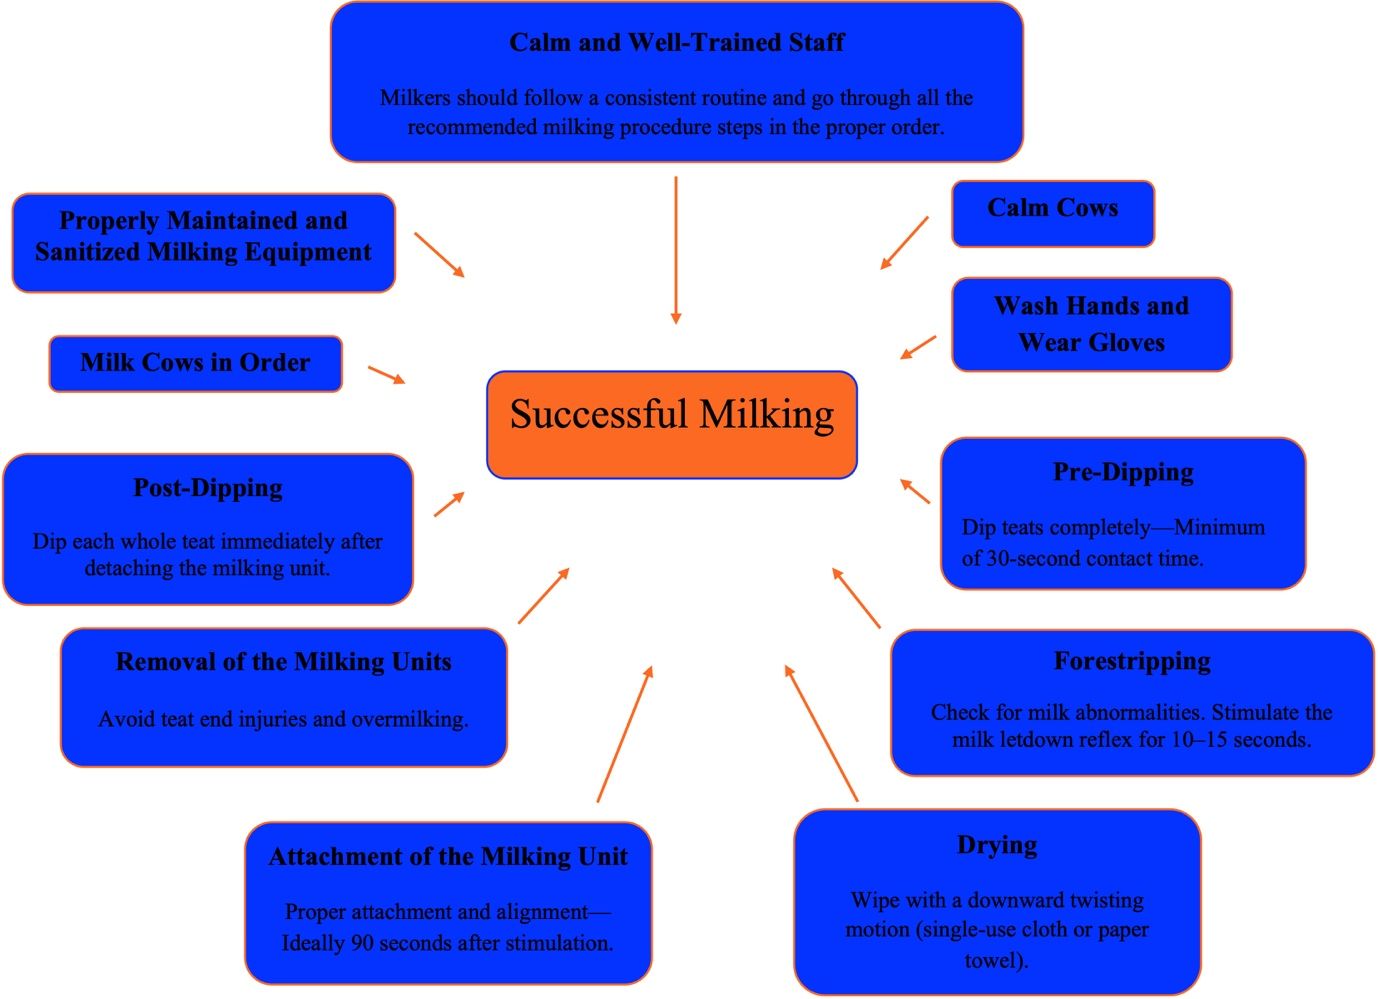
It is important that all operators responsible for milking follow a consistent routine and go through all the recommended milking steps in the proper order.
1. Wear Gloves

Credit: Izabella Toledo, UF/IFAS
Contagious mastitis-causing pathogens may live on the hands of milkers and can be transmitted to the teats of cows during milking. Before milking, hands should be thoroughly washed with soap and water to help prevent pathogen transfer. In addition, latex or nitrile gloves should be worn during milking to minimize the spread of contagious mastitis between cows. Throughout the milking process, hands should be disinfected, and gloves should be cleaned and changed regularly.
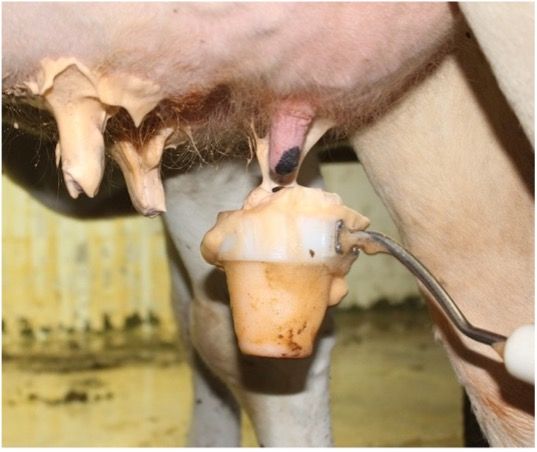
2. Pre-dip
Credit: Izabella Toledo, UF/IFAS
Pre-dipping is used to eliminate pathogens on teat ends prior to milking. All four teats should be pre-dipped entirely with a sanitizing solution. To work properly, pre-dipping solution should have at least 30 seconds of contact time with the teats.
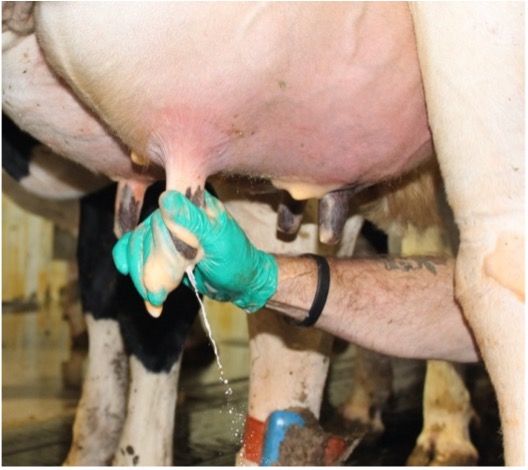
3. Forestrip
Credit: Izabella Toledo, UF/IFAS
Forestripping involves manually removing a few strips of milk from each teat and can be accomplished either before or after pre-dipping; however, it must occur before drying the teats. The proper method of forestripping is to express 2–3 strips of milk per quarter. This process allows the milker to check for any signs of mastitis and abnormal milk, including flakes, clots, or watery appearance. Also, forestripping helps to stimulate the teats and udder and initiates the milk letdown reflex. Effective stimulation helps to increase milk flow rate and reduce milking unit on-time. Forestripping should be managed by using a strip cup or by stripping milk onto the floor. Milk should not be stripped into the hand or a towel because this would contribute to the spread of mastitis between teats and between cows. To allow for adequate stimulation, this task should take about 10 to 15 seconds per cow.
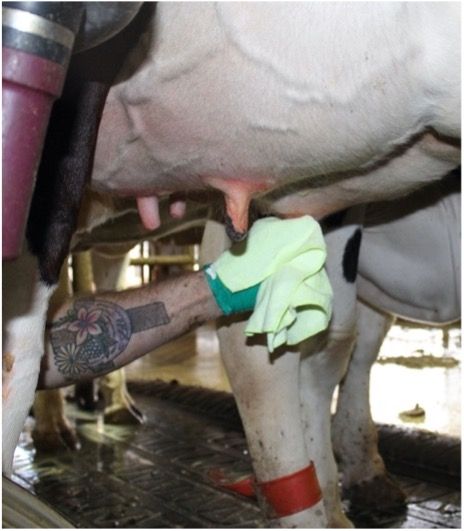
4. Dry
Credit: Izabella Toledo, UF/IFAS
The most important portion of the teat disinfection process is the complete drying of teat ends. A single cloth or paper towel should be used to wipe each teat using a downward twisting motion to dry and remove any debris, dirt, and pre-dip solution residue that may be present on the teats. Drying the teats also prevents possible contamination of the milk and teat by skin bacteria present in the water running off the cow’s udder. Water acts as a way for the bacteria to enter and contaminate the mammary gland. Additionally, milking machines are designed to stay securely attached to a dry teat. Air drying the teats is not an effective substitute for manual drying with individual cloths or paper towels. Keep in mind that the ultimate goal of every good mastitis control program is to prevent the introduction of bacteria into a healthy mammary gland. Ultimately, poorly dried teats usually result in increased incidence of mastitis.
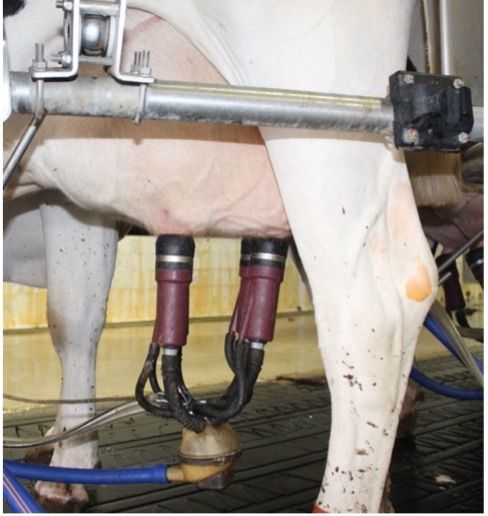
5. Attach the Milking Unit
Credit: Izabella Toledo, UF/IFAS
The most important element of the attachment process is timing. The time from the beginning of the cow preparation process until unit attachment is referred to as the prep-lag time, and it is critical in achieving optimum milk letdown. Blood oxytocin levels peak at about 60 seconds after initial stimulation of the mammary gland. The goal is to coordinate milk letdown with milk unit attachment. Therefore, to maximize milking efficiency and milk flow, units should be attached within 1–2 minutes after teat stimulation (forestrip/dry). Prep-lag times lower than 60 seconds or greater than 3 minutes can result in excessive milking time and/or reduced milk yield. Good milk letdown occurs when the milk flows immediately after the milk unit is attached.
Attachment should be done carefully to minimize the entry of air into the milking system. Adjust the milking unit to hang squarely beneath the cow’s udder and arrange the milking unit and hoses to avoid any twisting. The unit should be aligned so that the claw outlet points between the cow’s legs. The milking unit should be checked and adjusted to prevent liner slips throughout the milking process. When the milking unit is not aligned properly, teat cups may slip during milking and too much milk will remain in the udder after milking. Liner slip has been associated with cross-quarter contamination. When the teat cup liner slips, small droplets of milk may be forced back toward the end of the teat. If these droplets of milk contain mastitis-causing organisms, they may enter the udder and result in a new infection. Reattach units that fall off as soon as possible so cows are completely milked.
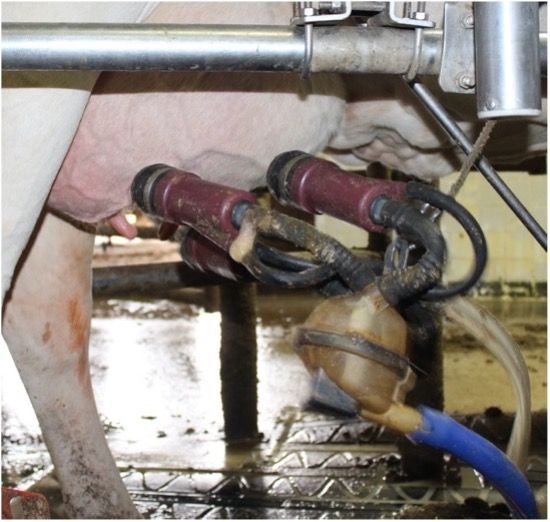
6. Remove the Milking Unit
Credit: Izabella Toledo, UF/IFAS
The milking unit may be removed manually or with automatic take-offs. With either process, care should be taken to avoid overmilking, which can increase the incidence of liner slips and lead to teat end damage. When automatic take-offs are used, the unit settings should be adjusted to ensure they do not stay on too long. Automatic take-offs are usually recommended because they do a consistent job of removing the milking unit. When removing teat cups manually, be sure to shut off the vacuum before removal. Complete milking should take 4–6 minutes per cow for most cows. Observe the milk flow carefully or use milk flow indicators to determine the ideal moment for shutting off the milking unit. Removing teat cups without shutting off the vacuum can lead to teat-end tissue damage, which allows invasion of bacteria from the environment into the mammary gland, resulting in increased incidence of intramammary infections. It is normal to have about 2–4 cups of milk left in the udder at the completion of milking. Properly stimulated cows milked with correctly functioning and attached milking units should not have excessive amounts of residual milk in the udder.
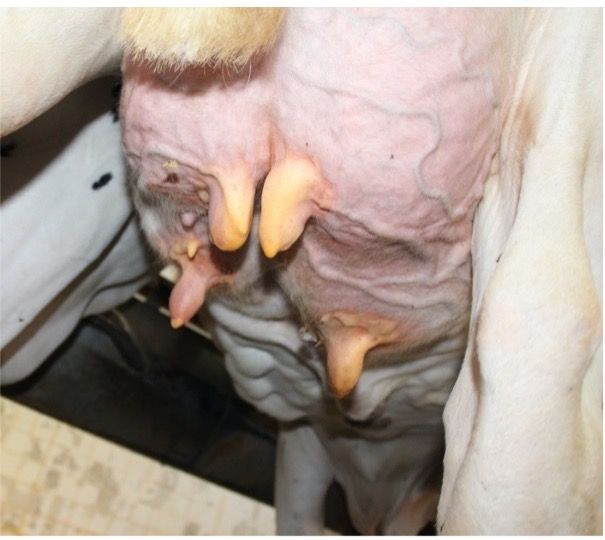
7. Post-dip
Credit: Izabella Toledo, UF/IFAS
Dip each whole teat with post-dipping solution immediately after detaching the milking unit. This is an important step in controlling contagious mastitis. An effective post-dip kills organisms on teats and prevents pathogens from entering the teat canal. To prevent new intramammary infections, ensure that the cows remain standing for at least 30 minutes after milking is completed.

Credit: Izabella Toledo, UF/IFAS
Milking Cows in Order
If proper milking procedures are not followed, a contaminated cow can spread bacteria to uncontaminated cows during milking. Milk healthy cows first, cows with questionable health next (i.e., recent purchase, post-treatment), followed by cows with chronic mastitis, high somatic cell counts, and/or signs of clinical mastitis.
Staff Training
One of the biggest challenges to improving parlor efficiency and controlling and preventing mastitis infections is the knowledge, understanding, and motivation of the people in charge of milking. The first step of a successful milking management program is to properly establish and understand the standard milking routine. Milking standard operating procedures (SOP) must be followed by all milkers and parlor supervisors and should be available and visible in the parlor at all times. In addition, a proper milking procedures routine training should be offered to all milkers and parlor supervisors every 3–4 months in order to keep the milking procedures fresh in the milkers' minds at every milking. Somatic cell counts, mastitis cases, and bulk tank bacterial cultures should also be reported and evaluated frequently. Taking the time to ensure that all employees responsible for milking are properly trained and are following the milking procedures consistently will secure continued production of a high-quality product and can frequently prevent the inconsistent milking practices that can negatively affect production and udder health.
Summary
The goal of a good milking management program is to optimize milking efficiency and milk quality. Minimal stress of the cows during movement into the parlor and during milking combined with consistent milking procedures contribute to maximum production and decreases in the occurrence of intramammary infections. Always milk clean, dry, and well-stimulated teats and ensure that milking equipment is well sanitized and operating properly.
*This document is accompanied by three brochures that aim to optimize milking efficiency and milk quality by illustrating proper milking procedures and mistakes that we do not want to see in the parlor and the barn.
Credit: UF/IFAS