The fundamentals of managing pests in protected structures are very similar in many respects to managing pests in field crops. The grower must still develop a management plan, assembling pertinent information for identifying, monitoring and controlling specific pests before planting. Integration of several pest management strategies into a comprehensive program is still critical. Recognition of seasonal patterns and anticipation of associated pests are important for timing control measures. Unlike field pest management, conditions within a protected structure can be modified to a certain degree to prevent, delay, or even mitigate pest issues. However, it's important to recognize that conditions that discourage one group of pests can often favor another. Protected structures can be screened to physically exclude many insect pests (Figure 1), but screens also shelter insect pests inside the structure from enemies. Structures with non-porous tops like greenhouses (Figure 2) and high tunnels (Figure 3) can mitigate the effect of rain on many bacterial and fungal pathogens that require free moisture for infection and movement, but without proper ventilation these same structures will increase humidity to a degree that offsets these gains or encourages other diseases such as Botrytis and powdery mildew. While the use of soilless media can eliminate many detrimental soil-borne pests and pathogens that plague field production, some soil-borne pathogens produce spores that can still be problematic in a protected structure even when the pathogen source is outside the structure.
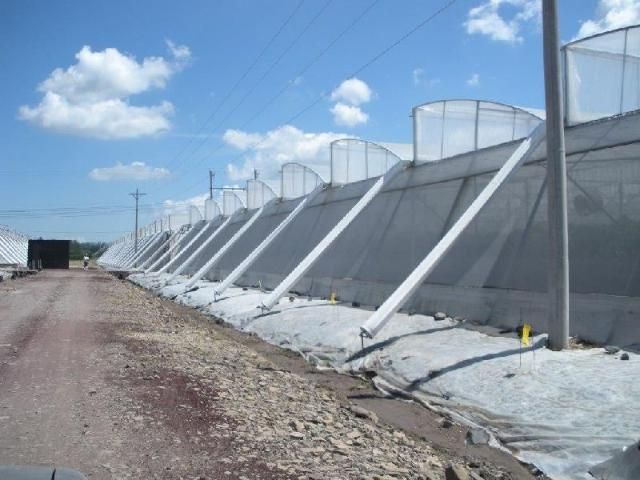
Credit: Bielinski Santos

Credit: Bielinski Santos
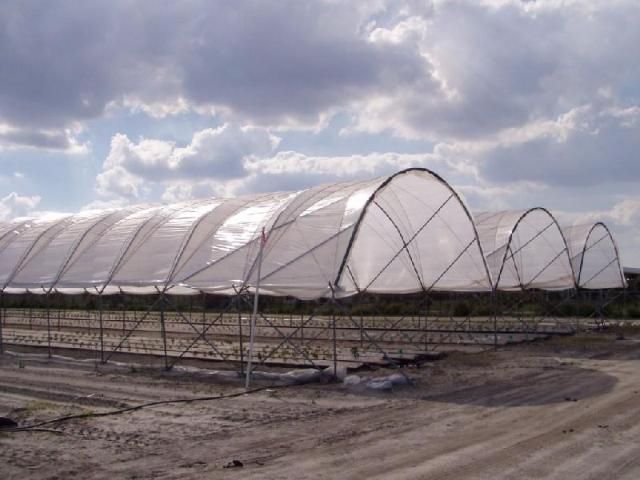
Credit: Hugh Smith
There are also greater limitations on the use of pesticides in protected structures. Depending on the type of structure, there may be fewer registered pesticides available compared to the array of options available for field production. Some materials cannot be applied in structures because of worker safety concerns. Other materials are not permitted because they leave pesticide residues. Depending on the crop and production strategy, production in a protected structure can take considerably longer than field production (Figure 4). These longer production periods sometimes present a problem because many pesticide labels have restricted application frequencies and maximum rates that were developed for commercial field production. The restrictions on pesticides that can be used and the potential for prolonged production mean that producers must plan carefully to ensure proper pesticide rotations so that pests in protected structures don't become resistant to pesticides. Fortunately, protected structures offer unique opportunities to use parasitic and predatory arthropods (Figure 5A–D) as well as other biological control strategies to offset the use of conventional pesticides.
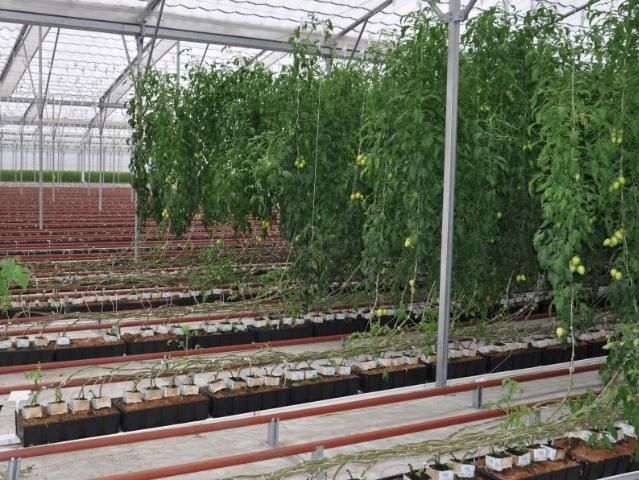
Credit: Hugh Smith
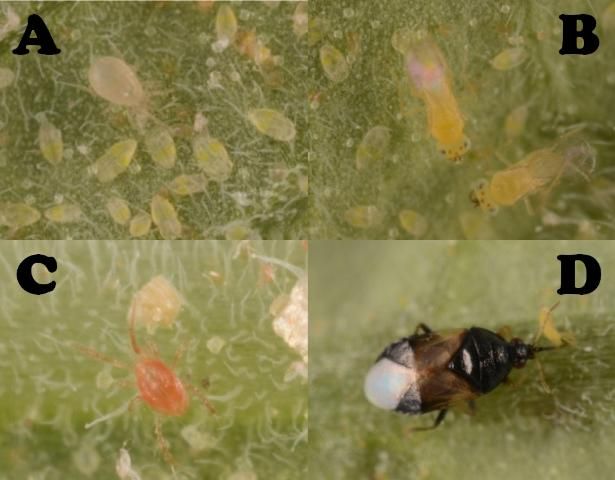
Credit: Lyle Buss
I. Prevention
As Henry de Bracton wrote, "An ounce of prevention is worth a pound of cure." The key to successful pest management is to prevent the problem from occurring.
- Avoid production near obvious sources of infestation, such as fields in which the same crop or a related crop is being produced. Be sure to destroy crops from the previous season well in advance of production, and ensure that all residues are buried to destroy possible sources of bacterial, fungal, and viral pathogens. This also includes weeds and volunteer plants near the structure that can be sources of insect pests and plant pathogens.
- Sanitation is important and begins before planting. Many products including—alcohol, sodium hypochlorite, or ammonium-based materials—can be used to sanitize structures, pots, equipment, and other reused materials.
- Make plans to sterilize your growing medium. Treat soils for common soil-borne pests and pathogens, either by fumigation or other cultural methods (solarization, steam pasteurization, or flooding). If you re-use a soilless media, it's safest to sterilize it before you plant your new crop.
- It is equally important to start with plant materials (seed, transplants, and cuttings) that are healthy and free of pests and disease (Figure 6). "Seedborne" plant pathogens, as their name implies, are carried on seed, and there are many of them, so it is wise to purchase seeds only from reputable vendors. Seed can be treated with hot water or sodium hypochlorite to destroy pathogens on the seed surface, a practice that is especially important if your intention is to produce seed for in-house use. Seed can also be treated with certain fungicides before you plant to reduce problems with certain soil-borne pathogens, such as those caused by species of Pythium, Phytophthora, or Rhizoctonia. If you initiate crops from vegetatively propagated materials, purchase materials that have been tested for common pathogens (bacterial, fungal, and viral) during the propagation process.
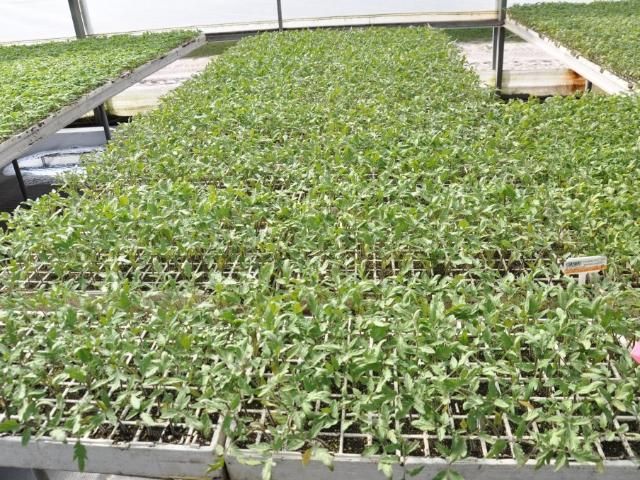
Credit: Hugh Smith
- Many types of insect-exclusion material will prevent the entry of insects such as whiteflies, thrips, aphids, and mites into protected structures. Materials that reduce UV light have been successfully used to reduce damage by whiteflies, aphids, and thrips in protected structures in Israel and California. These insects apparently use UV light to navigate and are deterred from colonizing areas with insufficient UV light. The advantages of insect-excluding and UV-absorbing materials are reduced when walls and ceilings must be raised or opened for ventilation.
II. Scouting and Monitoring
The success of any pest management strategy rests on timely identification of the pest or disease problem. Depending on the size of the operation and types of plants grown, the goal is to examine the majority of plants twice a week. If the operation is too large to examine every plant, follow a scouting plan that will ensure that different sections of production are examined each time. Basic scouting tools include a 10-40x hand lens, pocket knife, or pruning shears, and a scouting sheet (Figure 7). Scouting sheets are used to record the number of plants examined, pest or beneficial arthropods observed, and possible disease symptoms. It can be useful to carry a roll of colored tape to mark infested or questionable plants in order to find them again easily (Figure 8), and small (quart or gallon sized) ziplock bags for collecting diseased plant samples. In addition to examining plants for pests, striking the plant with the palm of your hand toward a light-colored surface will dislodge many insect pests and reveal the presence of minute or cryptic arthropod pests. The back of a clip board can be used as a striking surface. Any plant displaying a departure from normal growth, such as symptoms of wilting (Figure 9), stunting, distorted growth (Figure 10), general yellowing (chlorosis), or distinct yellow, brown, or black spotting of the plant tissue (lesions) (Figure 11A–D), or premature or abnormal fruit ripening should be noted and marked for closer inspection. Published guides to your area and crop are available and are a valuable reference tool to help identify and familiarize yourself with the common pests, diseases, and disorders.
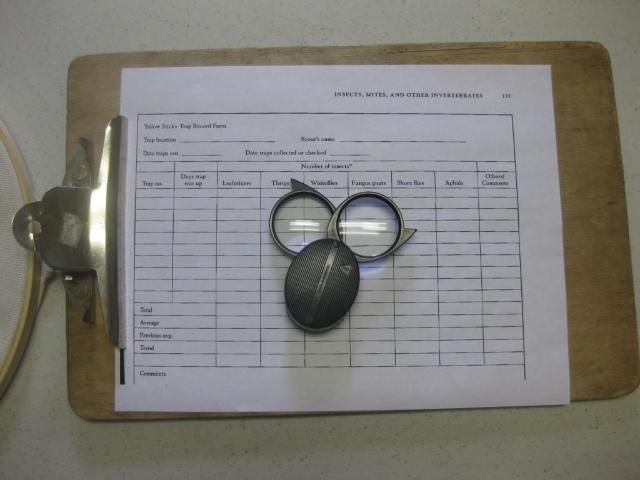
Credit: Hugh Smith
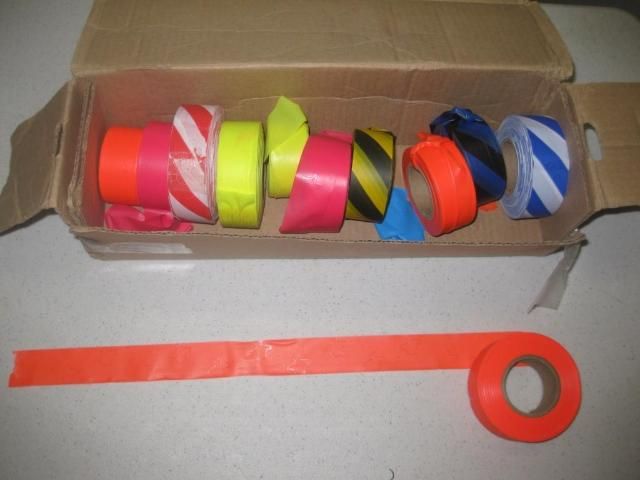
Credit: Hugh Smith
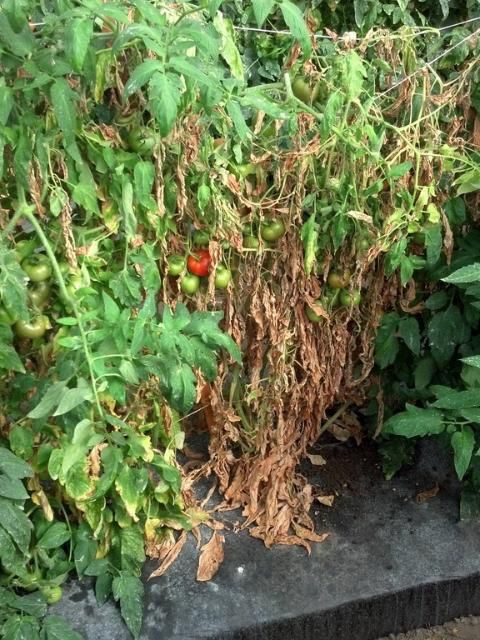
Credit: Gary Vallad
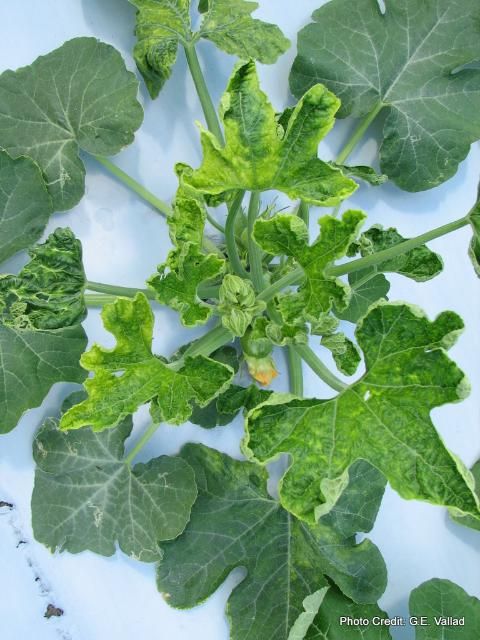
Credit: Gary Vallad
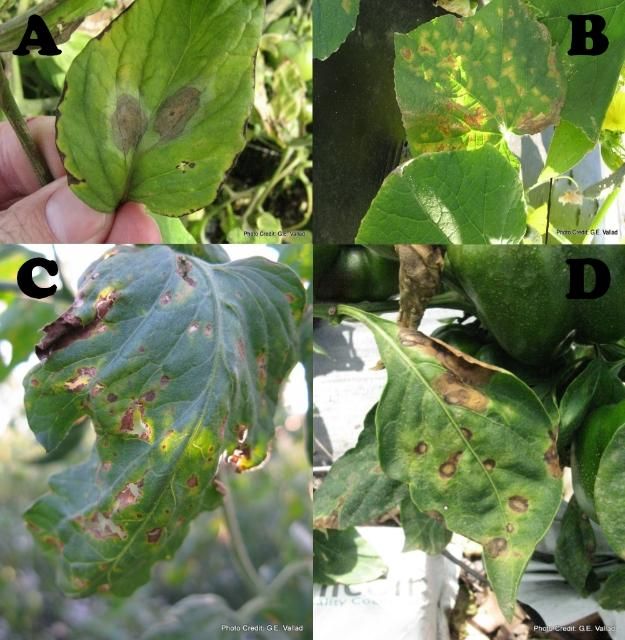
Credit: Gary Vallad
Methods of scouting will vary according to the crop and the particular pest or disease, but here are some general considerations.
For diseases:
- Get familiar with plant structures and what constitutes a departure from normal growth.
- Know what environmental conditions and seasonal patterns favor which diseases, so you can better focus your scouting.
- Spores of fungal pathogens develop at night. They are more numerous and therefore easier to view within lesions first thing in the morning when it is light enough to see but before they have dispersed. Use your hand lens to spot the tiny spores.
- Be sure to check the underside of leaves because the initial symptoms of some diseases are more evident on the underside of leaves than the top.
- Most symptoms of viral pathogens are evident in the new growth of plants.
- Nicked or cut stems (from pruning) are ideal sites for Botrytis and other opportunistic pathogens to establish.
- Powdery mildews typically start in older foliage of plants, often when the plants begin to set fruit or approach vegetative maturity. In many cases, the disease starts on the underside of leaves (Figure 12).
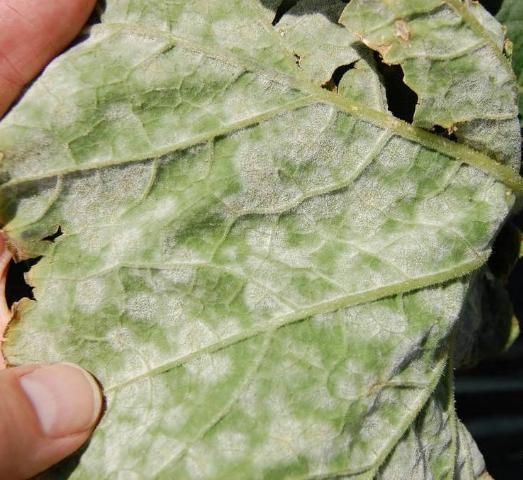
Credit: Gary Vallad
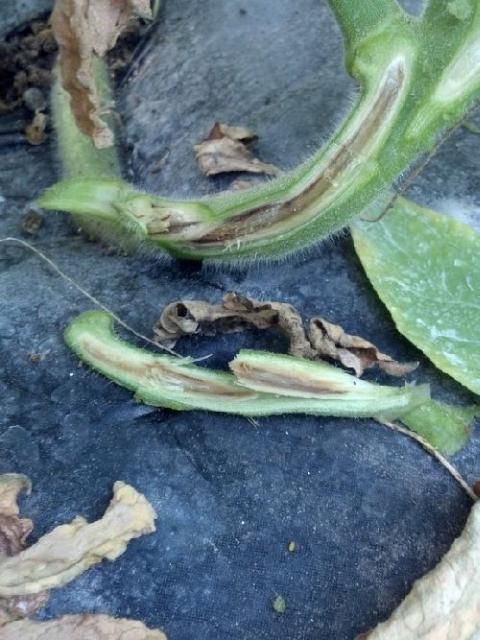
- Symptoms of most vascular wilt diseases will be uneven on the plant (often one sided) (Figure 13) and on individual leaves. Look for a distinct discoloration of vascular tissues (Figure 14); it is quite unlike wilt caused by inadequate water.
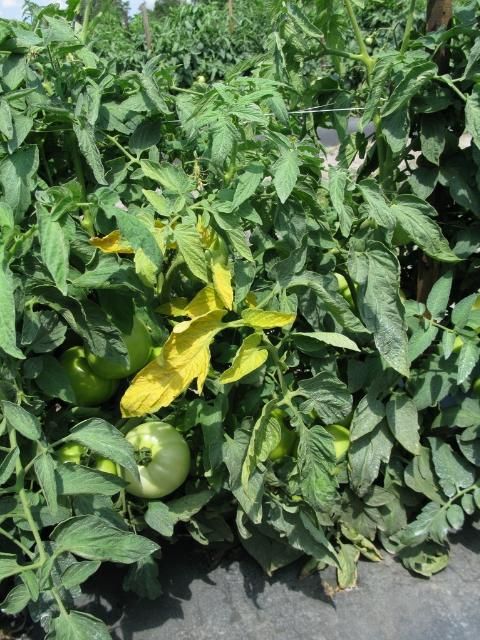
Credit: Gary Vallad
Credit: Gary Vallad
- Sudden green wilts are often caused by a severe crown infection, by girdling, or by inadequate water.
For insect or arthropod pests:
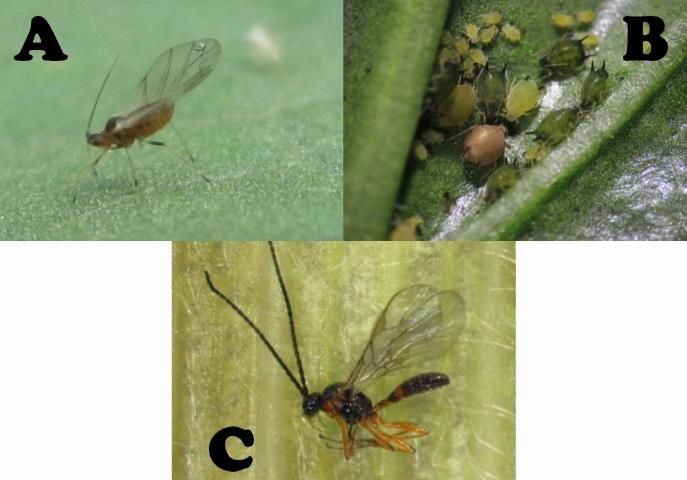
- Aphids can be found anywhere on a plant, but they prefer growing points (Figure 15A and B).
Credit: Hugh Smith
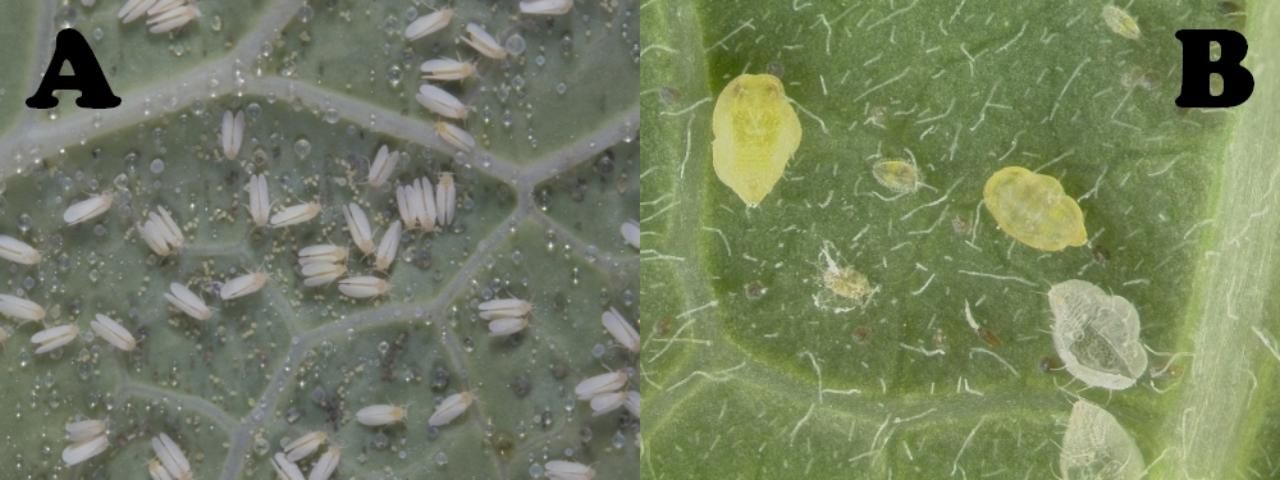
- Whitefly adults settle on the underside of leaves, where they lay eggs (Figure 16A). Whitefly nymphs are only mobile immediately after leaving the egg; they move away from the hatched egg, settle down to feed, and do not move during subsequent nymphal development. For this reason older whitefly nymphs are found on older leaves (Figure 16B).
Credit: James Castner and Lyle Buss
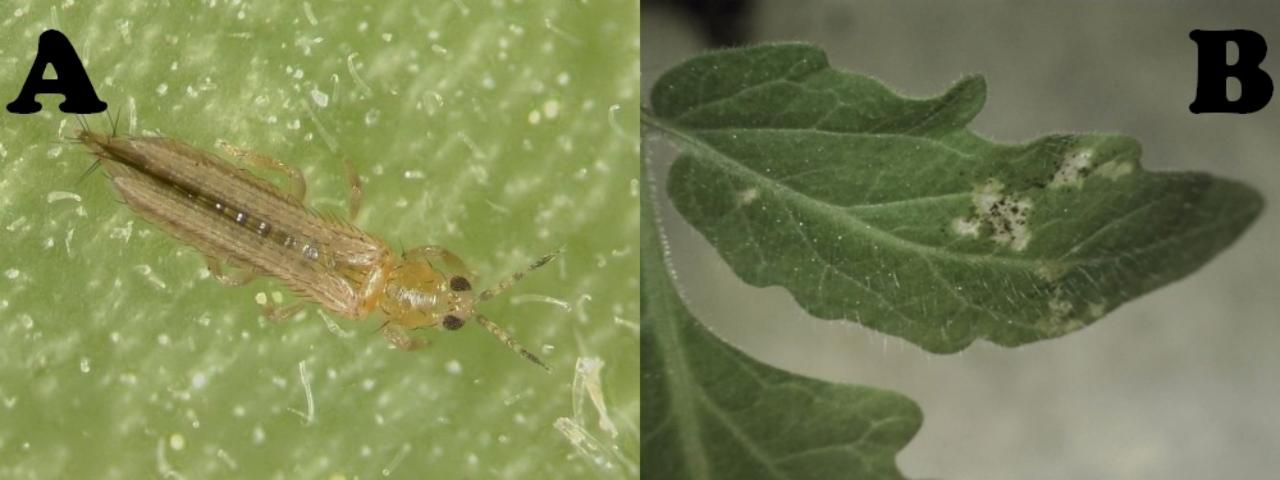
- Western flower thrips (Figure 17A) and other flower thrips are often hidden within flowers, where they feed on pollen. Blow or tap on the flower to dislodge the thrips and determine if they are present. Thrips puncture the plant cells and produce abrasions on the surface of leaves and flower petals. Thrips also deposit dark pellets of frass (excrement) in areas where they have fed, and this can be used to identify thrips damage even when thrips are not visible (Figure 17B).
Credit: Lyle Buss and Hugh Smith
- Spider mites often establish on the underside of leaves (Figure 18A). They feed by puncturing plant cells, causing damage similar to thrips damage. Spider mites produce characteristic webbing (Figure 17B).
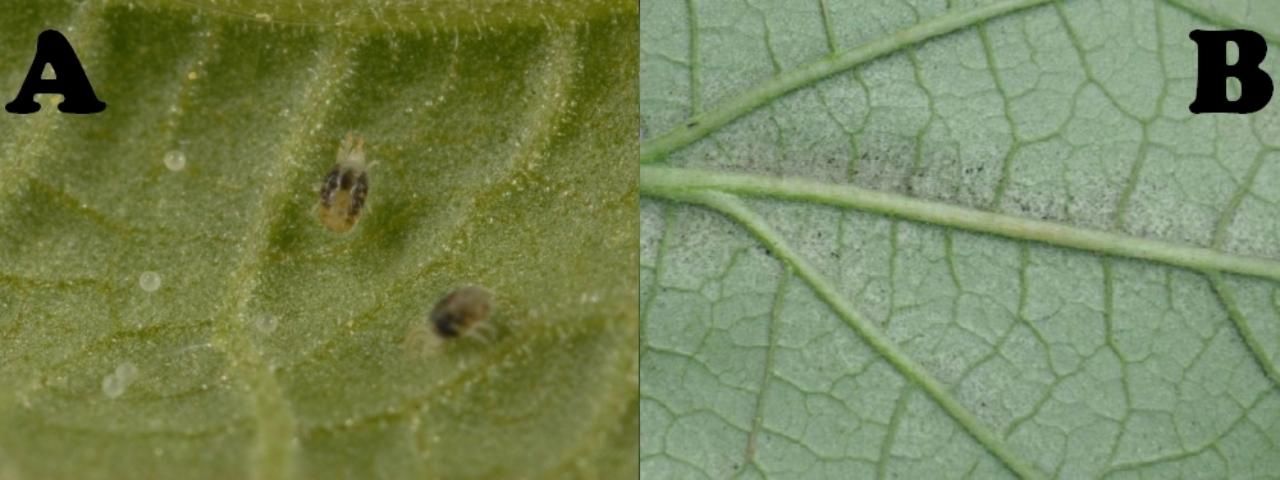
Credit: Lyle Buss and Yankai Li.
- Broad mites (Figure 19A) and cyclamen mites are much smaller than spider mites and are not easily detected with the naked eye. Broad mite feeding on pepper produces a characteristic blistering or strappiness of leaves (Figure 19B). Examine upper leaves with a hand lens to spot broad mites.
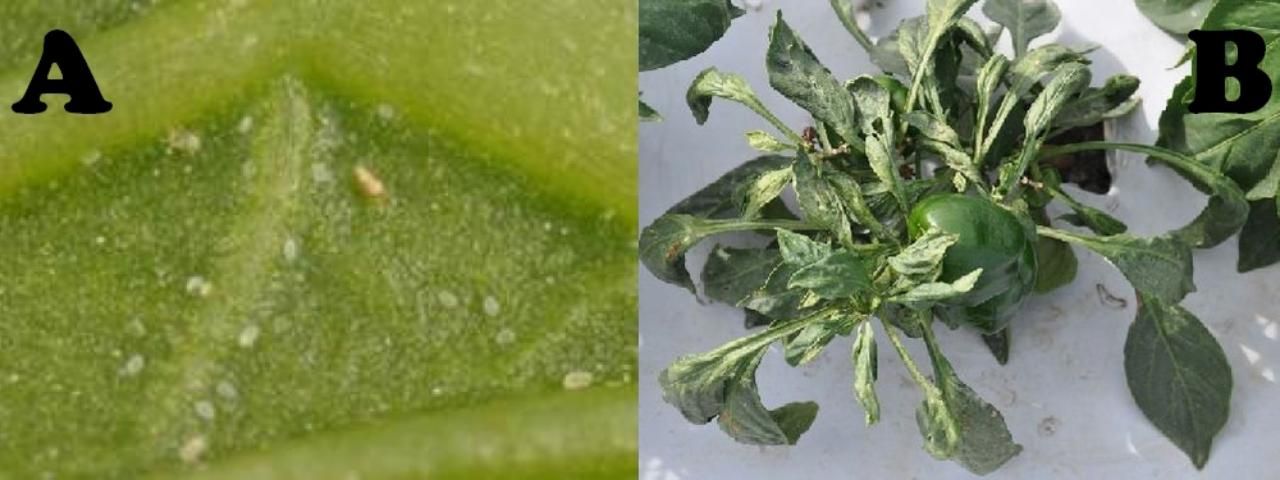
Credit: Hugh Smith
Yellow sticky cards are the most useful and commonly used monitoring tools to support a scouting program. Whiteflies, aphids, thrips, leafminers, leafhoppers, fungus gnats (Figure 20A), and shoreflies (Figure 20B) are all attracted to yellow sticky cards. Yellow sticky cards will trap primarily the adult stage of these insects because only the adults can fly. In the case of aphids, only alate (winged) adults will be trapped (Figure 15A). Some commercial biocontrol agents, such as parasitic wasps used to manage whiteflies, aphids, and other pests, are also attracted to yellow sticky cards (Figure 21). (Finding a limited number of parasitic wasps on yellow sticky cards in a greenhouse where they have been released indicates that the parasitoids are emerging and searching for hosts in significant numbers and should not be cause for concern.)
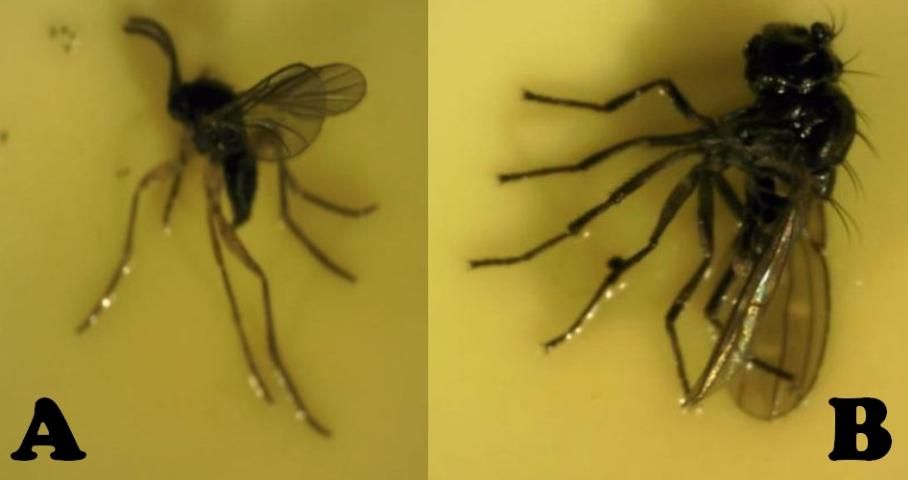
Credit: Hugh Smith
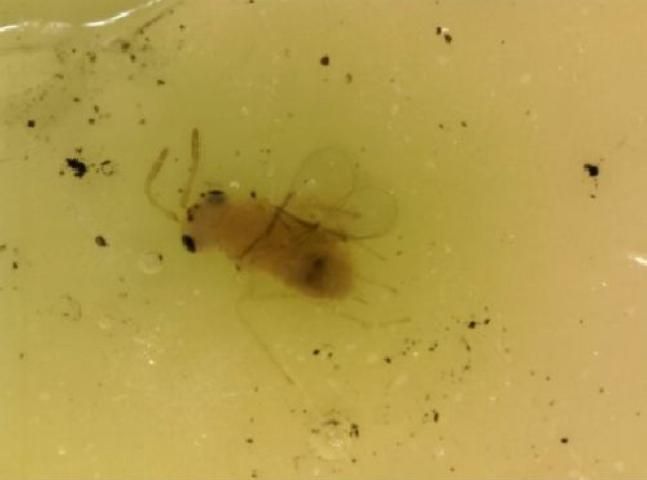
Credit: Hugh Smith
Some growers use sentinel plants to reveal the presence of pests in protected structures. Eggplant has been used as a sentinel plant for whiteflies and green beans for spider mites. Sentinel plants may be effective when the pest is easier to detect on the sentinel plant than on the main crop. If you use sentinel plants, take care that they do not serve as a source of infestation for the main crop. Keep accurate scouting records in order to become familiar with pest cycles in a given structure and to evaluate the effectiveness of your control measures.